We’ve explored Zion and Bryce Canyon across multiple trips since 2019, spending a combined 8 days hiking every major trail, chasing sunrise and sunset at iconic viewpoints, and learning the parks in completely different seasons. After an intense October 2019 trip where we tackled Angels Landing, The Narrows and Bryce’s famous hike Queen’s Garden Navajo Loop, plus our December 2021 return to explore Zion’s hidden gems like Kolob Canyons and The Subway – we finally know how to plan the perfect 3-day road trip focused exclusively on these two parks.
Our itinerary isn’t theoretical. We’ve experienced Zion jam-packed with October crowds and eerily quiet in December. We’ve camped in freezing overnight temperatures and stayed at lodges inside the parks. We’ve tested different driving routes, figured out which trailheads need sunrise starts versus midday visits, and learned which viewpoints actually justify the detour – plus which popular hikes you can skip if you’re short on time. We’ve also stayed in multiple gateway towns, so we know exactly where to base yourself for maximum efficiency.

Hi, we’re Mark and Kristen Morgan. We left our scientific careers in 2018 to become travel writers and photographers, and since then our expert guides have helped millions of travel planners take better trips. Read more about us.
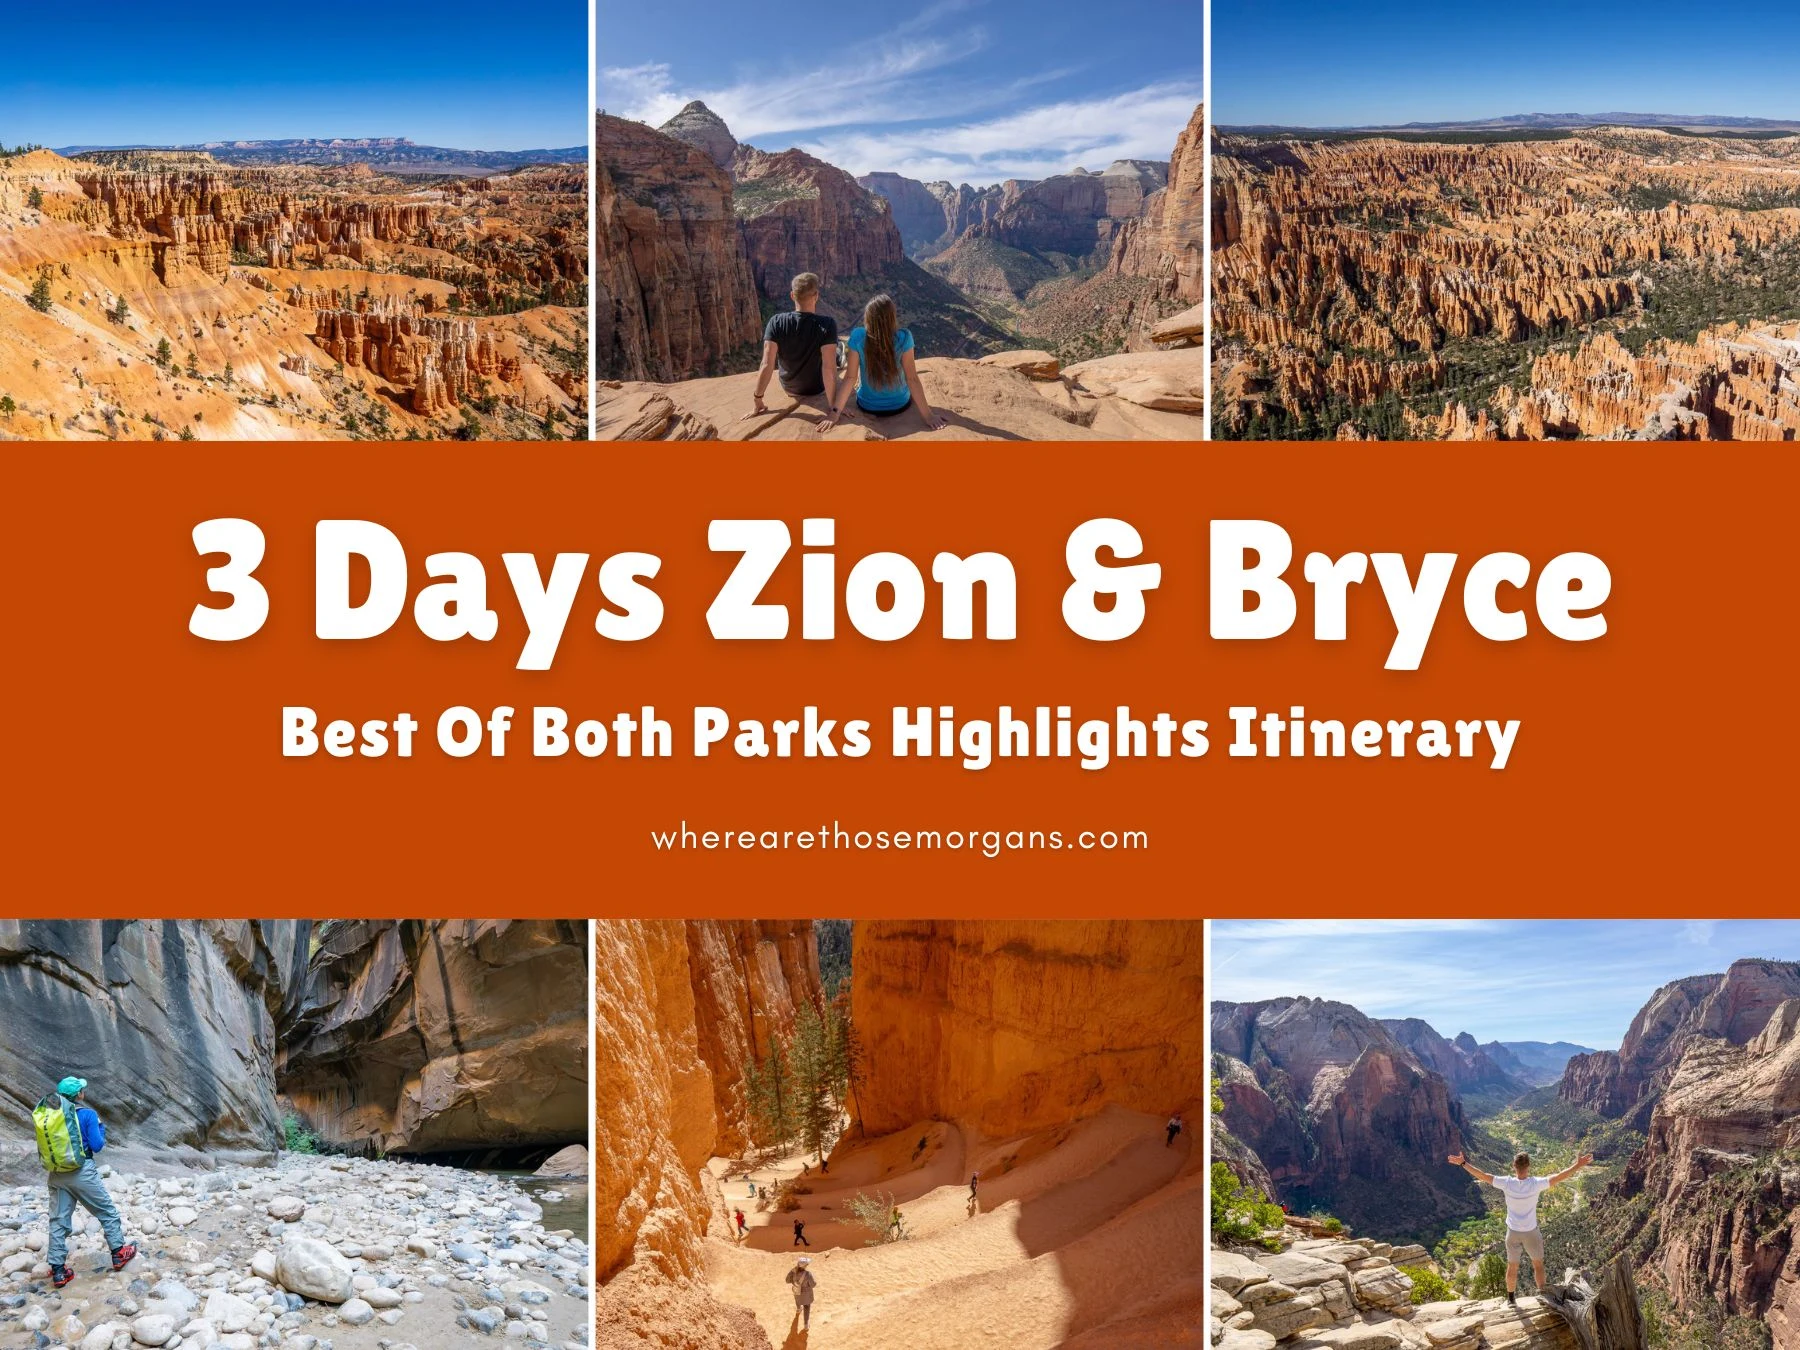
Why trust us with your Zion and Bryce itinerary? We’ve hiked every trail, visited every viewpoint and hit every photo spot across 2 trips to the parks. We know the best route. As always, every photo in this guide is ours.
This is a fast-paced, parks-only itinerary designed for travelers with just a long weekend or a few days to hit the highlights of both Zion and Bryce Canyon. We’re not including side trips to Kanab, other nearby parks, or bonus attractions – this guide strategically balances just these two iconic parks without feeling rushed. Days one and two tackle Zion’s most famous hikes, and day three explores Bryce Canyon’s otherworldly hoodoos with optimal photography timing. This efficient routing eliminates the common mistakes that cost us time on earlier trips – like underestimating how long the Zion shuttle takes, gear rentals or visiting certain trails at the wrong time of day.
This guide is the 3-day Zion and Bryce Canyon itinerary we wish we’d had for our first visit. After multiple trips across different seasons, we’ve condensed everything we know into a step-by-step plan that hits both parks’ must-see highlights while building in the breathing room you need to actually enjoy them. Stick around until the end for our route map, logistics and planning tips. Let’s dive in.
ZION Planning
📖 Ultimate Guidebook: Get our complete 45-page PDF with everything you need for Zion.
📞 Personalized Zion Planning Call: Book a call with Mark to perfect your itinerary and have your questions answered.
💡 Still Planning? Read our essential first-timer’s guide to visiting Zion.
Note: Our content is reader supported and contains affiliate links. If you make a purchase through one of these links, we may earn a small commission at no extra cost to you and it helps us keep this site running.

Day 1 Morning: The Narrows
We spent 8 hours day hiking The Narrows from the bottom up in October 2019, and honestly it’s one of the most memorable and unique hikes we’ve ever done. Bear in mind we travel and hike for a living, so that’s a big statement.
When we returned to Zion in December we hiked Angels Landing for a second time, but we didn’t hike The Narrows again because the water would have been freezing cold and we hiked The Subway instead. So next time we do Zion, The Narrows will be our top priority.
Based on all the hikes we’ve done in Zion, we’d say The Narrows is the one truly unmissable trail. Yes, Angels Landing is thrilling, but wading through a narrow slow canyon filled with water is unlike anything else we’ve done in the US.
So even if we only had one day in Zion for our first visit, we’d do The Narrows. It’s immense, you’re going to love it.

There are two ways to hike The Narrows: bottom up day hike with no permit and top down multi-day requiring permit. Almost everyone hikes bottom up because it’s easier, more accessible and doesn’t need the permit.
And the beauty is that you can go as far as you feel comfortable or have time for, before turning around. It doesn’t matter if you walk 30 minutes in and 30 minutes out, or 3 hours in and 3 hours out like we did all the way to Big Springs (end of the permitted day hike route), you’ll still get to experience what makes this trail so famous.
Breakfast + Gear Hire (7:00 AM)
We’d start our first morning early, making sure we arrived at Zion Outfitter right as it opened at 7:00 AM on the dot to hire our waterproof gear for The Narrows. If it was summer we’d get the “warm weather package” or if it was any other season we’d get the “dry bib package”.
Note: We hired the “dry pants package” in 2019 but the bib is now recommended due to deeper pools in the slot canyon. With food, water, phones and our camera, we decided it was smart to pay $12 extra to also hire a waterproof backpack. And we’re glad we did because we got chest deep a few times.

We didn’t love paying $50 each, but the waterproof shoes and pants were essential for us being able to stay inside the cold water and slot canyon for so many hours.
Even more important? The solid wooden pole we each took as part of the package. Without the pole, there’s no way we would have made it to Big Springs. We saw more than a few people slipping on the rocks and falling into the river, so please listen when we tell you a heavy pole is crucial. Trekking poles aren’t going to cut it.
Just a few steps away from the gear rental place, we’d make a quick pitstop at a great little coffee shop called Perks! which does breakfast sandwiches and also opens at 7:00 AM.
We would get coffee and food to take away, then hot-foot it back over the bridge to the visitor center and get on the next available Canyon Shuttle. They run every 5-10 minutes so we wouldn’t have to wait long. Then we’d eat our breakfast as we rode the shuttle to very last stop – the Temple of Sinawava, stop number 9 – which takes around 45 minutes.

Mark’s gear rental tip: If you arrive into Zion the night before day 1 of this itinerary, go over to Zion Outfitter between 3:00 PM – 7:00 PM and pick up rental gear for the next day. It won’t cost you any more and it gives you a head start the next morning. We didn’t realize this when we visited and made the mistake of losing time in the morning. If you can also get breakfast sorted out the night before, and you visit in summer – you can get the 6:00 AM shuttle into the canyon and be well ahead of the crowds.
Kristen’s food tip: Right next to the gear rental and coffee places is a grocery store called Happy Camper Market, but it’s overpriced and there’s not a great deal to choose between. If you can, drive or walk down to Sol Foods Market in Springdale for normal prices and a better selection. We picked up sandwiches, snacks and drinks at Sol to have plenty of sustenance inside The Narrows.
The Slot Canyon (8:30 AM)
Our early morning shuttle bus was busier than we expected in October, and we didn’t get that “lost world” feeling we wanted as we approached the slot canyon. So if we did it again, we’d really try hard to get the first shuttle of the morning.
After getting off the bus, we’d quickly hustle along the flat and easy 1-mile long Riverside Walk until reaching steps leading down into the river which marks the beginning of The Narrows.

When we hiked it – we spent 3 hours wading through ankle, knee, waist and even chest deep water until reaching Big Springs (three small waterfalls in a row), ate lunch and then hiked back the exact same way for 3 hours. Add in 15 minutes each way on Riverside Walk, 30 minutes for lunch and more time for photo stops along the way. Bus-to-bus, we clocked in at almost 8 hours.
It was genuinely an incredible experience because we spent most of it totally alone, just the two of us wading through a dramatic river slot canyon with towering cliffs. But it was a grueling hike, both physically and mentally – we’ve never had to take so much care over foot placements, and staying concentrated for hours on end was tough. One bad fall and you’re in trouble.

We loved this hike, so if it was our first time all over again, we’d still spend most of day 1 hiking to Big Springs. But honestly the full Narrows day hike is very strenuous, and it eats up so much time on an already short itinerary.
If you’re not bothered about going the whole way and just want to get a taste for The Narrows (which should be most people!), we recommend wading into the slot canyon for 1-2 hours before turning around and wading back out again. You’ll still get the full experience, just without “completing” the route. And this way you won’t be wrecked, with plenty of time to squeeze more into your first day.
Day 1 Afternoon: The Watchman + Pa’rus Sunset
After hiking a few hours into the slot canyon and hustling back down Riverside Walk to the bus stop at Temple of Sinawava, let’s say it’s 12:30 PM. That’s a realistic target without rushing.
We’d take the 45-minute shuttle straight back to the visitor center, drop our waterproof rentals back at the outfitter, and then head out for lunch in Springdale.
Lunch (1:30 PM)
We’ve eaten at tons of places in Springdale across our trips, but the rotisserie chicken and craft beers we had at Camp Outpost would make for a fantastic late lunch now.

With the logistical stresses of The Narrows out of the way, our afternoon would be calm, low-key and easy going. We’d want easy-access and easy-paced hikes with no more shuttle buses required.
Watchman (3:00 PM)
After refueling, we’d head back to Zion’s visitor center and get onto The Watchman Trail, which begins near the shuttle station. It’s a steady and gradual 3.3-mile roundtrip trail with 370 feet elevation gain – the trail is rated as moderate but we thought it was on the easier end of moderate.

We’d go slow after eating lunch, taking around 45 minutes to 1 hour to summit. At the top we’d walk around the small loop to enjoy staggering views looking back over Springdale and giant towering red cliffs behind, then we’d slowly walk back down to the visitor center. All in, The Watchman hike would take us around 2 hours with time at the top for photos.
Pa’rus (5:00 PM)
Back at the visitor center, we’d walk a few steps across the bridge to begin Pa’rus Trail. We actually thought the Pa’rus Trail was one of the most underrated hikes we did in Zion because it was super easy and flat, it had sensational views throughout and it led us to a magical sunset photo spot at Canyon Junction Bridge.

We’d slowly amble through the middle of the valley we just looked at from The Watchman, this time looking up at the gigantic cliffs from ground level so they appear even more majestic. After crossing a few bridges, we’d arrive at Canyon Junction (where the road into Zion’s main canyon begins), look back at the Virgin River and snap photos of colorful clouds in the sky at sunset. It’s stunning.
Dinner (7:00 PM)
To finish the day we’d either walk back along Pa’rus Trail or hop on a shuttle bus on the opposite side of the road back to the visitor center. Then we’d head out into Springdale for dinner, a few more casual beers and conversation with other hikers visiting the park. We loved Oscar’s Cafe for a bit of Tex-Mex, King’s Landing was great but it was more upscale and expensive, and Onyx Pizzeria would be our pizza of choice in town.
Nowhere stays open late in Springdale, it’s not a party place. Instead it has a chill, outdoorsy vibe with a “couple of craft beers in your sweaty hiking clothes” sort of style. The more windswept you look, the more nods of approval you get. So after dinner, we’d head back to our hotel and get an early night, ready for another early start on day 2.

We’ve stayed at a range of low to mid budget hotels in Springdale, but next time we’ll book further in advance to get better deals at either Cable Mountain Lodge, Red Rock Inn or Watchman Villas. They all have excellent guest ratings and would be our top choices.
Kristen’s timing tip: Depending on the time of year you visit Zion, it might be a better idea to go out for an early dinner after The Watchman, before ending with a walk up Pa’rus Trail for a later sunset. Check sunrise and sunset times.
Day 1 Alternatives
Planning a one-size-fits-all itinerary for Zion and Bryce Canyon is a challenge because everyone will arrive with different hiking levels and sightseeing goals. This 3 day itinerary is how we’d do it efficiently, but we know it’s not going to suit every traveler. So, we have two alternate options available for day 1.
Kolob Canyons
If you don’t feel comfortable hiking into The Narrows (we hear you – it’s very slippery and uneven underfoot the whole time), you should spend the morning exploring Zion’s quieter region called Kolob Canyons instead.

We hiked three fun, deserted and photogenic trails in Kolob Canyons – Taylor Creek Trail (5 miles roundtrip – moderate), Timber Creek Overlook Trail (1 mile roundtrip – easy) and a hidden hike that’s not on the map called South Fork Trail. We did not hike La Verkin Creek Trail because it’s 14 miles roundtrip, strenuous and not suitable for a shorter trip like this.
If you’re a strong hiker but don’t fancy The Narrows, hike the three trails we did. Or if you’re not much of a hiker, skip Taylor Creek and South Fork, but make sure you still walk the easy Timber Creek Overlook path because it leads to one of our favorite viewpoints in the park.
The Subway
This one is for fast, very strong and ultra-keen hikers. The ultimate hiking itinerary for Zion is to tick off The Subway, The Narrows and Angels Landing in one trip. They’re our three favorite hikes in the park, but they’re all strenuous and time consuming.
To make this trio of trails work in two days, we would apply for and win this permit in advance to day hike The Subway from the bottom up on day 1 of this itinerary. It took us 7 hours roundtrip, plus driving time to Kolob Terrace and back from Springdale. We would still pick up The Watchman and Pa’rus Trail in the evening if we got an early enough start and visited when daylight hours were longer.

Then on day 2 we would hike Angels Landing first thing in the morning (we cover that next), before heading into The Narrows in the late morning. We’d have to be sensible inside The Narrows and set a cut off point to turn around so we didn’t end up walking back in darkness. That would be a big mistake.
We loved hiking The Subway because it’s limited to less than 100 people per day, so it has a real lost world feeling – especially in December when we did it and only saw 7 other hikers all day. Pathfinding and scrambling non-stop to the emerald pot-pools at the end was an amazing day. Read our full guide to day hiking The Subway from the bottom up to learn more about the trail.
Day 2 Morning: Angels Landing + Emerald Pools
On the second day we’d hike Zion’s remaining popular trails and then drive over to Bryce Canyon National Park in time to watch the sunset.
We’d check the sunset time in advance and make sure we were at Sunset Point at least 30 minutes before, but the first thing on day 2 would be making sure we had already applied for and won this permit to hike Angels Landing.

We first hiked Angels Landing on a weekday lunch time in October 2019, and honestly that was a mistake. The amount of people hiking it at the same time as us was scary. The chain section is ridiculously narrow and the lines of people waiting to pass each other was mind-blowing. One foot placement to the side was a 1,000-foot vertical drop.
So in December 2021 we made sure we were the very first people on the trail. We paid over the odds to stay at Zion Lodge, just so we could be a short walk from the trailhead. With headlamps on, we hiked up West Rim Trail to Scout Lookout and then climbed to Angels Landing in twilight to summit for sunrise. It was amazing being the only ones up there, but boy was it cold!

We haven’t been back since Zion implemented a permit for hiking Angels Landing. Permits are annoying (we still haven’t won one for Half Dome) but in truth we’re surprised it took so long here because it was so dangerous when we did it in October.
Angels Landing permits are based on the following time slots:
- Before 9:00 AM
- 9:00 AM – 12:00 PM
- After 12:00 PM
We strongly recommend applying for a “before 9:00 AM” permit so you can get a good start on the day. We’d definitely go up for sunrise if we hiked it again.
Angels Landing (7:00 AM)
With our pre-9:00 AM hiking permit, we’d get up early, sort out coffee and breakfast, be on the first canyon shuttle of the day heading for stop 6 – The Grotto. That’s the 6:00 AM shuttle in summer or the 7:00 AM shuttle in fall or spring.
Or, if we were visiting Zion in winter again, we’d drive our own car into the canyon well before sunrise and park at the trailhead (limited spaces so early arrival would be essential).

Once on the hike, we’d push ourselves hard to get up the early steep section of West Rim Trail quickly, level out for a quick breather, climb the short series of switchbacks known as Walter’s Wiggles, and arrive at the flat sandy staging area for Angels Landing called Scout Lookout.
Hopefully it wouldn’t be too busy, so we’d have plenty of space in front and behind us as we climbed the exhilarating but terrifying chain sections ahead.
We’d very carefully climb the lower portion, holding onto chains when present, until reaching a flat shelf which opened up our first views of the razor-thin climb. Then we’d drop down onto the narrow curving path and begin our ascent. This is the really scary part, so we’d go slow and secure until we reached the summit with our hearts thumping out of our chests.

At the top we’d spent 20 minutes soaking in the views, the achievement and the photo opportunities. Then we’d steel ourselves and calm our nerves before heading back down, hopefully before the trail gets too busy.
We can tell you it’s not fun on those chain sections with lots of other hikers going up and down. Here’s our full guide on hiking Angels Landing to learn more about the trail.
Emerald Pools (10:00 AM)
Three hours is plenty of time to get up and down Angels Landing, and strong hikers will do it quicker. Back at the bottom of West Rim Trail with looks of sheer relief written across our faces, we’d continue walking on Kayenta Trail and connect to Emerald Pools Trail.
This is one of the most popular family hikes in Zion so it would be busy in the mid-morning, but it’s worth putting up with the crowds.

We’d start by hiking straight to Upper Emerald Pool. It’s a bit of a climb on a sandy and rocky trail, so we’d take it easy as the day gets warmer. At the top we’d take photos of the waterfall and pool, before turning around and heading back to Middle Emerald Pool.
We found Middle Pool to be pretty anticlimactic, but we think it’s because there was very little water during both our trips. Then we’d finish by walking around a crescent moon shaped path underneath a waterfall dropping into Lower Emerald Pool.
Lunch (12:00 PM)
From Lower Emerald Pool we’d walk to Emerald Pools Trailhead which is opposite shuttle stop 5 at Zion Lodge.
Now, we stayed in one of the cabins at Zion Lodge for a night, and we found both the room and breakfast to be surprisingly disappointing. But the views from the dining room are fantastic, so if you want a unique lunch experience and don’t mind overpaying, cross the road into the lodge at eat there.

Personally, we’d take a shuttle back to the visitor center, hop in our car and drive to another of Springdale’s restaurants instead. We ate at Thai Sapa for lunch, and despite the below average reviews, we actually thought it was pretty good.
Day 2 Afternoon: Canyon Overlook + Bryce Sunset Point
After lunch, we’d get back in the car and drive up the 6 tight switchbacks on Zion-Mount Carmel Highway until reaching the single-lane tunnel. When instructed, we’d drive through the Zion-Mount Carmel Tunnel and a few seconds after emerging into daylight we’d turn right into a small parking lot.

If luck was on our side, there’d be a space free. If not, we’d leave the parking lot and continue driving away from the tunnel until the first bend. Hopefully one of the 10 or so spaces on the opposite side of the road would be empty and we could get parked.
In October it took us a lot of laps turning around before a spot opened up, but in December we got parked in the small lot first time.
Canyon Overlook (2:00 PM)
After parking, we’d make our way by foot to the opposite side of the road near the small lot (not far from the tunnel) and up a narrow staircase leading away from the road.
This would be us starting Zion Canyon Overlook Trail – one of our favorite hikes in the park. It’s easy, family friendly, fun, short and leads to a remarkable viewpoint.

We’d pass through the UFO-shaped cave (you’ll know what we mean when you see it!), cross a few wooden planks, lightly scramble up some smooth rocks and eventually arrive at the summit with the immense Pine Creek Canyon open ahead.
Both times we hiked this trail to arrive at the summit in time for sunset photography, and it blew us away each time.
With just 3 days for both Zion and Bryce, you don’t really have time to wait around for sunset at Canyon Overlook because you still need to drive to Bryce, and the sunset there is worth seeing too. Plus, you’d miss the scenery on the way over because it would be dark.
Drive To Bryce Canyon (4:00 PM)
If we were doing well for time and the sunset time was 3-4 hours ahead, we would definitely stop at Many Pools (parking location) and Checkerboard Mesa (parking location) for half an hour each on the way out of Zion. Not allowing enough time to stop at these two spots is a mistake we made during our trips.
When we were ready to get on the road, we’d set our GPS for Bryce Canyon Sunset Point and head east for 13.5 miles until reaching Mt Carmel Junction. We’d fill up our gas tank at the Shell station before heading up to Bryce, and we’d consider eating at Subway, Thunderbird Restaurant or Sugar Knoll Chicken if we needed more food.

At this point, if we were still doing well for time (or if we skipped Many Pools and Checkerboard Mesa) we would drive less than a mile south to take a quick side trip to see the Belly of the Dragon. We walked through the tunnel in December 2021 on our way from Zion to Kanab, and it turned out to be a surprisingly cool photo spot.
We said this was purely a Zion and Bryce itinerary, but Belly of the Dragon is 2 minutes away from the route so it’s not really a detour. We wouldn’t spend any more time heading further south to Coral Pink Sand Dunes, Moqui Sand Cave or any more of the fun things to do near Kanab – even though they’re all worth seeing. With 4+ days for this road trip we would add them in.
Instead we’d set off on the 62.8-mile drive from Belly of the Dragon to Bryce Canyon’s Sunset Point, which would take us around 1 hour 15 minutes on US-89 and UT-12. We’d drive straight through Bryce Canyon City, enter the park and park in the loop at Sunset Point.
Bryce Sunset Point (6:00 PM)
It would be getting close to sunset now, so we’d walk straight out to the viewpoint and watch the sunlight slowly turn to shadows inside Bryce’s mind-bending amphitheater. The hoodoos – oddly shaped sandstone needles and spires – are super photogenic, so we’d take advantage of the softer light and snap a ton of sunset photos.

We had a far more spectacular sunrise the next morning, but we still think the sunset was worth arriving in time for. So we would do it this way again next time. After the sunset we’d head to our hotel to check-in, grab dinner and get another early night.
We’d stay at Bryce Canyon Grand Hotel in Bryce Canyon City on night 2 and Bryce Canyon Log Cabins in nearby Tropic on night 3 after finishing the itinerary. We stayed at both during our trip to Bryce back in October 2019 and they worked really well.
Mark’s photo tip: After the sunset we actually walked a minute or so down into the amphitheater to Juliet’s Balcony to try some long exposures once it was dark and the stars came out. It didn’t work out too well because it clouded over, but we still got to enjoy a stunning (albeit cold!) night. Next time, we’d definitely try again.
Day 2 Alternatives
If you’re a quick hiker and want to tick off as many top Zion hikes as possible in the first 2 days, we would suggest adding in East Mesa Trail to Observation Point.
It’s a pain because you can only drive as far as Zion Ponderosa Ranch Resort with a 2WD vehicle (the rest of the way to the trailhead is 4WD only), so you’d have to take a paid shuttle bus from Ponderosa Resort to get on the hike. But the views looking down over Angels Landing and Zion from way up look worth the extra effort.

If you wanted to deviate from just seeing Zion and Bryce, you could skip Angels Landing, only hike to Emerald Pools and Canyon Overlook, then leave the park in the late morning and head south to see things near Kanab like Coral Pink Sand Dunes, Moqui Sand Cave or Toadstool Hoodoos.
We spent a few nights in Kanab so we could hike The Wave and hike Buckskin Gulch, but they can’t be done in half a day. You’d need to stay in Kanab or Page for at least one night, so you’d need 4+ days for this itinerary to fit them in, which won’t work if you only have a long weekend or few midweek days.
Our third day would be far more relaxing and easy going. Zion was tough because the hikes required permits, shuttles or even gear hire – whereas we found Bryce Canyon to be so easy to visit.
In fact, even if we had a week for this trip, we’d probably still only do one full day in Bryce Canyon. It’s smaller, simpler and less overwhelming to tick everything off.
Amphitheater Sunrise (6:00 AM)
Waking up early for a third day in a row would be getting old by now, but knowing how amazing the sunrise is over Bryce Canyon’s amphitheater means we’d 100% be right there again at Sunrise Point in the dark waiting for first light.
Seriously, this sunrise mesmerized us – it’s up there with our favorite photo spots in the US, so we encourage you not to miss it. The colors were just so deep and intense.

We’d throw down a coffee and fill a flask with more, grab our camera and tripod, hop in the car and drive to Sunrise Point parking lot. Then we’d walk up onto the small raised viewing platform, set up our camera and wait for sunlight to burst into the amphitheater.
It was freezing cold the morning we did this in October (Kristen almost didn’t get out of the car with heating on full blast!), but the beautiful burning red sunrise we got made it worthwhile. Sunrise Point is at 8,100 feet elevation, so it gets cold up there.
After the sunrise we’d head back to our hotel for a warm shower and a hearty breakfast before heading back out to the exact same parking area ready to start hiking down to Queen’s Garden by around 9:00 AM.
We’d take a relaxing walk down into the maze-like amphitheater, take a ton of photos of the unique sandstone formations and really allow ourselves to soak it all in at a slow pace. Queen’s Garden Navajo Loop is the unmissable hike in Bryce Canyon so we’d milk it for all it’s worth.

After descending, we’d enter the Queens Garden – which is wide open with lots of trees and desert vegetation. It’s also the only part of the hike that doesn’t have postcard-perfect photo views so we wouldn’t spend too long in the trees. Eventually we’d reach the point where Queen’s Garden turns into the Navajo Loop, and this is where it would get fun.
At the loop, we’d take the counter-clockwise path (turning right) but only as far as the Two Bridges formation. Then we’d turn around and walk clockwise all the way around and up through Wall Street – the only slot canyon in Bryce Canyon – to the iconic switchbacks which would lead us back up to the rim at Sunset Point.

Those switchbacks were a killer on the thighs and lungs, but looking down from above was such a cool photo. Back at the top we’d then continue walking around the loop until reaching Thor’s Hammer formation for another fun photo.
But we wouldn’t go down the switchbacks on the other side of the loop, instead we’d turn around and go back up to the rim. This is the best way to see everything on the hike without doing two sets of switchbacks.
Kristen’s timing tip: Queen’s Garden Trailhead is right next to the sunrise viewing area, so if you’re short on time or don’t have easy access to your hotel, get straight on the hiking path once the sun comes up.
Day 3 Afternoon: Bryce Scenic Drive
One of the things that disappointed us most at Bryce Canyon was a lack of decent food options. It’s the same at a lot of America’s national parks to be honest – why won’t they just improve the standard?
Anyway, there’s a place just a few minutes walk from Sunset Point called Valhalla Pizza which does reasonable pizzas and salads that we recommend for lunch. The alternatives in Bryce Canyon City are worse quality and require a drive, so stick with Valhalla to keep the itinerary efficient.
Scenic Drive Overlooks (1:00 PM)
After lunch, we’d hop in our car and drive 16 miles to the very end of Bryce Canyon Road to a viewpoint called Rainbow Point, which sits at 9,100 feet in elevation – the highest point in the park.
From there we’d stop at every single pullover on the way back to the main rim area – and every parking area would be on our side of the road.

The views from every overlook are outstanding, but our favorites from the October 2019 trip were Ponderosa Canyon, Agua Canyon Overlook, Natural Bridge, Bryce Point and especially Inspiration Point. We had clear blue skies and bright sunshine, which lit up the sandstone formations but also cast deep shadows in areas hidden from the sun.
By the time we arrived back to the rim it would still be early enough to stick around for another sunset. Or, like we did back in 2019, we would drive to Tropic, check into our hotel and head out for dinner (we ate at i.d.k. bbq but it’s since closed) and another early night so we could get up early the next day and drive to Capitol Reef.

Mark’s planning tip: The scenic drive is a fantastic way to see the park without making any effort, so if you don’t want to hike Queen’s Garden Navajo Loop, this is how to spend your time instead.
Kristen’s packing tip: Don’t forget sunscreen even if you visit in winter, spring or fall like we did – the sun is brutal at these elevations.
Day 3 Alternative
One mistake we made was not realizing that we had enough time to hike both Queens Garden Navajo Loop and the second most popular hike in Bryce Canyon called Fairyland Loop Trail in the same day. We would do both in the same day next time.
Fairyland is longer and more challenging but it’s much quieter, and we should have done it. If you’re a strong hiker and a quick traveler, you have time to add this in. If you want to do both but you’re not a quick hiker, consider skipping the sunrise or stopping at fewer pullovers on the scenic drive.
Need help planning your trip to Zion?
Our popular Zion travel guidebook helps you with planning every aspect of your visit, including the unmissable hikes, where to eat and stay, itinerary ideas and map!
View Guidebook
Route Map
Map key:
- Orange – Day 1
- Blue – Day 2
- Purple – Day 3
How to use this map: Click the map above to activate, then tap any icon to see more information. See a list of all attractions by clicking the arrow icon in the top left, or see a full version of the map by clicking the “view larger map” icon in the top right. When you’re in the parks you can open the map, tap the next place you want to visit and get directions. Attractions for all three days on the map are listed in order, so you can easily follow the route.
How to save this map: Click the small star next to the map title – this will add the map to your Google account. Open your Google Maps app, tap “saved”, then tap “maps” and open this map.

Logistics + Planning Tips
Driving distances and times: Zion is 166 miles (2h 40m) from Las Vegas airport, Bryce Canyon is 84 miles (1h 45m) from Zion, and then Las Vegas airport is 269 miles (4h 10m) from Bryce Canyon. That’s a total of 519 miles and 8 hours 35 minutes drive time in just three days. Not ideal, but well worth it.
Backup airport: If flights to Las Vegas didn’t work from our origin, we’d try Salt Lake City airport as a backup option. It would add more driving distance and time to our itinerary, but it could save more time if we don’t have to take a connecting flight both ways.
Park fees: Both Zion and Bryce Canyon cost $35/vehicle to enter for a total of $70 for this itinerary. We used our America the Beautiful Pass to enter both (this is what we always use for national parks).
Park shuttles: Zion’s main canyon can only be access by this shuttle March-November, but personal vehicles can be driven into the canyon in winter. We’ve done both, and driving our own car saved us a ton of time. Bryce also has this shuttle, but it’s optional year-round and we haven’t used it.
Flash floods: It’s crucial to check on current conditions in Zion before and during a visit to the park. Flash floods in The Narrows can occur suddenly and they can be life threatening. We never ran into any issues in October or December – they’re more common in spring and early summer.
When to visit: Next time we go to Zion and Bryce Canyon, we’ll plan a late September trip. This specific time has a nice blend of fewer crowds (kids are back in school), reasonable hotel prices, warmer weather (milder nights), stunning autumnal colors, fully open trails and low risk of flash flooding. Our alternatives would be June or October again. We loved our December trip to Zion because it was quiet, but it was freezing cold in the mornings and evenings. Read our guide on the best time to visit Zion to learn more.
Camping: If hotels are too expensive, try camping at Zion (Watchman or South) and Bryce (Sunset and North) instead to cut costs. We’ve camped at both and the nights were brutally cold in October, but they gave us instant access to trails. If campgrounds are sold out, use our 30 day free trial with The Dyrt to get alerts about cancellations.
With more time: Kanab, Capitol Reef and the Grand Canyon are popular places to add on to a Zion and Bryce trip with more time. But honestly, our top recommendation if using Las Vegas as your airport is to add in Valley of Fire State Park. We absolutely loved the photo ops and sunrise hike to Fire Wave.

Non-Hikers Itinerary
We know our 3 day itinerary is filled with the most adventurous hikes in Zion and Bryce Canyon, but what if you only want to take on the easiest hikes? Well, here’s how we’d plan this road trip route with only easy trails included:
Day 1: Breakfast, drive to Kolob Canyons and hike Timber Creek Overlook. Head back to Springdale and shuttle into the main canyon. Walk to Lower Emerald Pool and Kayenta Trail, stop at Zion Lodge for lunch and a beer. Shuttle to Temple of Sinawava and follow Riverside Walk to see The Narrows. Another shuttle all the way down to Canyon Junction Bridge, enjoy the views and walk back to the visitor center on Pa’rus Trail. Finally, head out into Springdale for dinner.
Day 2: Drive through Zion-Mt Carmel Tunnel and park on the far side. Hike Canyon Overlook to the stunning viewpoint. Stop for a quick look around at Many Pools and Checkerboard Mesa. Grab lunch at Thunderbird Restaurant and drive up to Bryce Canyon. Take an easy stroll around the rim and stay out to watch the sunset.
Day 3: Start at dawn with photography at Sunrise Point. Hike a small way down Queens Garden to see the hoodoos up close and turn around for the rim. Grab breakfast and drive down Bryce Canyon Road. Take it easy and stop at all the roadside pullovers for different perspectives of the surrounding landscape.

Next Steps
We hope our itinerary helps with planning your Zion and Bryce Canyon road trip.
Don’t forget you can book a travel planning video call with us if you’d like our expert help organizing your first trip to southern Utah. We can answer any questions you have or adapt our itinerary to suit your travel style.
Still researching for your trip?
- Here’s our ultimate first time visitor guide to Zion.
- Don’t miss our top 10 unmissable hikes in Zion.
- Here are the best places to stay near Zion.
- See our top photo spots in Bryce Canyon.
Finally, if you’ll be visiting more places on the same trip, we recommend reading our Utah travel guide for more helpful tips and advice.
Happy Travels,
Mark and Kristen
Was this guide helpful? Pin it for your visit!
All Rights Reserved © Where Are Those Morgans, LLC. Republishing this article and/or any of its contents (text, photography, maps, graphics, etc.) in whole or in part is strictly prohibited.
Mark and Kristen spent 6 years traveling the world, visiting over 40 countries across 4 continents and more than 30 US states. They created Where Are Those Morgans in 2018 to help others plan the best possible vacations by writing authentic travel and hiking guides based on their real experiences.
Since the arrival of baby Maya in late 2024, Mark and Kristen’s extensive travels have slowed down but they still take plenty of trips. Where Are Those Morgans now helps millions of travelers each year to visit new places and hike new trails through information-packed blog posts and expert travel guidebooks. Read more about Mark and Kristen.
Mark and Kristen, what fabulous and thorough descriptions plus a multitude of resources you offer your blog readers. Thank you so much for doing the work, so we don’t have to.
My friend and I are planning a trip in October to Zion, Bryce, Grand Canyon Southern Rim and Valley of Fire ( as you suggest with such difficulty winning the lottery for the Wave), Plus, we want to spend a few days in Sedona.
We enjoy hiking but in our 70s, we hike less vigorous trails than our energetic spirits would like. I am an amateur photographer and am beyond excited about our up and coming trip.
Were flying in from Boston and plan to be in the area for about 10-12 days. Any suggestions on where to go first and where to fly in and out of. Of course, we will be renting a car. Any advice you have will be appreciated.
Thank you again for sharing your knowledge and enthusiasm for traveling!
Hi Ellen, thank you for getting in touch and it sounds like a fantastic trip you have planned. We are more than happy to help! You could do this trip in so many ways but we would suggest flying into Las Vegas and flying out of Phoenix. Start with Valley of Fire on the way to Zion from Las Vegas, then go to Bryce Canyon, before driving through Kanab to Page. The Wave is exceptionally photogenic so definitely try to win a permit (you can do daily lottery 2 days in advance). If not continue to Page for Horseshoe Bend and Antelope Canyon (book this in advance). Next you drive down to South Rim and then Sedona is not too far from the Grand Canyon. After Sedona it is just 2 hours to Phoenix Sky Harbor airport. This is the most efficient route for the spots you want to see. You could always do it in reverse as well. October is a great time to do this trip because temperatures are comfortable, hotels have more availability and better rates, and it is less crowded than summer. Hope this helps and you have a wonderful time!
I really loved reading your post, quite insightful. I know the amount of time you might have invested in typing all of these. I really hope I get to travel like you.
Thank you, Sid. We hope you are able to visit Zion and Bryce Canyon sometime soon!
With only a day to do both, it sounds like Zion is a pretty intense hiking area. Would we be better if doing a couple of hikes in Bryce and just grabbing the scenic view points in Zion? For the record we are not hardcore hikers.
Where would u recommend staying in Bryce?
Thx!
Hi Bev, yes if you only have one day it’s a better idea to drive through Zion. Take the shuttle bus into the main Zion canyon just to look around, maybe even hike one of the smaller quicker trails like Emerald Pools. Drive up to the tunnel but park as soon as you get through the other side and hike Zion Canyon Overlook, it’s really short and easy but leads to a fantastic viewpoint. Then you can continue on to Bryce, hike Queen’s Garden and Navajo Loop, then watch sunset on the rim and stay at Best Western Plus which has the best hotel rating in Bryce. Hope that helps and have a great trip!
@Mark and Kristen Morgan, thanks for the insight! Looking forward to this trip! We are heading there on our way to Vegas, driving from Alberta. Any pointers on things to see on the way? Coming via Montana
That will be a fantastic drive down! Glacier National Park (although you’ve probably already been and it’s similar to parts of Alberta), Yellowstone and Grand Teton are both well worth driving through even if you don’t have time to stop, SLC is a great city to explore, Bryce Canyon and Zion as we discussed for sure, also try stopping at Valley of Fire state park not far from Las Vegas and hike Fire Wave. Capitol Reef is another nice stop before Bryce if you have extra time, you can then drive the picturesque UT-12 to Bryce. Even though we’ve done all those places a few times, talking about it makes us want to go again! Have fun!
Would it make sense to drive from Vegas to Bryce Canyon just to get the further driving done. So Day 1- Fly to Vegas and drive to Bryce, Day 2- Bryce Canyon and drive to Zion, Day 3- Zion, Day 4- Zion, Day 5- Drive back to Vegas
Hi Jen – Yes that definitely works, ideally you would arrive into Bryce for sunset, then do sunrise in the amphitheater and spend the day hiking before driving over to Zion. If you can hike Zion Canyon overlook around sunset that would work perfectly. Then you have 2 full days for the main Zion canyon with The Narrows, Angels Landing etc. And if you have time on your way back over to Vegas – drive through Valley of Fire state park and hike Fire Wave. Have a great trip!
Great post. Don’t overlook the Kolob Canyon area in Zion on your next visit.
Thanks, Dick – Great recommendation and coincidentally just a week before you left this comment we revisited Zion and spent a full day hiking in Kolob Canyon (and we also got permits for The Subway nearby!). The areas outside of the main Zion canyon are fantastic for getting away from the crowds.
You are fantastic ?
You give me many inputs.
Thanks.
Thank you – Glad we could help and let us know if you need any help planning your visit to Zion and Bryce Canyon!