Emerald Pools Trail is one of the most popular hikes in Zion because it has a superb location in the main canyon, a perfect balance between distance and level of difficulty, and it leads to picture-perfect waterfalls. Despite the waterfalls being dry when we hiked to lower, middle and upper pools in December 2021, we immediately understood why the trail is rated so highly.
In this guide we show you how to hike Emerald Pools Trail in Zion National Park, based on our experiences. Read more about us.
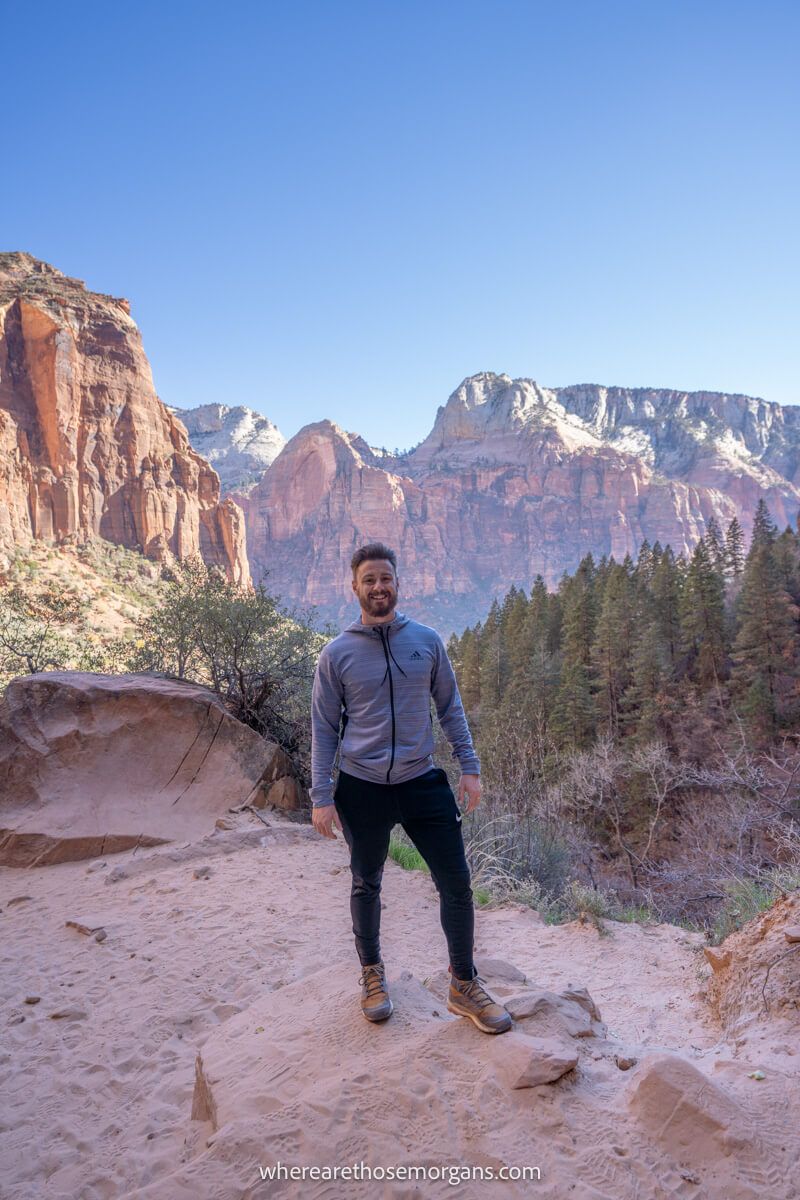
The night before, we stayed at Zion Lodge so we could wake up super early and hike Angels Landing for sunrise. It was amazing (we had the summit to ourselves) but we didn’t stay up too long because it was cold and we were hungry! So we descended and went back to Zion Lodge to eat breakfast, before walking out of the door and straight onto Emerald Pools Trail.
We wanted to do the full loop, so we took the longer route and arrived first at middle pool. From there it was a bit of a thigh-burner to upper pool, then we dropped all the way down to lower pool (which was the most picturesque). Overall, we thought it was a fun and enjoyable hike that’s perfect for families with kids or beginners looking for a bit more of a challenge. Okay, let’s begin!
Note: Our content is reader supported and contains affiliate links. If you make a purchase through one of these links, we may earn a small commission at no extra cost to you and it helps us keep this site running.
ZION Planning
📖 Ultimate Guidebook: Get our complete 45-page PDF with everything you need for Zion.
📞 Personalized Zion Planning Call: Book a call with Mark to perfect your itinerary and have your questions answered.
💡 Still Planning? Read our essential first-timer’s guide to visiting Zion.
What You Need To Know
Okay, let’s dive right in. Here are the most important things you need to know about hiking Emerald Pools Trail:
- The trail begins next to Zion Lodge (shuttle stop #5).
- There are steep drop offs so keep a close eye on younger kids.
- You don’t need technical hiking gear or footwear.
- Only lower pool is accessible for wheelchairs and strollers.
- Lower and upper pools are more worth seeing.
- The waterfalls have stronger flows in spring and after rain.
- You can connect directly to Angels Landing via Kayenta Trail.
- The trail is busiest 10:00am-3:00pm when more families are in the canyon.
- You cannot swim in any of the three pools.
- Dogs are not allowed on Emerald Pools Trail.
- Stay on top of current conditions in the park in case of flash floods.
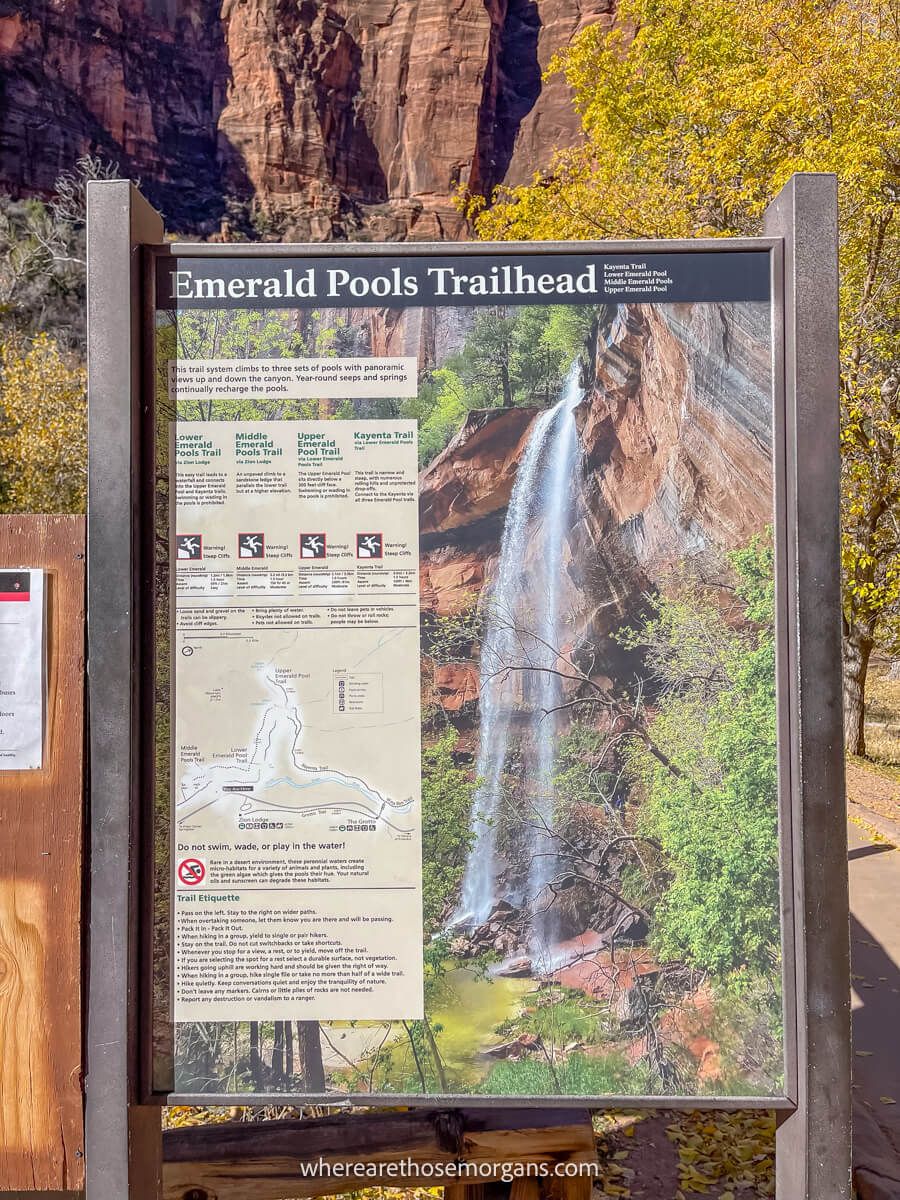
Trail Statistics
- Distance: 3.2 miles roundtrip
- Type: Loop and spur
- Elevation Gain: 400 feet
- Difficulty: Moderate
- Time: 1.5-2.5 hours
- Trailhead: Zion Lodge
We’d rate the full Emerald Pools hike as moderately difficult because it has some steep sections with uneven rocks and sand underfoot, especially on the climb to upper pool. Most regular hikers will find it a breeze, but you can cut out upper pool if you want to make things easier.
Hiking to lower and middle pools only reduces the overall difficulty to easy. If you’re visiting Zion with mobility issues or in a wheelchair, you can follow a paved path all the way to lower pool and back to the trailhead.
Trail Map
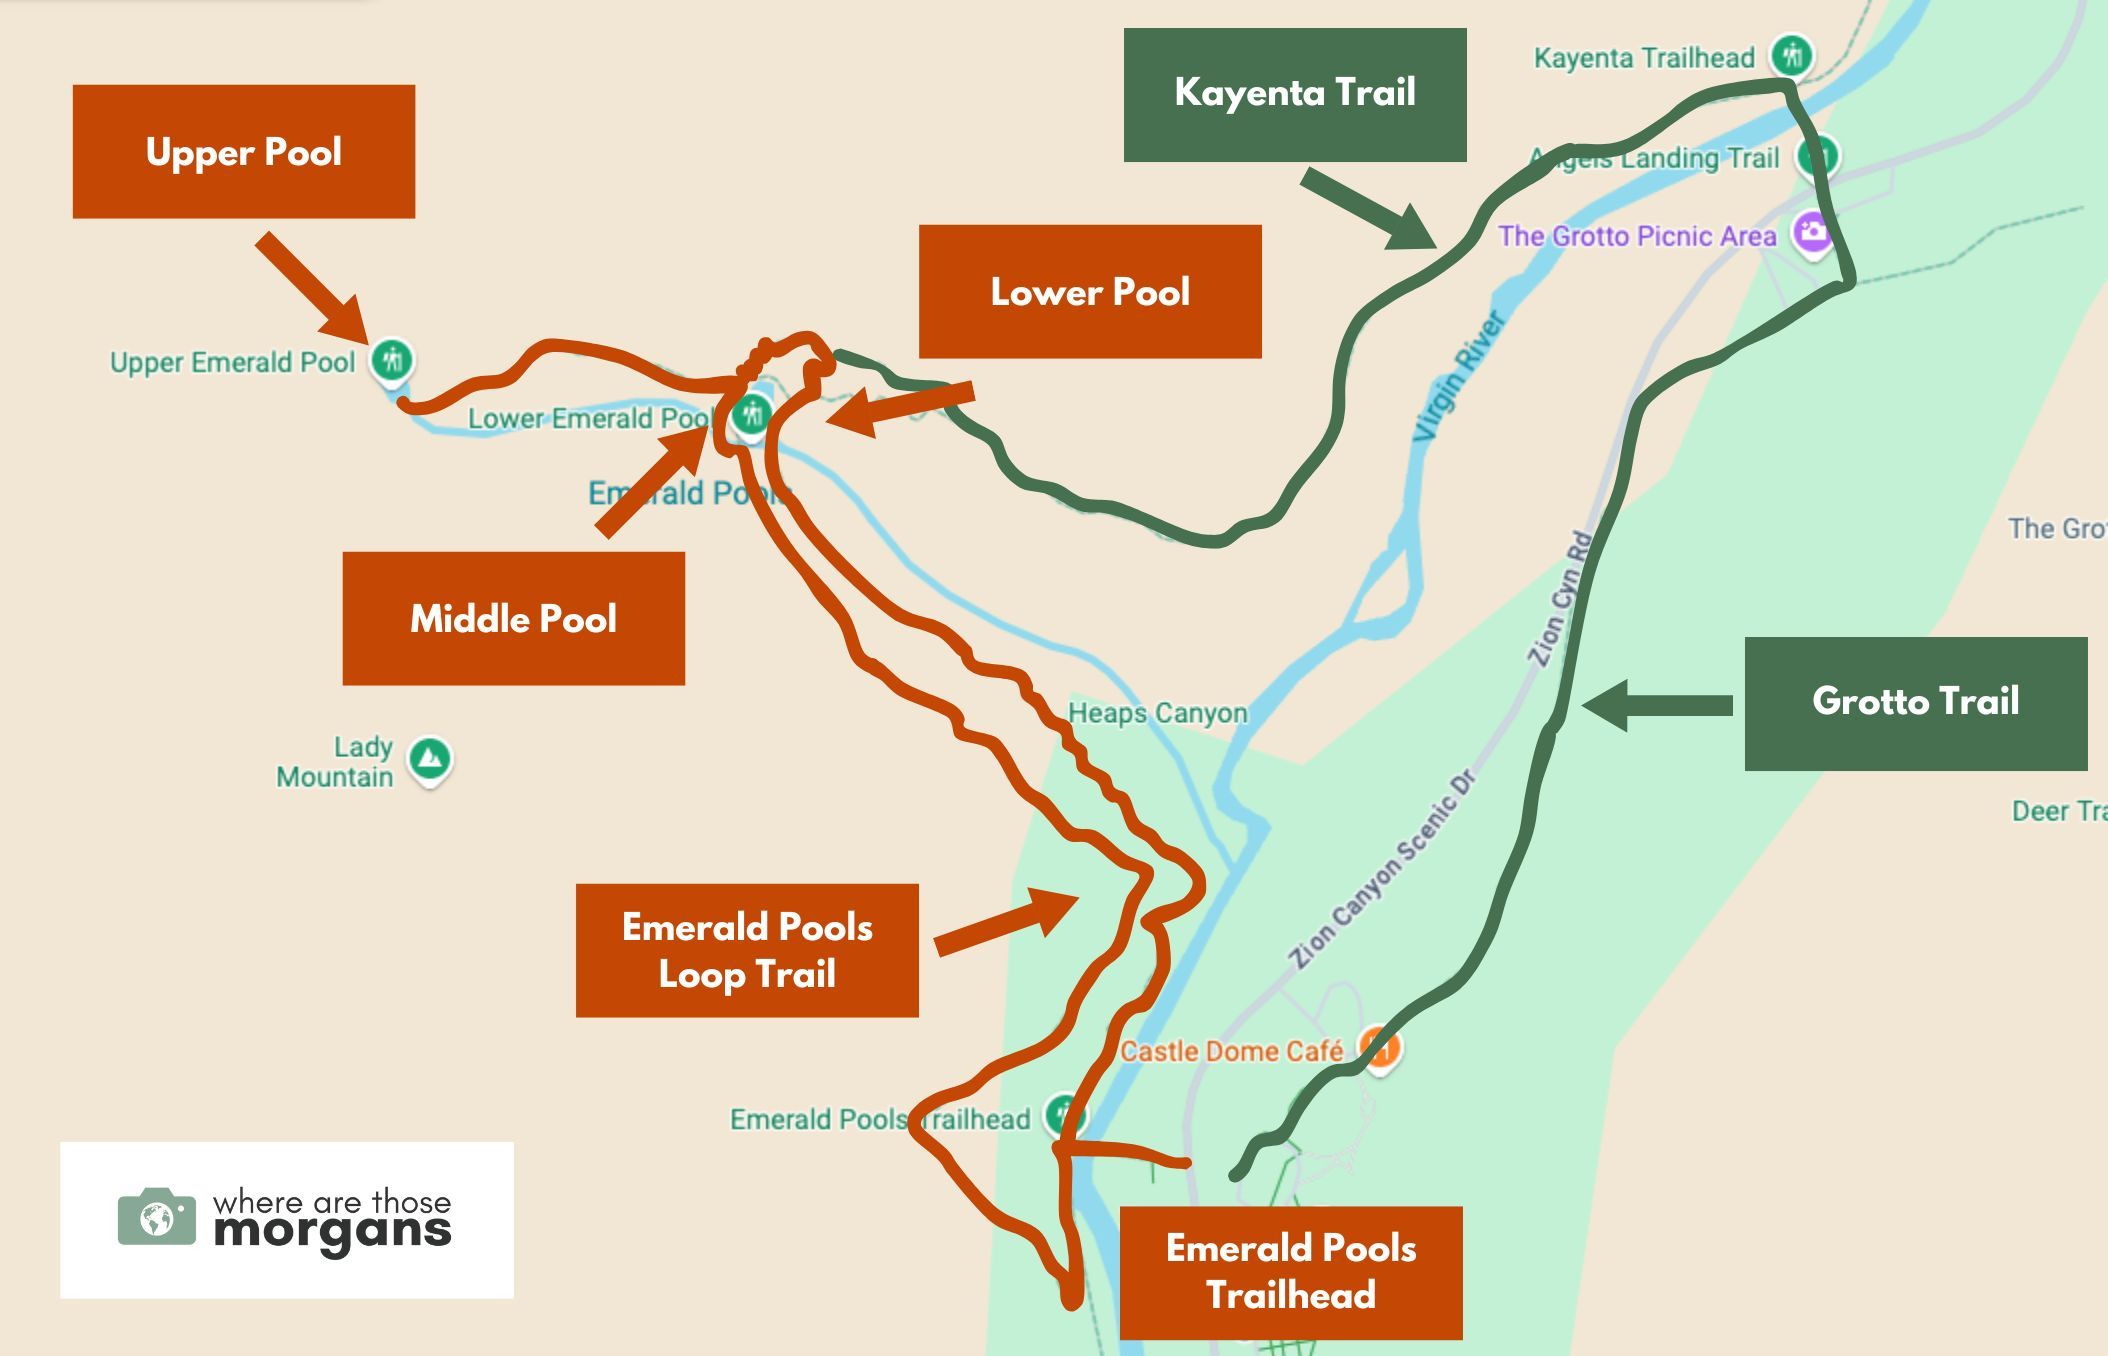
As you can see in the map we created above, there are several hiking options for Emerald Pools Trail. One option is to hike to one, two or all three of the pools in a loop from Emerald Pools Trailhead near Zion Lodge. And that’s the version we’re showing you in this guide.
But there are two alternatives to consider:
- Hike all three Emerald Pools, but instead of going straight back to the trailhead you can hike along Kayenta Trail and connect onto Grotto Trail to complete a much larger loop back to Zion Lodge. Both Kayenta and Grotto are flat and easy.
- Hike all three Emerald Pools either before or after hiking Angels Landing by connecting on Kayenta Trail. A lot of hikers coming down from Angels Landing will continue straight onto Emerald Pools Trail to tick off two of Zion’s most popular trails in one go.
Getting To Emerald Pools Trailhead
Emerald Pools Trailhead is located opposite Zion Lodge at shuttle stop 5 inside the park’s main canyon. Here are three easy ways you can reach the trailhead:
- Take the canyon shuttle bus to stop #5 – Zion Lodge (March-November).
- Drive your own car to the trailhead parking lot (December-February).
- Hike to the trail on a connector path like Kayenta or Sand Beach.
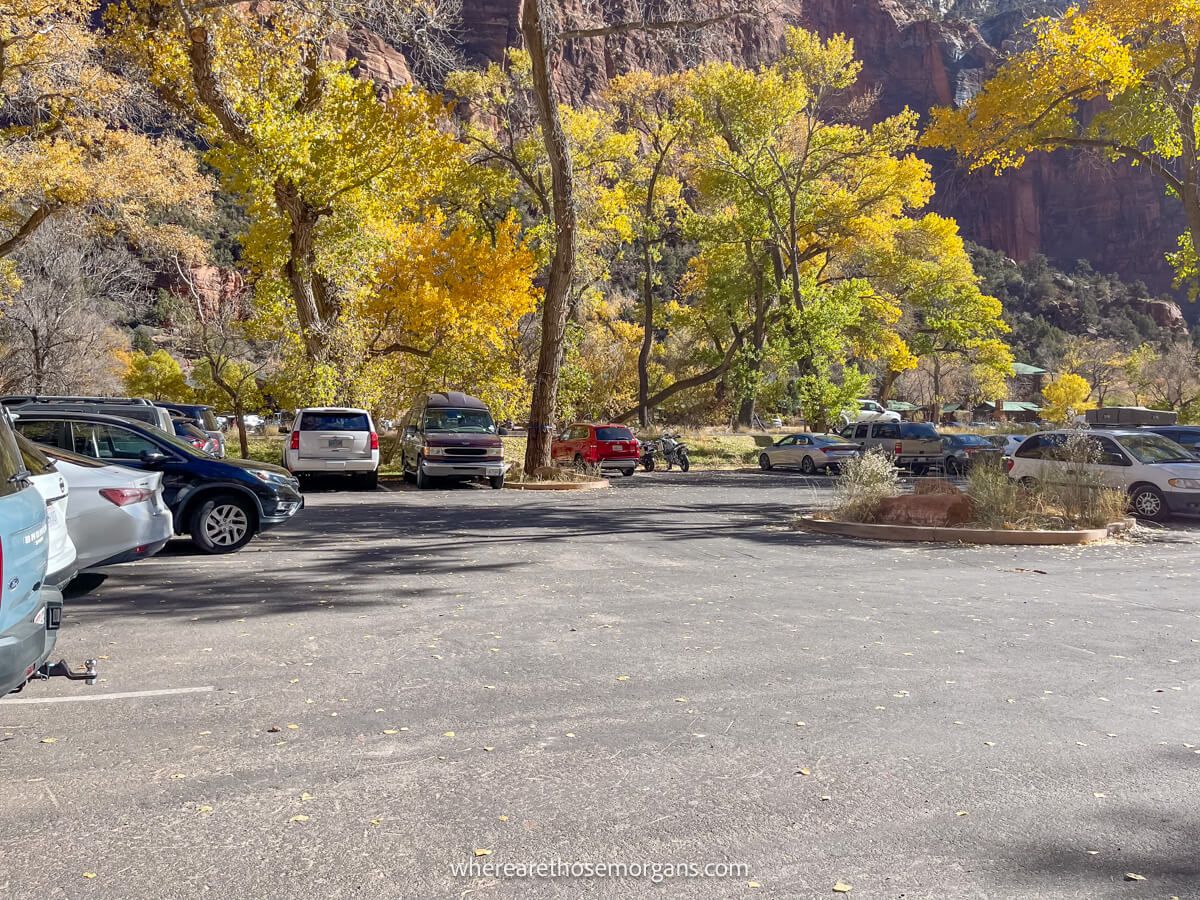
Most people visit Zion between April-September when the shuttle bus is in operation (here’s the shuttle schedule). But if you visit in winter you can drive your own car into the main canyon. Emerald Pools Trailhead parking lot has around 35 spaces, but you can also park at the lodge on the opposite side of the road if the lot is full.
Need help planning your trip to Zion?
Our popular Zion travel guidebook helps you with planning every aspect of your visit, including the unmissable hikes, where to eat and stay, itinerary ideas and map!
View Guidebook
Trail Walkthrough
Next, let’s walk through the hike exactly as we did it so you know what to expect.
1. Start At Zion Lodge
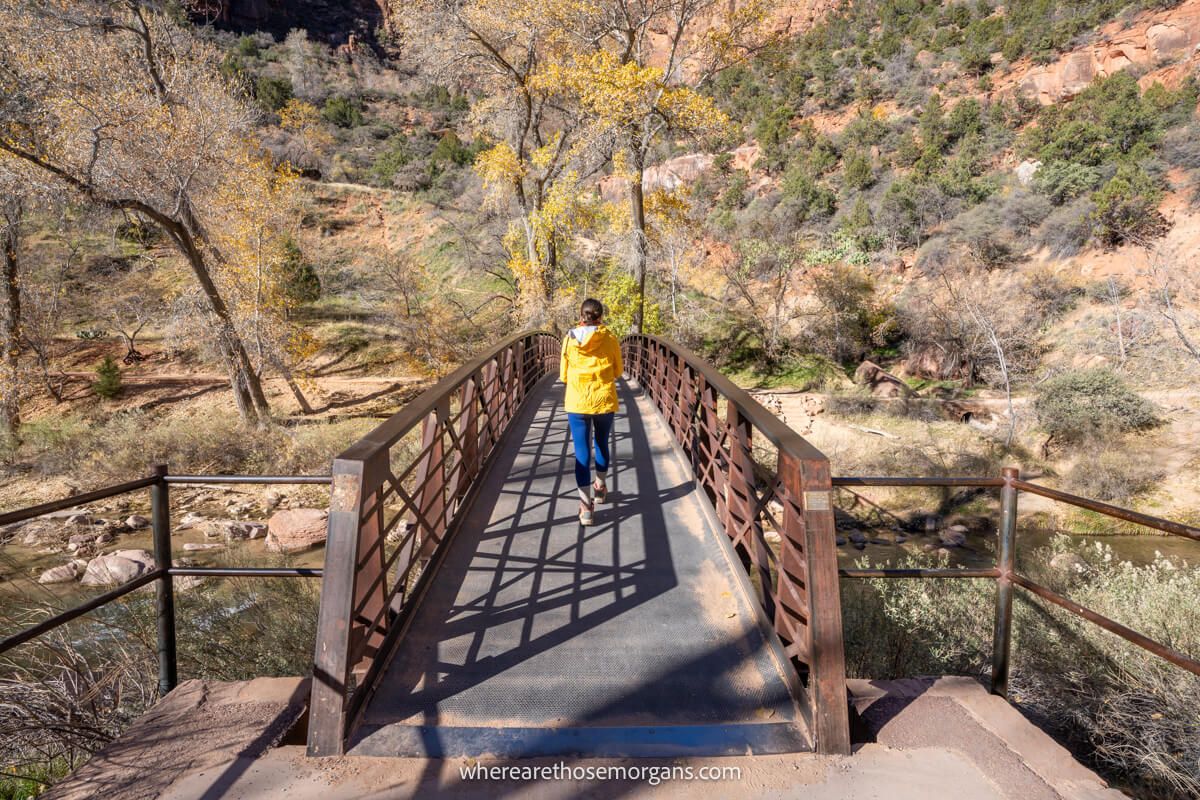
After breakfast at Zion Lodge it only took us a minute or two to access the trailhead. It was December 1st so the canyon was open to private vehicles but we were surprised to see the lot almost full considering it was a weekday morning in early winter. We aimed straight for the Virgin River and crossed over a bridge.
2. Left At The Split
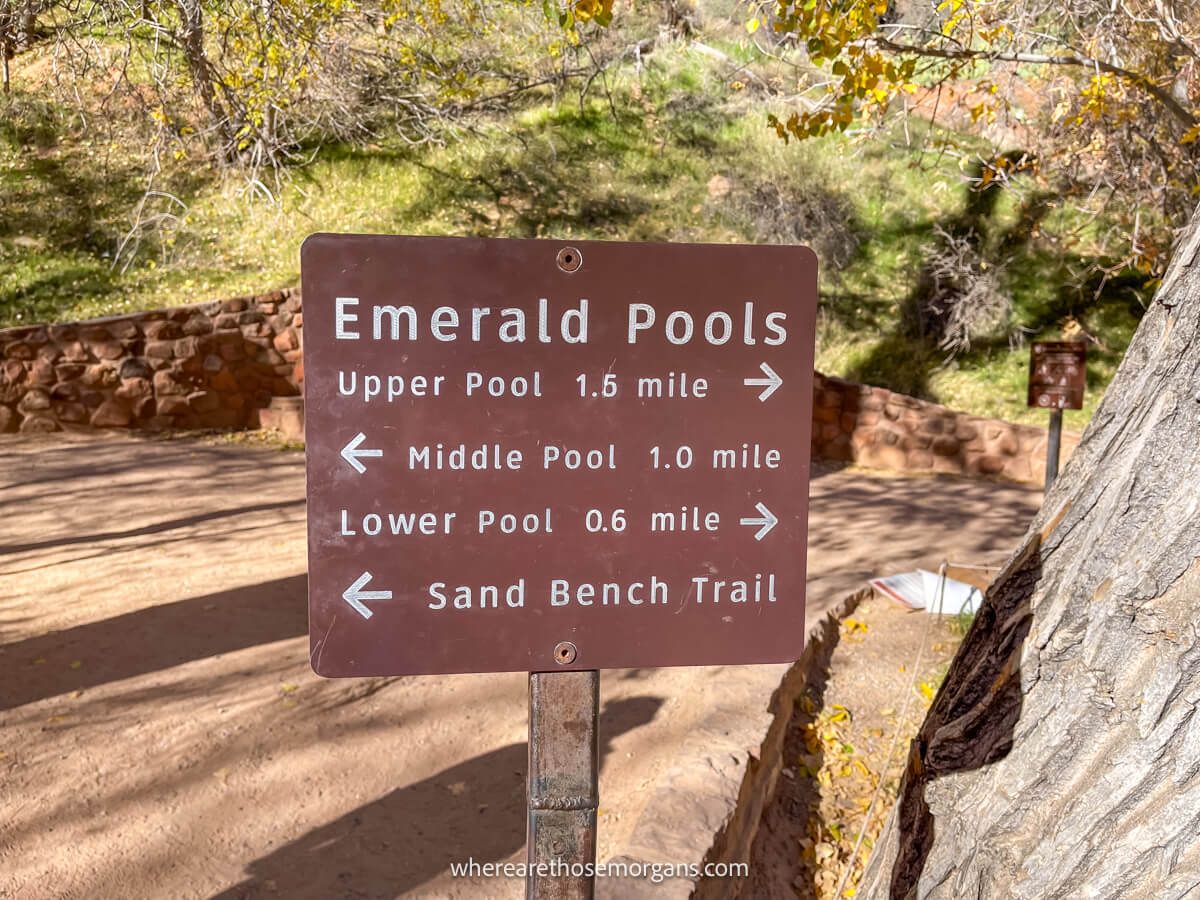
At the far side of the bridge we saw a sign stating that upper pool and lower pool were to the right, but middle pool was to the left. It’s important to note here that if you don’t want to do the full loop, you should turn right here and go straight for lower pool. We turned left and walked south on a narrow dirt path hugging the river.
3. Long Flat Walk
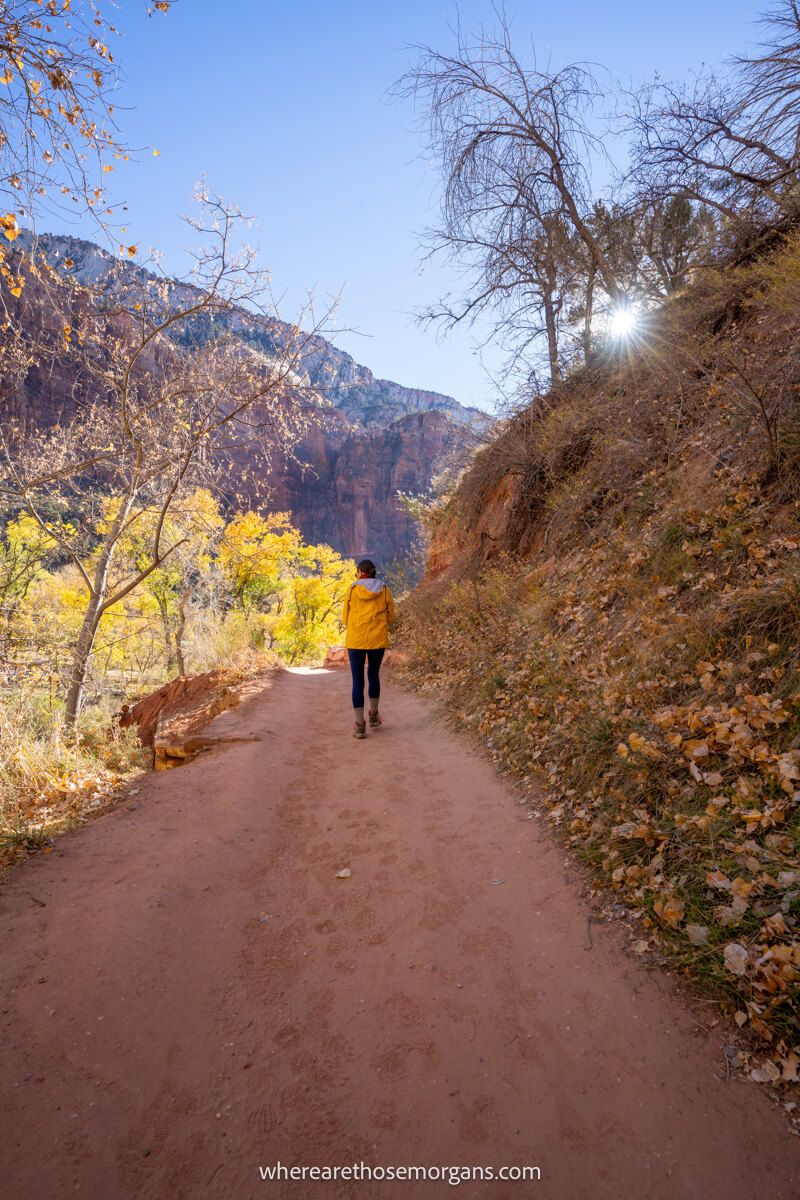
A few minutes later we arrived at a short but steep climb, so we slogged it up and arrived onto another flat path. The elevated views were already much better despite such a short climb, and from here we walked for quite some time on a flat and narrow dirt trail admiring the scenery. The only thing we passed of note was a natural water hole which must be filtered if used.
4. Middle Emerald Pool
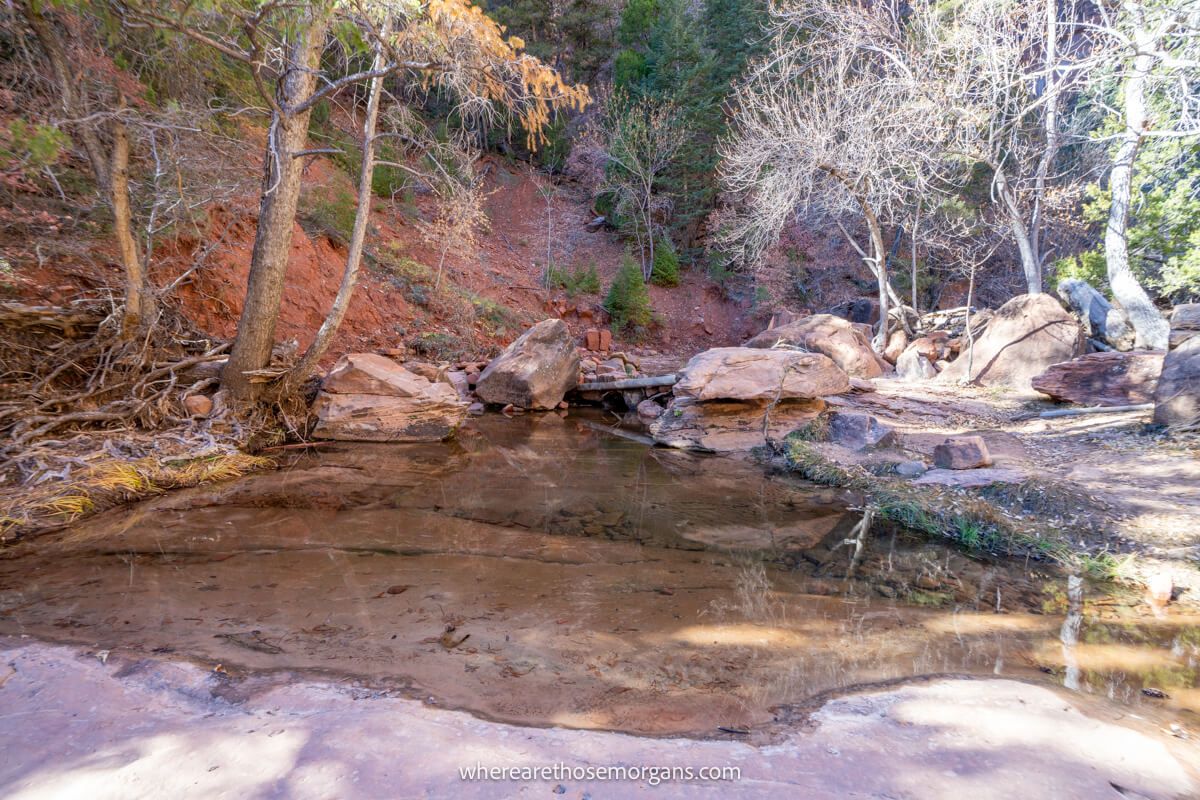
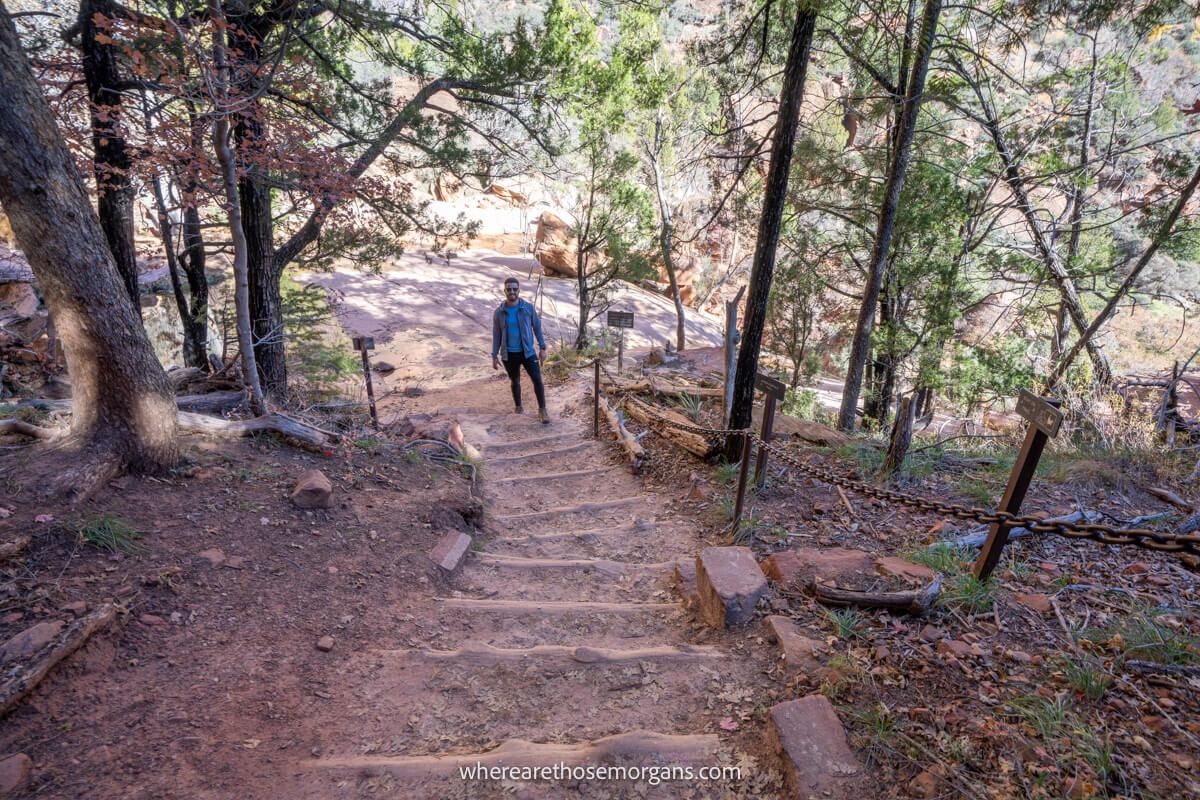
After thinking nothing was ever going to happen on this hike, we eventually reached a staircase leading down through trees onto a flat table-like rock. To the right was a chain fence to prevent people falling over the edge and to the left was Middle Emerald Pool. It wasn’t particularly impressive because of the time of year, but we imagined it would be better with more water flowing over the ledge.
5. Steep Climb
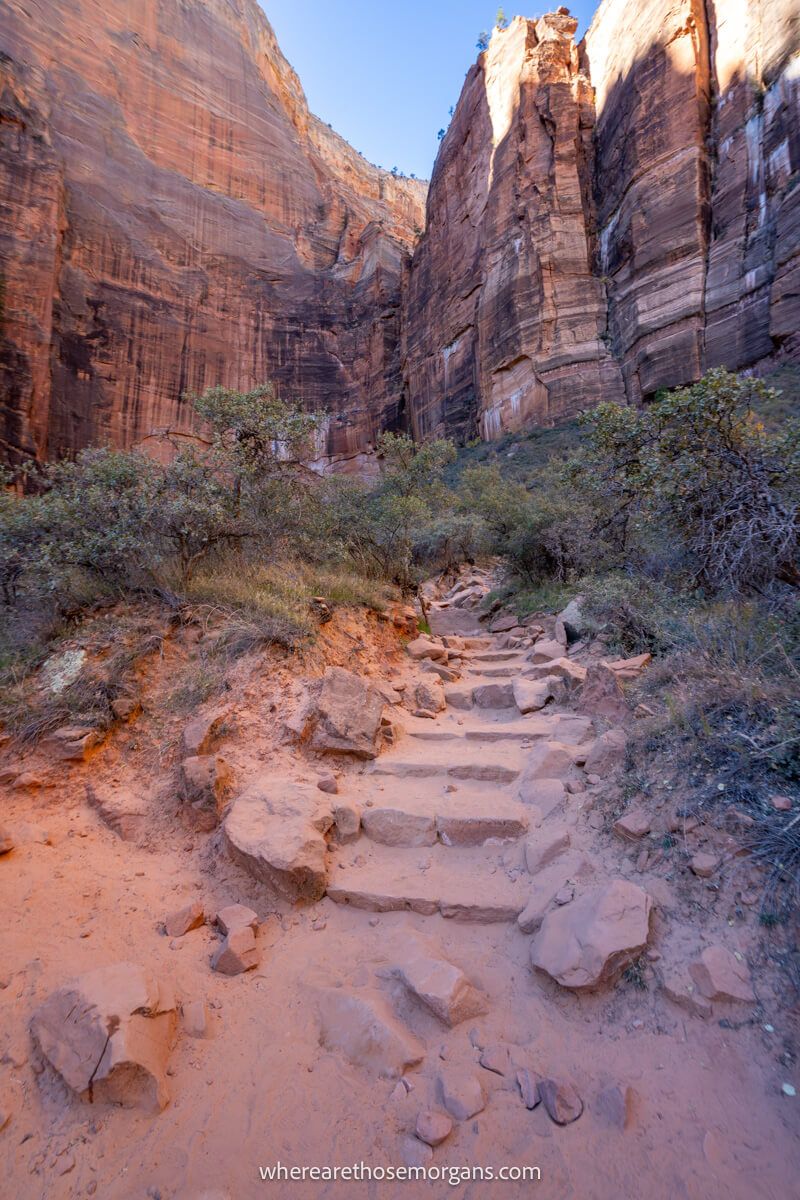
Up to this point, Emerald Pools Trail hadn’t really challenged us or impressed us. Then we took a left turn for upper pool and the trail turned steep, rocky and sandy. Our lungs started working harder and our calves burst into life. The soft sand and loose rocks made this section of the hike more difficult than we expected, so take your time and take care with your foot placements.
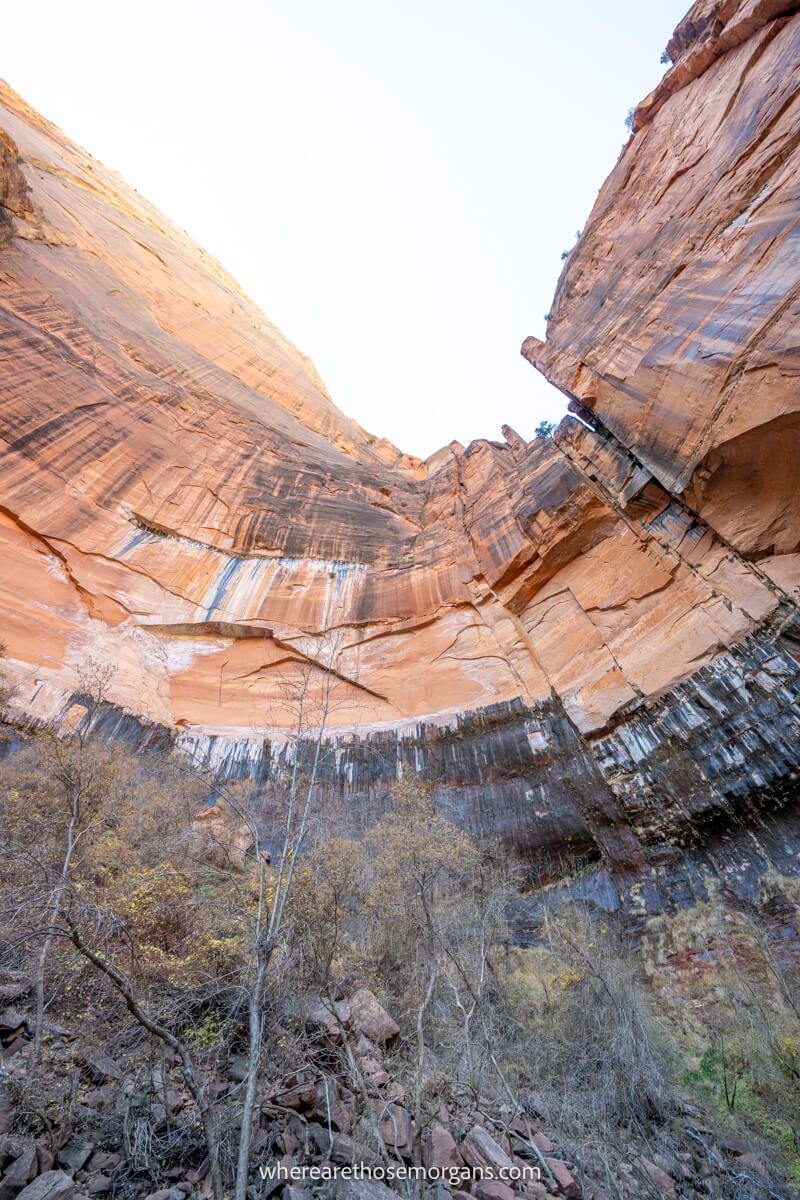
6. Upper Emerald Pool
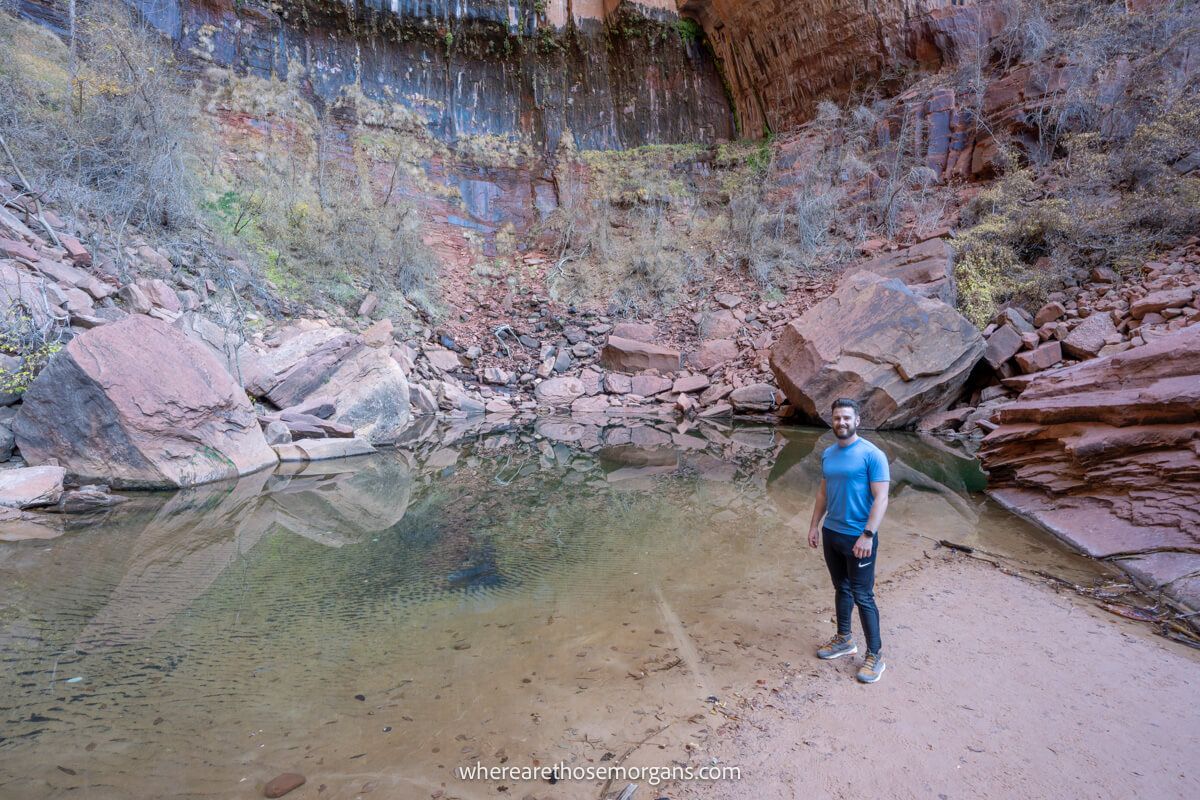
The final approach to Upper Emerald Pool had large rocks and boulders to navigate which made things a bit more exciting. The views behind us were really beginning to open up but it was inward facing views that really lit up the hike. We looked up to see gigantic red rock cliff walls converging at a 90 degree angle, which is where the water falls from after rain. And the pool itself was more photogenic.
7. Back Down The Same Way
Hiking back down the steep sandy trail to middle pool was much nicer because we could enjoy the wide open canyon views ahead. It was getting busier with people because we were getting into the morning rush time period, but it was still much quieter than it would be in peak season. Once back at middle pool, we took a left turn heading for lower pool.
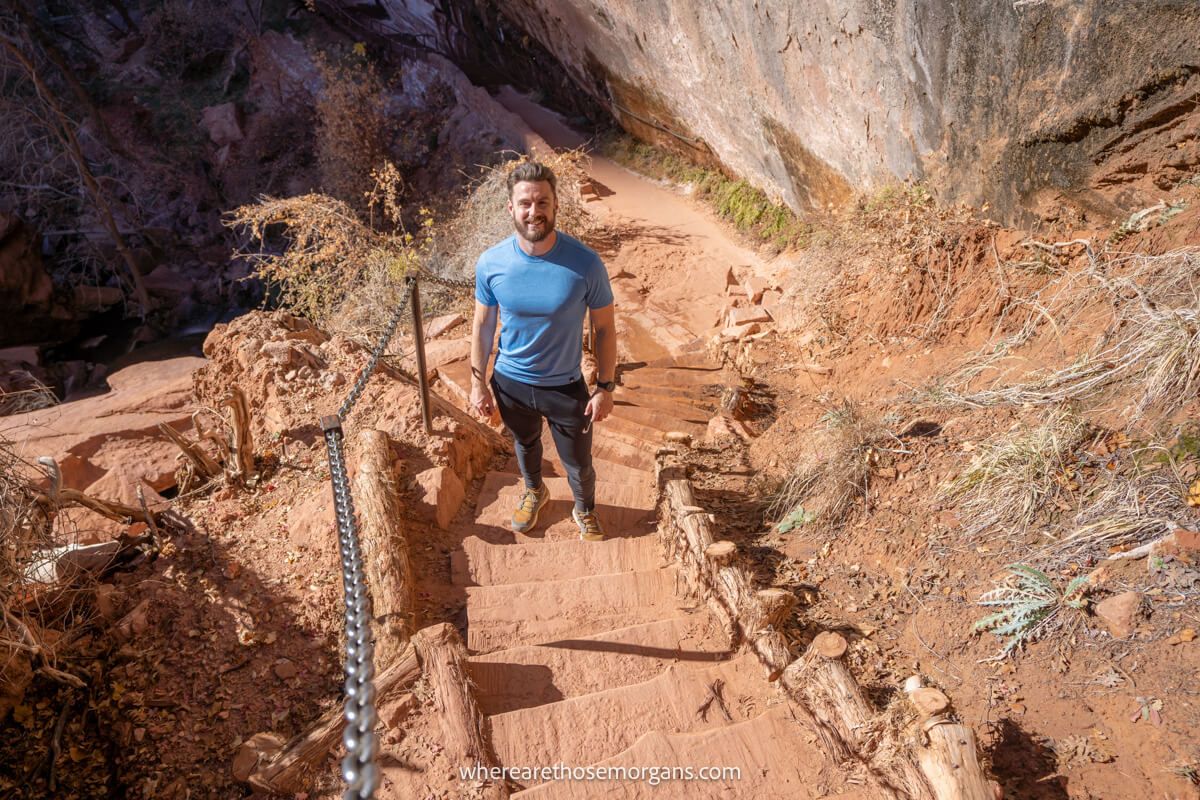
8. Descend A Narrow Staircase
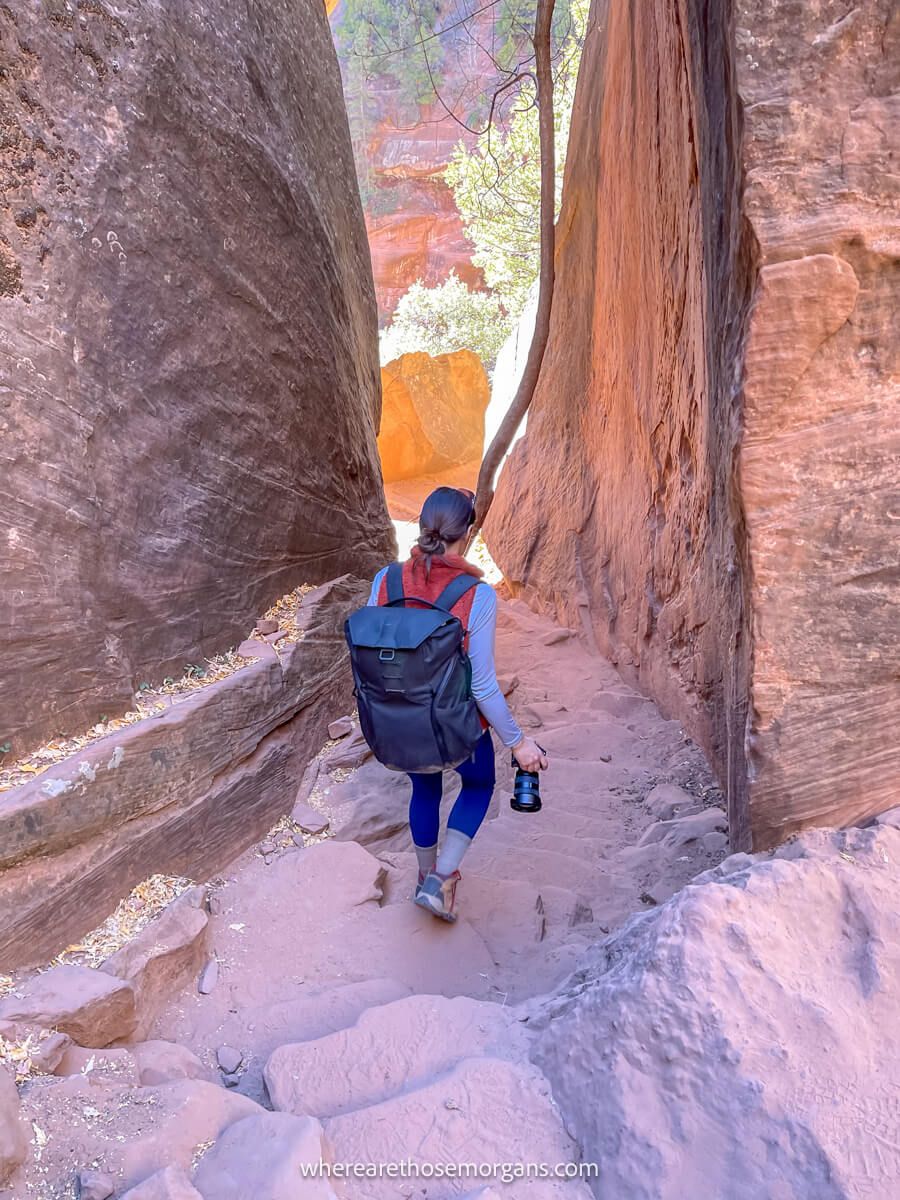
The next part of the trail was completely unexpected. Shortly after we took the turn and skirted around a narrow dirt trail surrounded by vegetation with drop-offs to the side, we encountered a set of stone steps that looked a bit like a short slot canyon. At the bottom we turned right to see lower pool, but this is where you’d turn left for Kayenta Trail and Angels Landing.
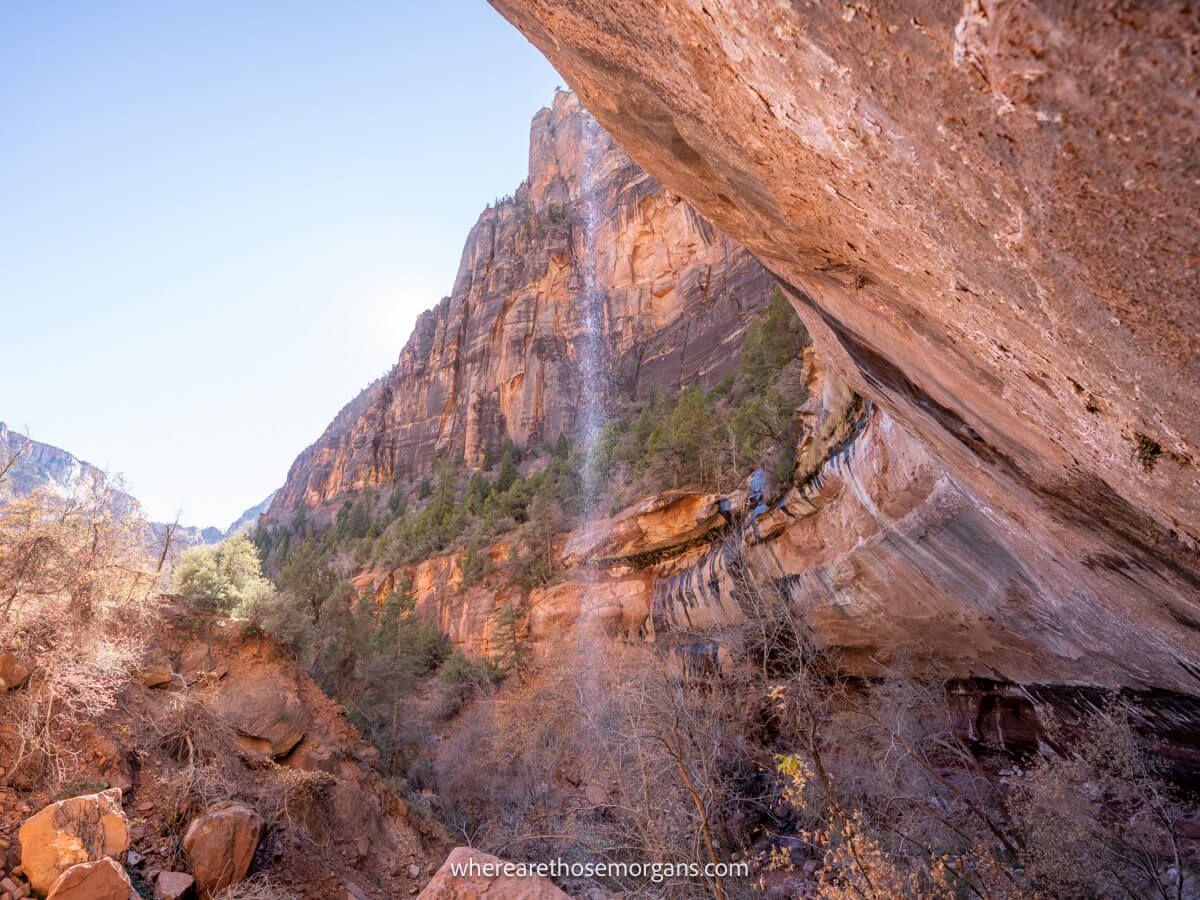
9. Lower Emerald Pool
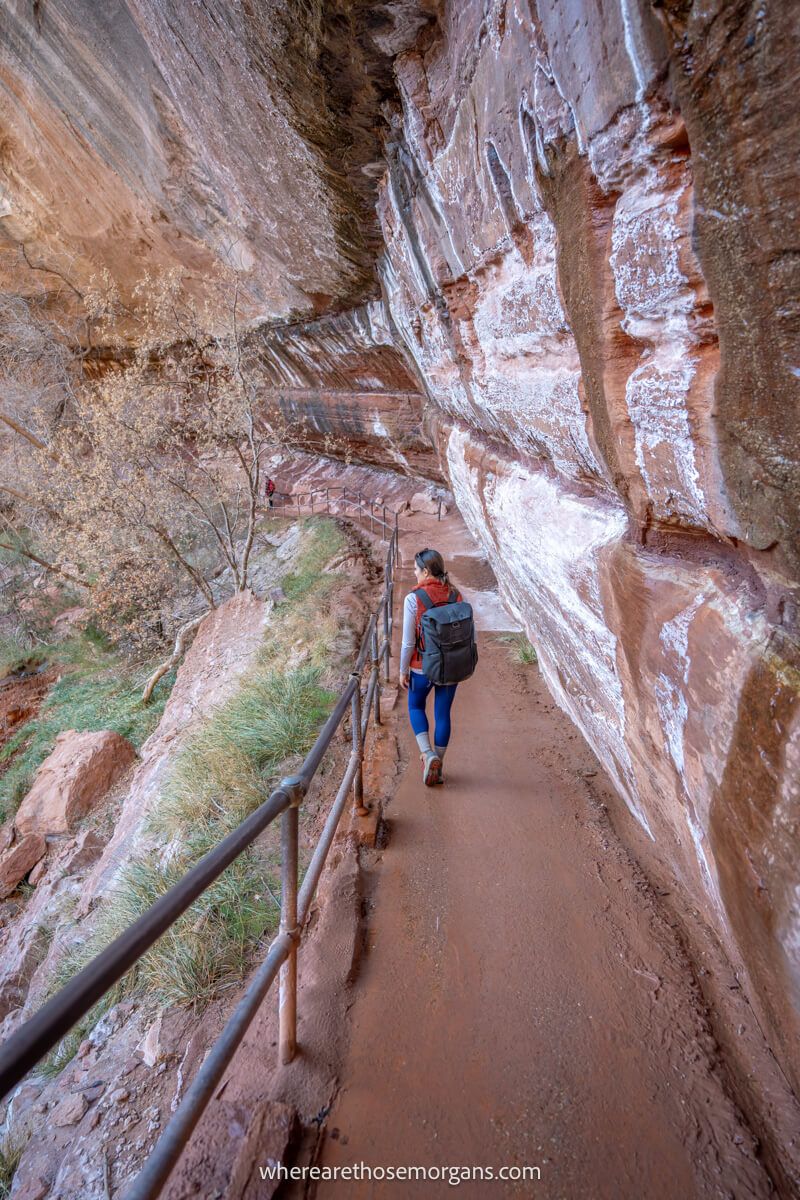
Moments after taking a right turn at the bottom of the steps, we turned another right corner which opened up a fantastic view over Lower Emerald Pool. Well, we couldn’t see the pool itself, but we could see a photogenic crescent moon shaped rock ledge with a wispy waterfall flowing down. We took stone steps down and walked underneath the waterfall on a curving path. It was our favorite part of the hike.
10. Finish The Loop
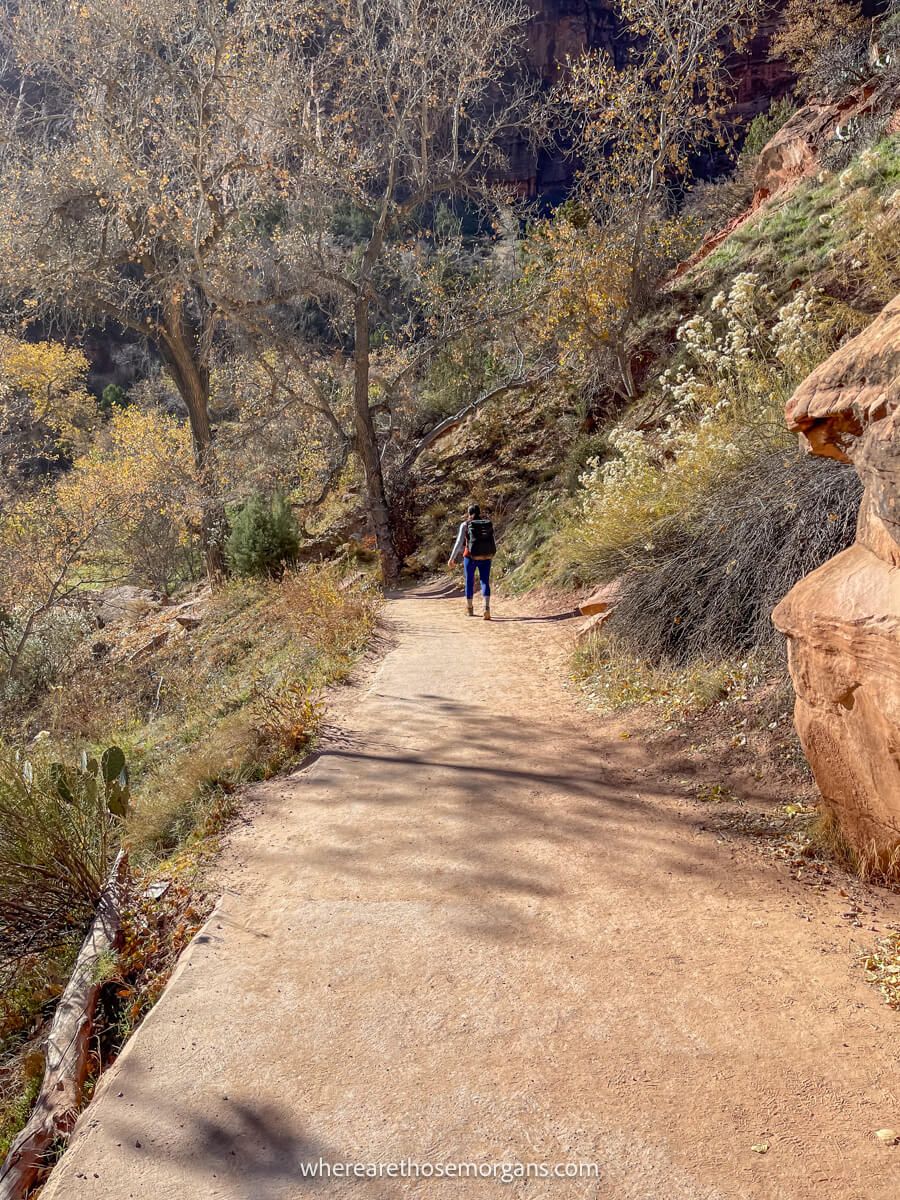
Once we walked along the crescent moon curve, the paved trail was flat and easy all the way back to the bridge we walked over a few hours earlier at the trailhead. The walk back only had 50 feet elevation loss spread across half a mile, so we got a hustle on because we had a bunch more hikes to get stuck into!
Best Time To Hike Emerald Pools Trail
We think late fall is the best time to visit Zion in general for a good balance between crowds, costs and hiking temperatures. But for Emerald Pools Trail specifically, you can hike it any time of year without having to worry about permits or hiring waterproof gear like other trails.
With that said, you’ll only see waterfalls in the spring or after heavy rainfall. We hiked it in when we visited Zion in December when the pools were very shallow, upper pool had no waterfall and lower pool only had a tiny wispy waterfall. The other thing to consider is ice on the trail in winter because it stays in the shadow for a lot of the day.
In terms of seasonality, Zion is busy from April-September but it’s busiest June-August so we recommend avoiding those summer months if you can. The trail wasn’t too overcrowded in December even though we hiked it at probably the worst time of day around 10:00am. But we can only imagine what it would be like in August, and that’s a hard no from us!
The Morgan Conclusion
What we like: It’s one of the only hikes in Zion that leads to waterfalls and pools of water. We also liked that it was picturesque and fun without being overly adventurous like Angels Landing or The Narrows, so it’s more inclusive.
What we don’t like: We were disappointed by the dry waterfalls but that’s the tradeoff for visiting in the off season. It’s also a hugely popular hike because it’s so inclusive, which means it gets incredibly busy in peak months.
Is Emerald Pools Trail worth it? Yes, hikers of all abilities and especially families with kids should definitely hike Emerald Pools Trail on a first trip to Zion. It’s got waterfalls and pools, it’s a good workout without being too hard and it’s very easy to access in the main canyon. Overall, we think this is one of a handful of trails that should be on every Zion itinerary.
We hope our guide to hiking Emerald Pools Trail helps with planning your visit to Zion!
Please let us know if you have any questions in the comments below.
Happy Travels,
Mark and Kristen
Was this guide helpful? Pin it for your visit!

All Rights Reserved © Where Are Those Morgans, LLC. Republishing this article and/or any of its contents (text, photography, maps, graphics, etc.) in whole or in part is strictly prohibited.
Mark and Kristen spent 6 years traveling the world, visiting over 40 countries across 4 continents and more than 30 US states. They created Where Are Those Morgans in 2018 to help others plan the best possible vacations by writing authentic travel and hiking guides based on their real experiences.
Since the arrival of baby Maya in late 2024, Mark and Kristen’s extensive travels have slowed down but they still take plenty of trips. Where Are Those Morgans now helps millions of travelers each year to visit new places and hike new trails through information-packed blog posts and expert travel guidebooks. Read more about Mark and Kristen.