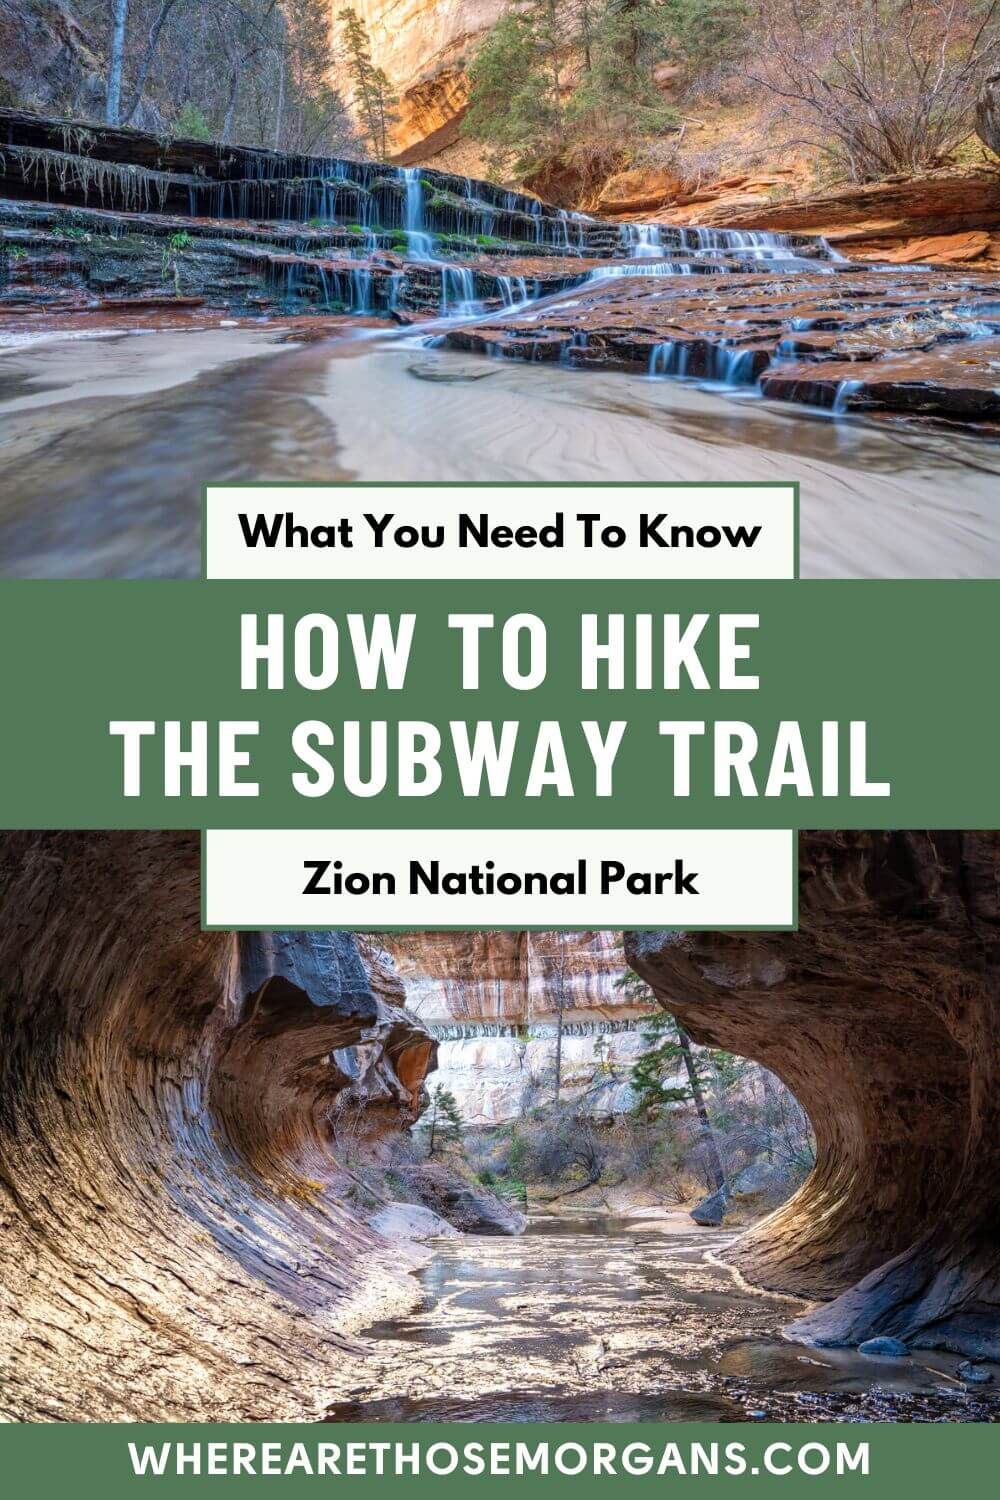
Interested in day hiking Zion’s Subway from the bottom up? We don’t blame you, it’s a fantastic off the beaten path trail with a maximum of just 80 hikers per day, so it really feels like an adventure. In this guide we show you how to get a permit, where to park and a full step by step walkthrough of our own hike to the Subway in Zion.
Countless river crossings, no clear path, an extraordinary climax and barely another soul in sight: The Zion Subway Trail has all of the wow-factor and none of the crowds. In fact, we only saw 3 other people all day when we hiked alongside and quite literally through the Left Fork of North Creek to the striking tunnel-like formation on November 30th, 2021.
It was our second Zion vacation, and the Subway was the only big hitter left on our wishlist. We’d already done The Narrows and Angels Landing when we visited the park in October 2019. Back then Zion was jam-packed so we didn’t bother trying to win a coveted permit for the Subway, instead deciding we’d go back in the off season for a better chance.
And it worked like a charm. We applied in-person for a next day Subway permit upon arriving to Zion on November 29th and the ranger gave us a permit right then and there. Early next morning we drove to Left Fork and hit the trail, forging our own path upstream until reaching one of the best endings to a hike we’ve ever seen. It took us around 7 hours, and it was so much fun! Read more about us.
Note: This article may contain affiliate links. If you make a purchase using one of these affiliate links, we may earn a small commission at no extra cost to you. Thank you!
ZION Planning
📖 Ultimate Guidebook: Get our complete 45-page PDF with everything you need for Zion.
📞 Personalized Zion Planning Call: Book a call with Mark to perfect your itinerary and have your questions answered.
💡 Still Planning? Read our essential first-timer’s guide to visiting Zion.
What You Need To Know
Okay, let’s dive right in. Here are the most important things you need to know before day hiking The Subway from the bottom up:
- You must win a hiking permit (which we explain below)
- Bottom up is the non-technical version of the hike
- But it’s a tough trail with obstacles throughout
- Expect creek crossings, boulders and steep banks
- There’s no clear path to follow
- You must figure out your own route
- Slick rocks near the end are very slippery
- Consider hiring waterproof socks and shoes in Springdale
- If not, you must wear shoes with strong grips
- It can be dangerous with high water levels
- Check live conditions for flash flood warnings
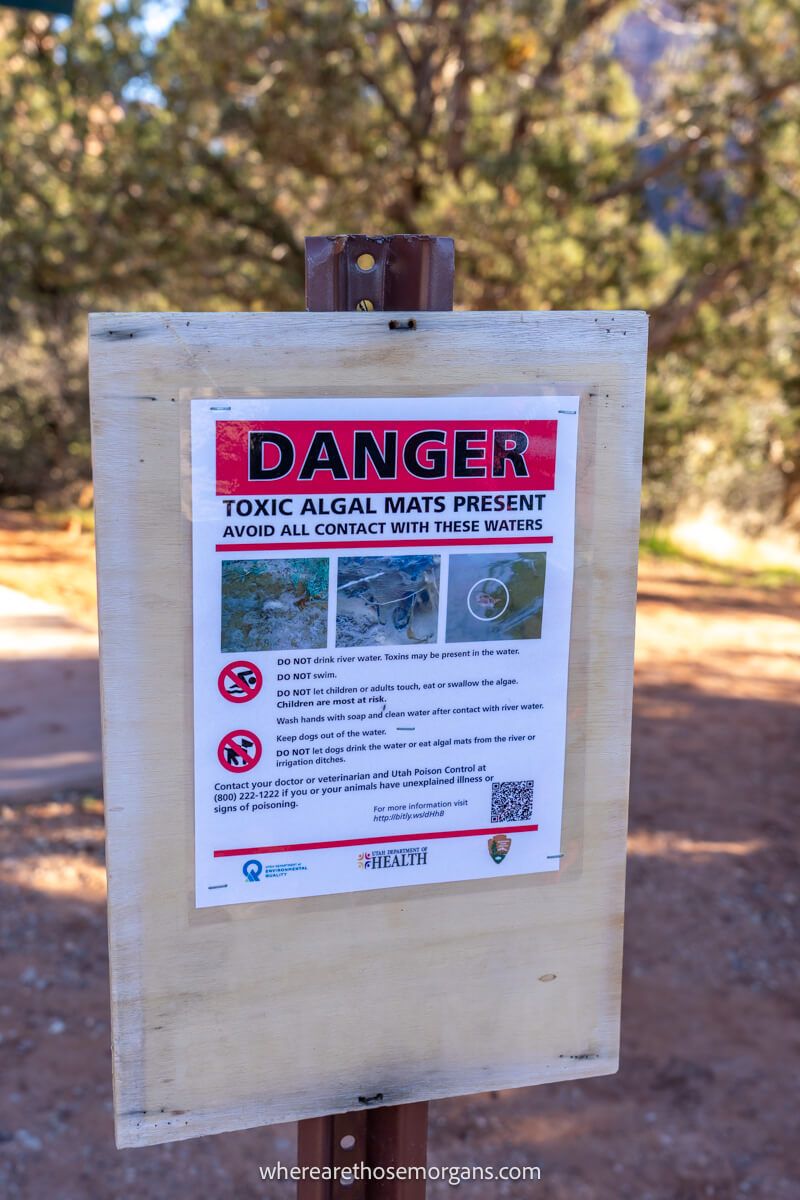
- Do not drink water from the creek (toxic cyanobacteria)
- Dogs are not allowed on the trail
Trail Statistics
- Distance: 9 miles roundtrip
- Type: Out and back
- Elevation Gain: 1,300 feet
- Difficulty: Hard
- Time: 6-8 hours
- Trailhead: Left Fork
We’ve hiked hundreds of trails around the world, so we have reference points for rating difficulty. And we’d rate The Subway as a hard day hike. At 4.5 miles each way it’s a pretty long hike to begin with, but it’s made even longer because of the path finding element. We zig-zagged and had to go back on ourselves more than a few times.
Around half the total elevation change occurs on a steep cliff between the trailhead and the creek. But it’s not just steep, it’s also quite dangerous with loose stones and dirt so take extra care on this section. Once alongside the creek, the remaining elevation change is so gradual you’ll barely notice it.
Hiking Permit
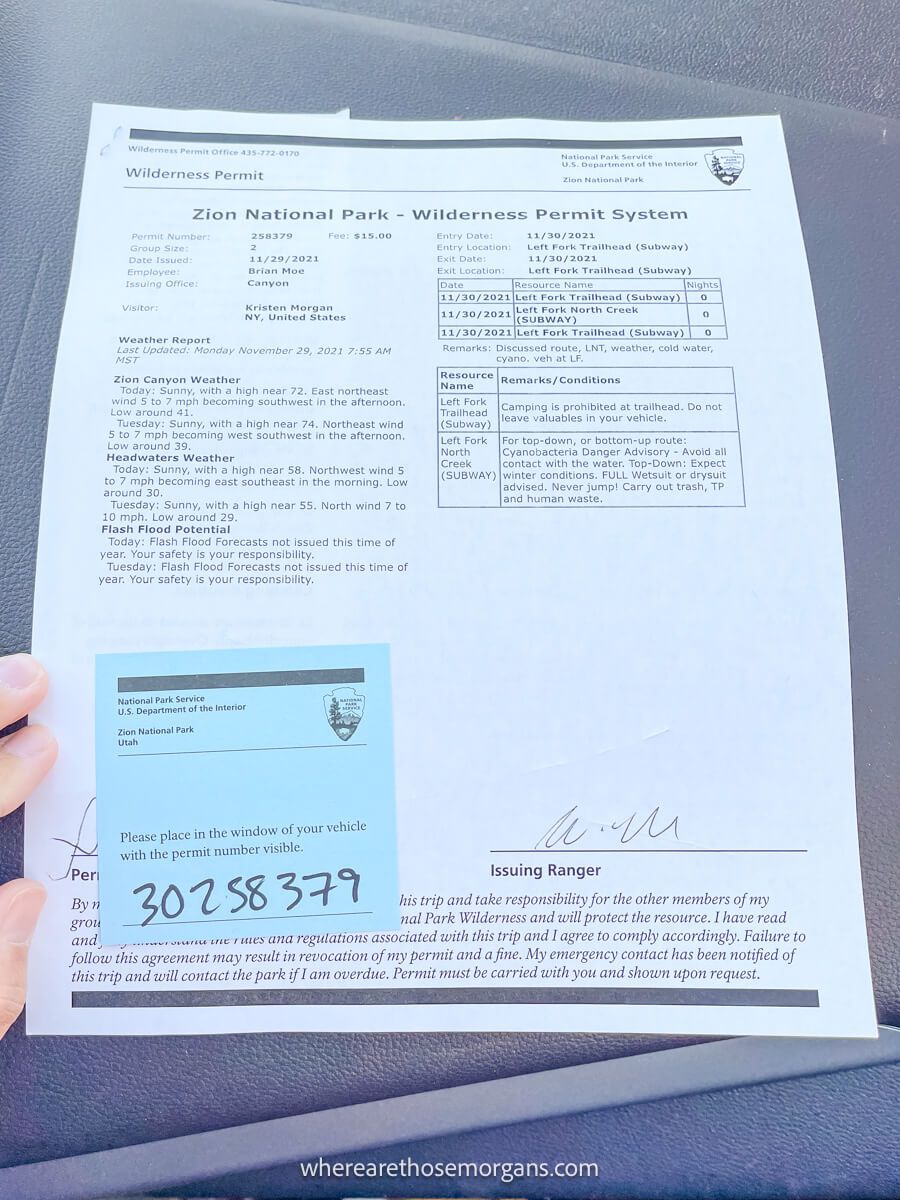
Okay, The Subway can be hiked top down or bottom up. Top down is an overnight hike with technical canyoneering and rappelling elements, whereas bottom up is a day hike with no technical canyoneering. But it’s important to know that both versions require the same permit. Only 80 permits can be won on any given day, combined between the two trail versions (ie. 53 bottom up and 27 top down).
You can apply in advance through this seasonal lottery which accounts for 60 of the total 80 permits each day. Or you can apply through this canyoneering daily lottery which accounts for the remaining 20 permits. It costs $6 to enter the lottery and a further $10 per person to pick up winning permits.
The seasonal lottery works on a 2-4 months ahead basis, four times a year (ie. apply in February to hike in April, May or June / apply in May to hike in July, August or September). The daily lottery is for 2 days ahead, not the next day like it was when we won (ie. apply on Tuesday to hike on Thursday).
Trail Map
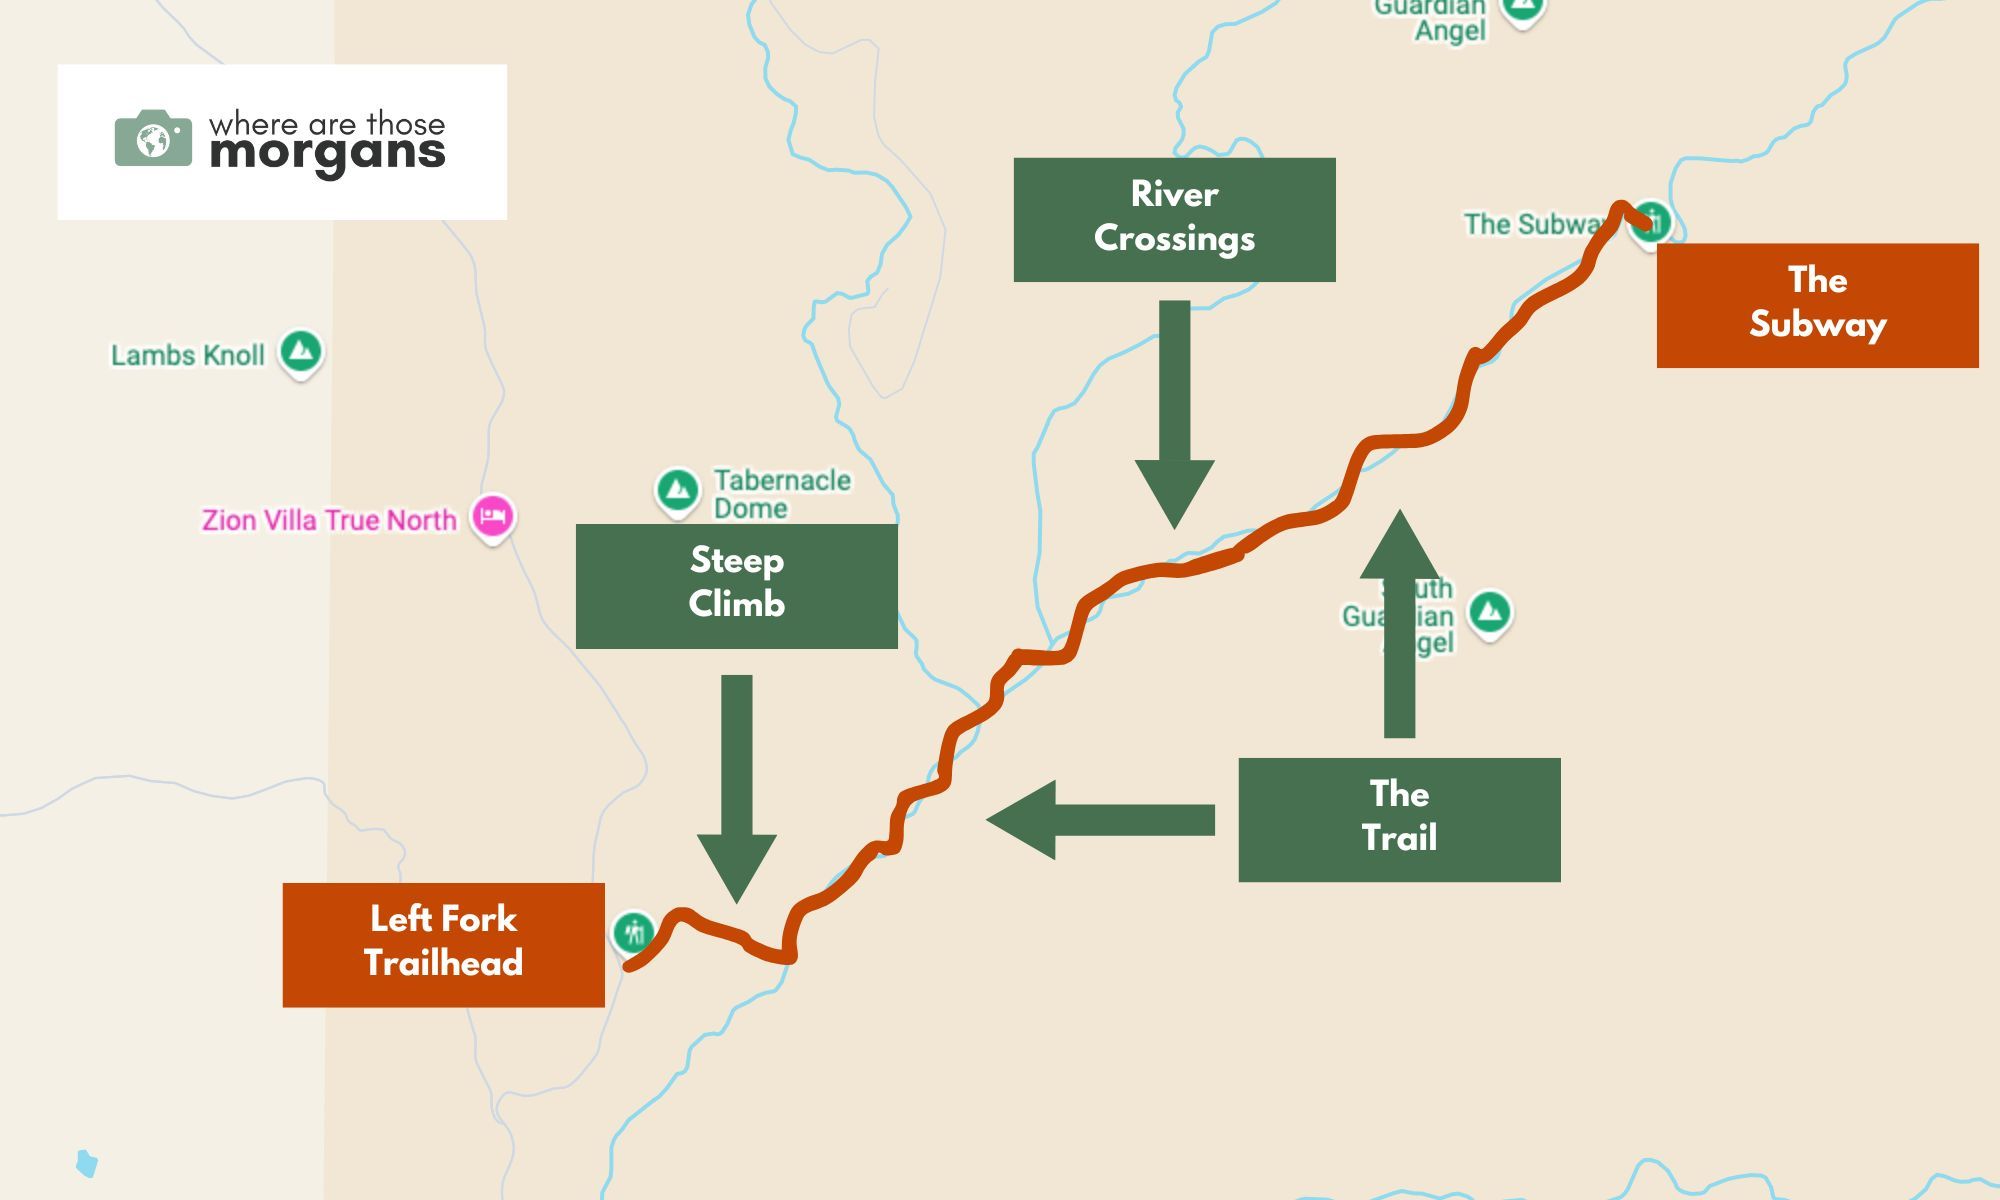
As you can see in the route map we created above, the trail to Zion’s Subway is actually pretty straightforward. You drop down to a creek, follow it for around 4 miles, turn around and go back the same way before climbing out of the creek.
There are no spur trails leading away in other directions or connecting trails leading to other areas of the park. Put simply, you just have to keep following the creek. But with that said, we recommend downloading an offline map onto one of the top mobile hiking apps to help with navigation. Here are two screenshots we took on our app during the hike:
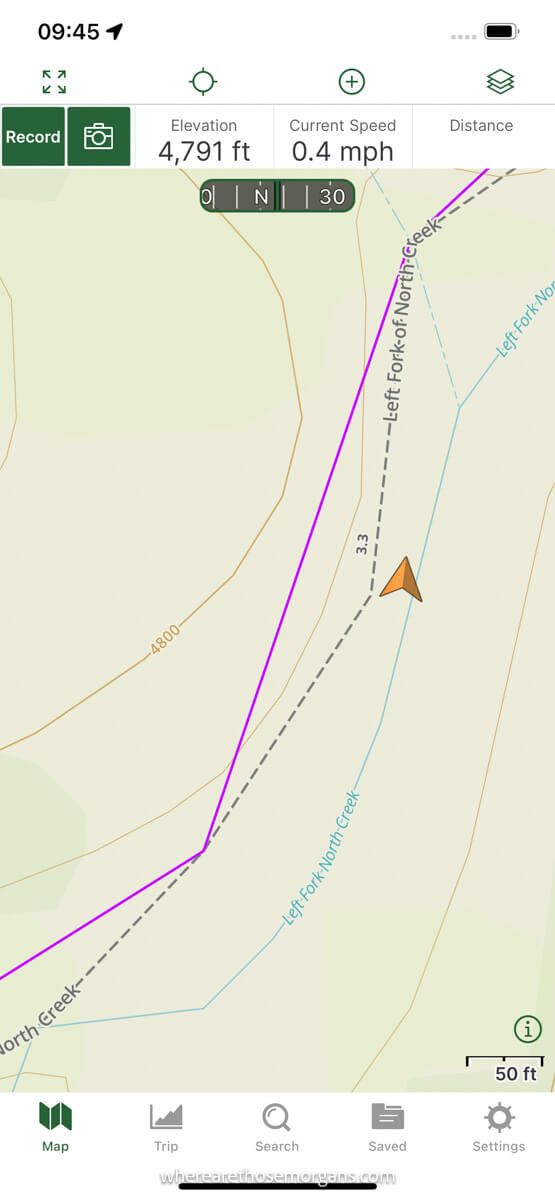
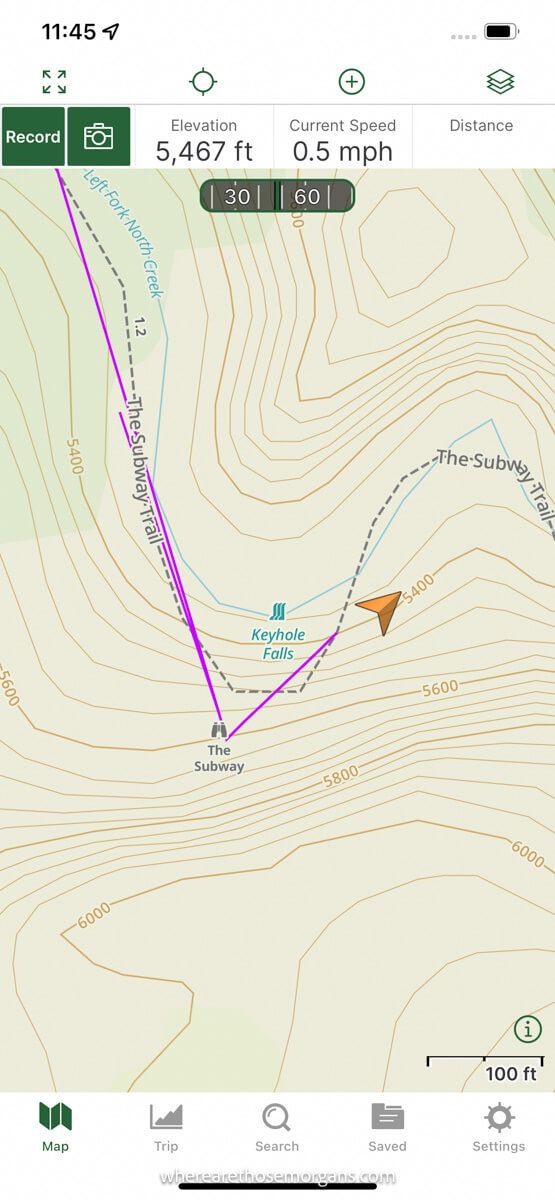
We always use our Gaia Premium app to download offline maps for trails with no designated path, so we can track our live position and make sure we’re heading in the right direction (here’s our exclusive 10% discount link for Gaia Premium). You can of course use a different app like AllTrails instead. Either way, being able to see our live location helped!
Trailhead Parking
The bottom up day hike to The Subway begins and ends at Left Fork Trailhead in the Kolob Terrace region of Zion. From the main visitor center in Springdale it’s a 21.5-mile drive to Left Fork Trailhead, which takes around 30-35 minutes. Remember to factor in the drive time if you plan to get an early start on the hike.
From Springdale, head south and west on UT-9 before taking a right turn onto Kolob Terrace Road when you reach Zion Wildflower Resort near Virgin. It’s a narrow, bumpy and undulating 8-mile drive on Kolob Terrace Road to reach the trailhead.
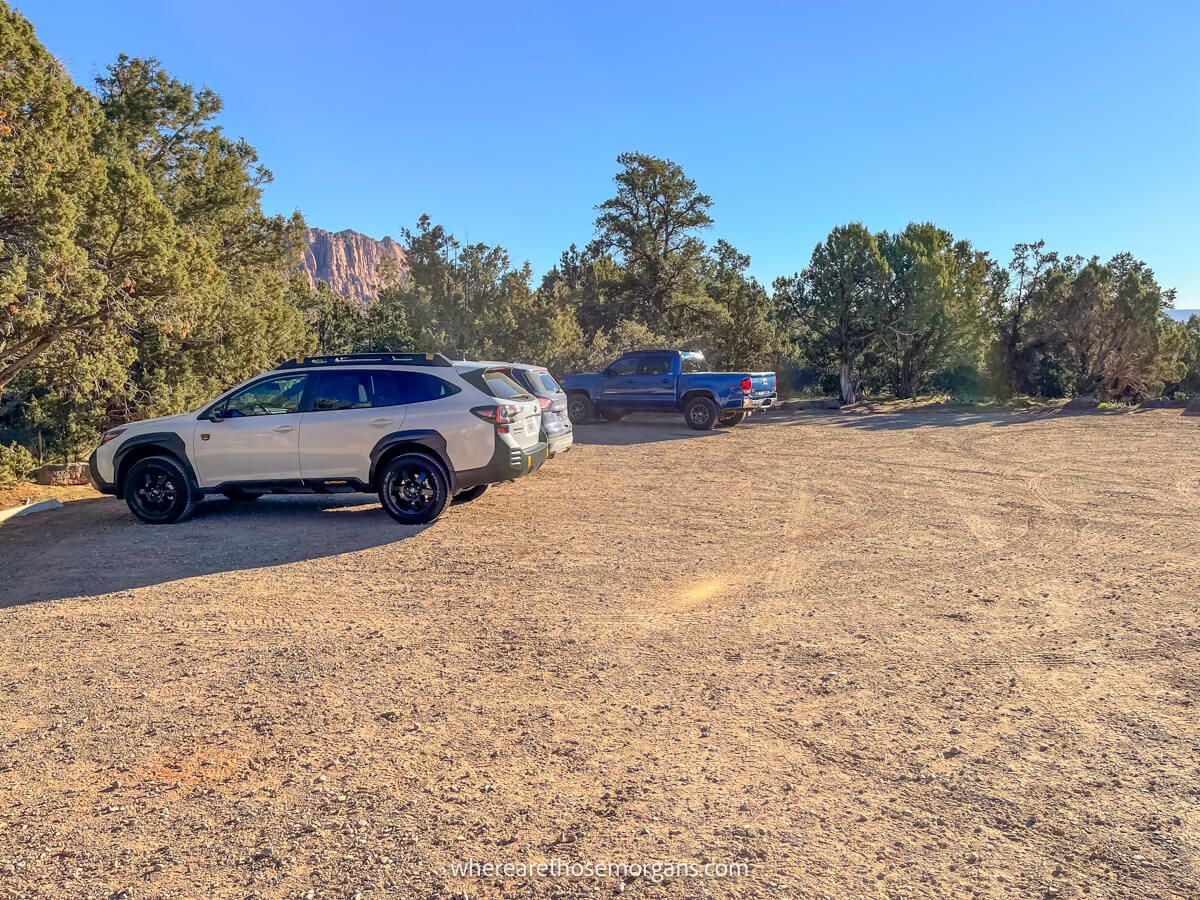
The parking lot at Left Fork Trailhead is surprisingly small with space for maybe 25 cars if everyone does a good job of squeezing in. So, we’re not quite sure how parking would work on a day when all 80 permits are in use. There were only 3 cars in the lot on November 30th when we hiked The Subway, but we imagine it would be much busier in peak season.
Tip: Left Fork is part of Kolob Terrace which is inside Zion’s boundaries, so you’ll need to display your $35 entry pass or America the Beautiful Pass on your car dashboard (along with your Subway permit) during the hike.
Need help planning your trip to Zion?
Our popular Zion travel guidebook helps you with planning every aspect of your visit, including the unmissable hikes, where to eat and stay, itinerary ideas and map!
View Guidebook
Our Trail Walkthrough
Next, let’s walk through the hike exactly as we did it so you know what to expect.
1. Park At Left Fork Trailhead
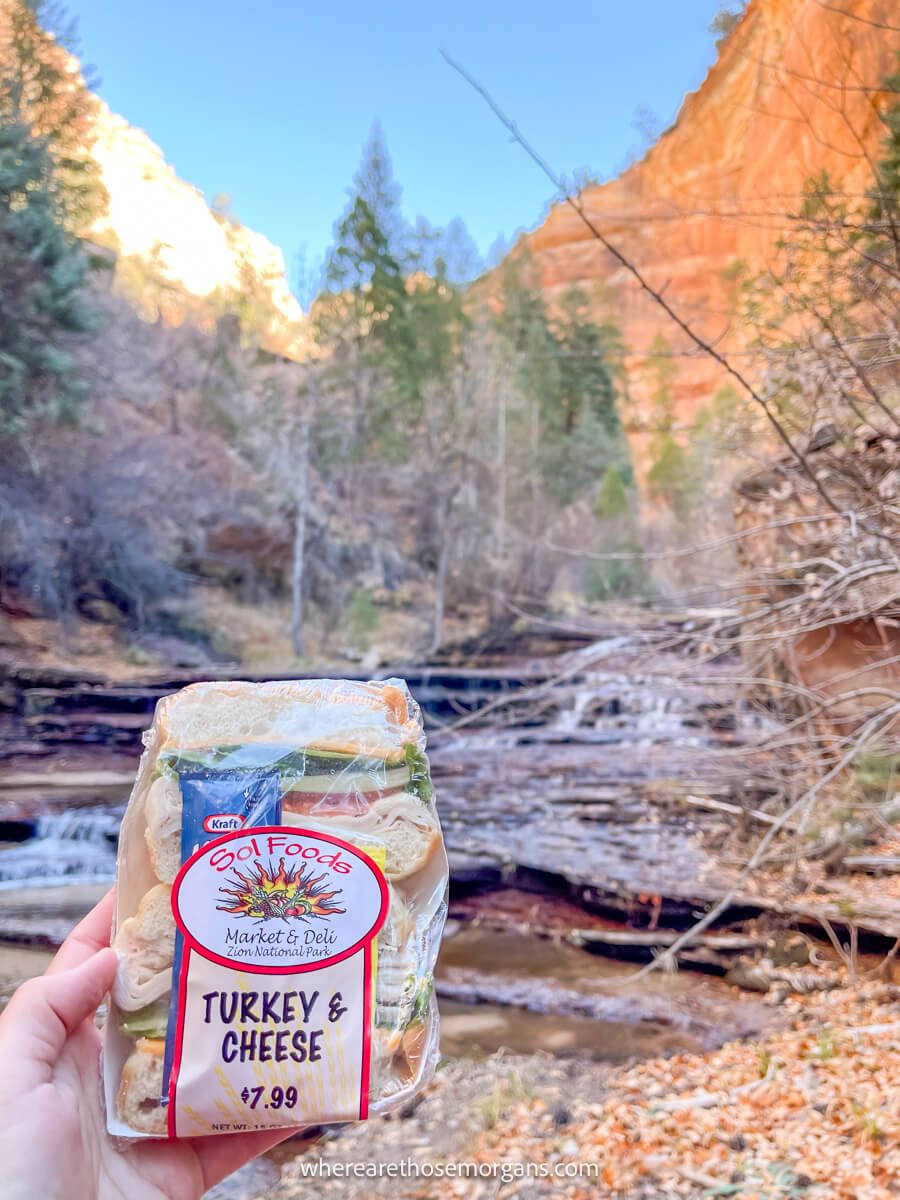
The evening before we bought food for breakfast and a packed lunch at Sol Foods Supermarket in Springdale. Then we got all our hiking gear ready, checked the sunrise time for Springdale and set an alarm to go off 30 minutes before sunrise. In the morning we ate our breakfast and set off for Left Fork Trailhead as daylight was breaking.
There was only one other car in the gravel lot when we arrived (and only 3 cars in the lot when we returned from the hike). We grabbed our gear, used the vault toilets and checked out the information board. It showed a warning about toxic cyanobacteria in Left Fork of North Creek and not to fill water bottles from the river. We made sure we had plenty of fluids, despite the cool temperatures.
2. Gentle Start
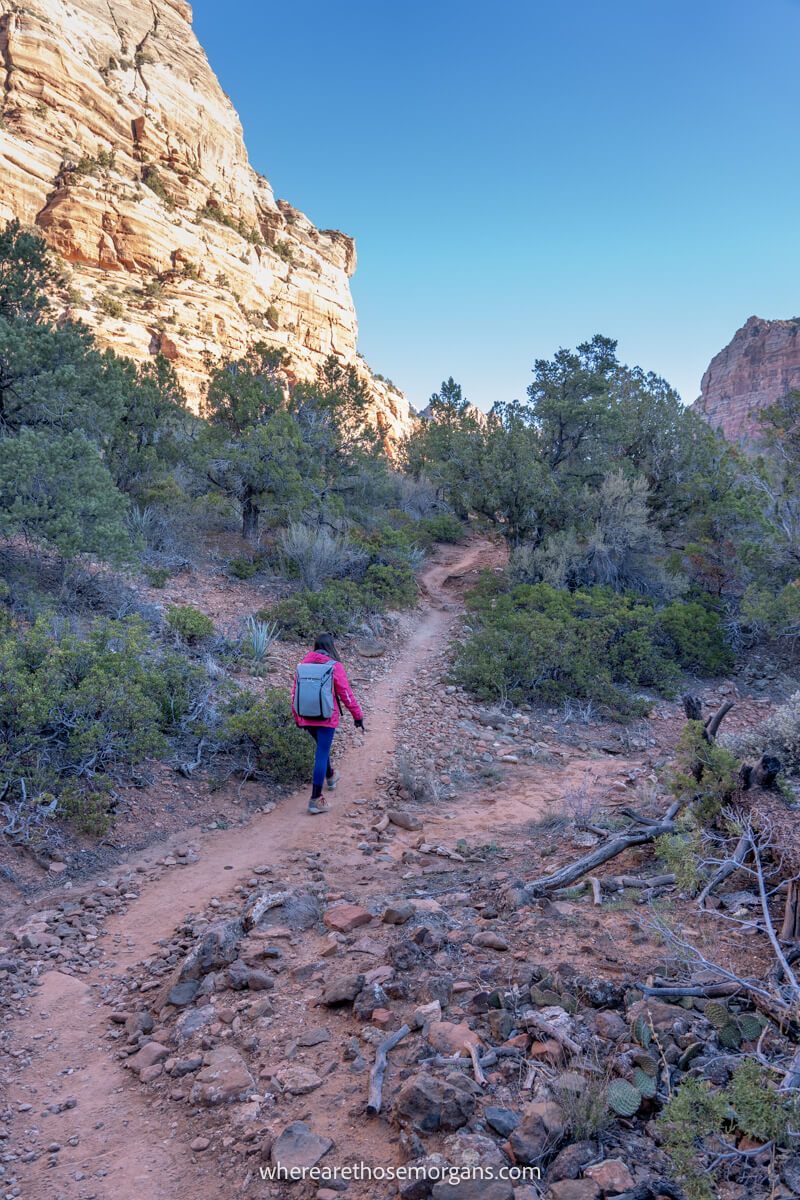
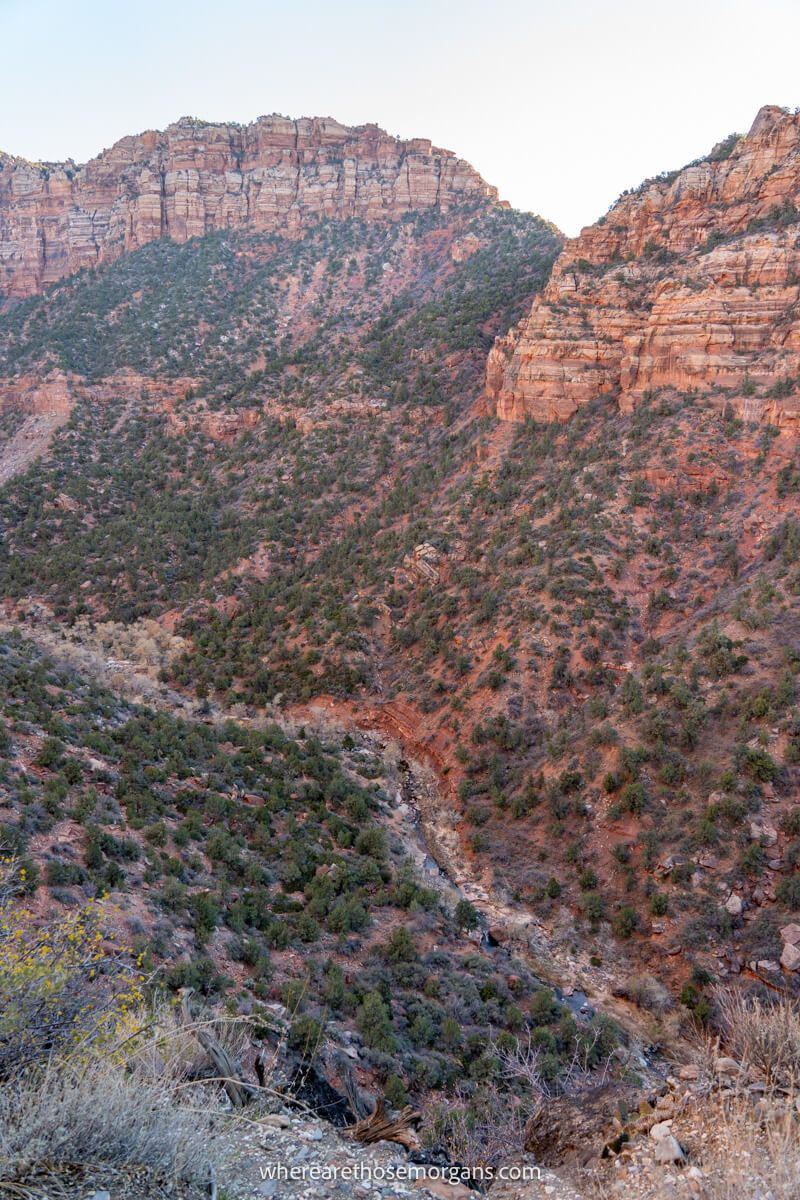
The start of the hike was easy going on dirt and gravel paths, with some gentle undulations. We walked through a lightly forested area with dry creek beds and cacti for around 10 minutes until noticing a huge drop off to the right side. It was a narrow V-shaped gorge and we could just about see Left Fork of North Creek cutting through the bottom.
3. Steep Descent To The Creek
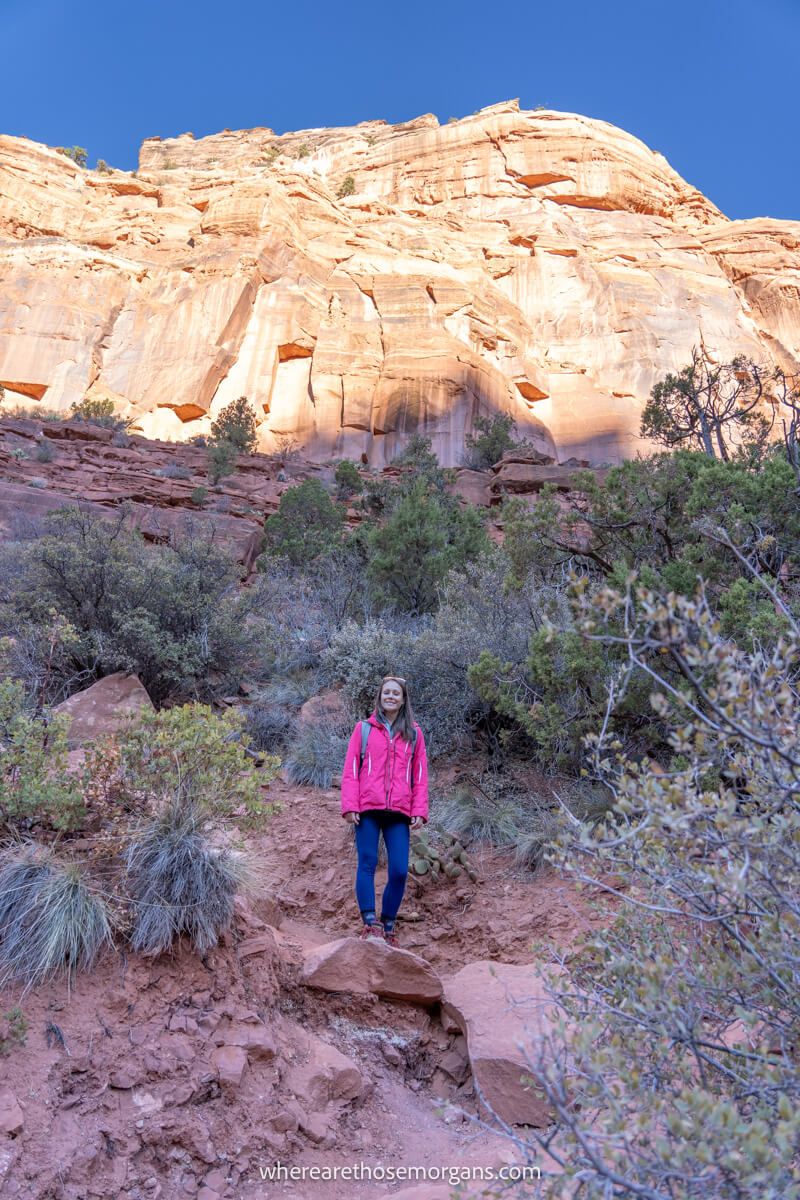
In order to reach the creek, we knew we had to drop down a steep cliff face. It started gradually but quickly turned into a very steep angle of descent. Loose stones and gravel were sliding out from underneath our feet, and there were times we used our hands to help with stability. It was a pretty brutal descent, and probably the hardest part of the hike (coming back up it later was easier).
4. Begin Hiking Left Fork
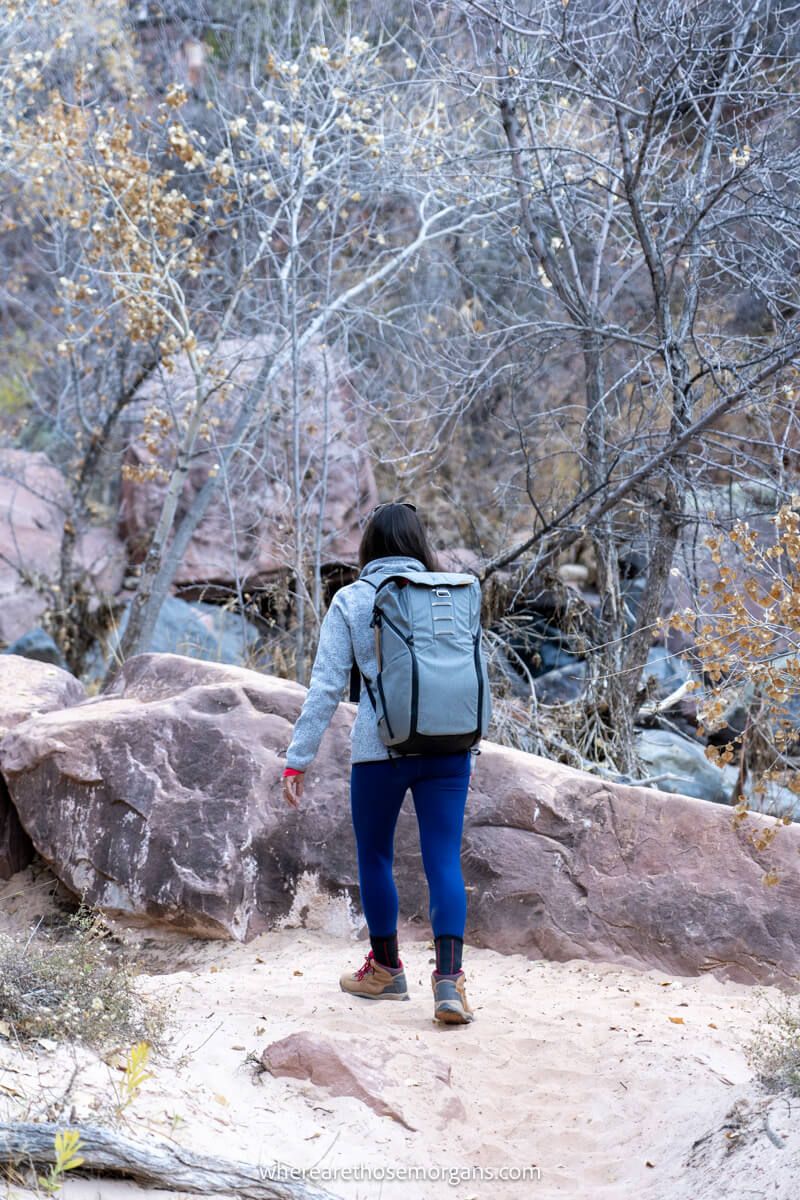
Eventually, we reached flat ground alongside the creek and noticed a small brown sign showing a right turn back to the trailhead. We took a mental note of the area so we wouldn’t miss it on the return journey. Then we set off upstream (heading northeast). The early part of the hike was easier and mostly on a dirt path, which gave us time to get used to things.
5. Multiple Creek Crossings
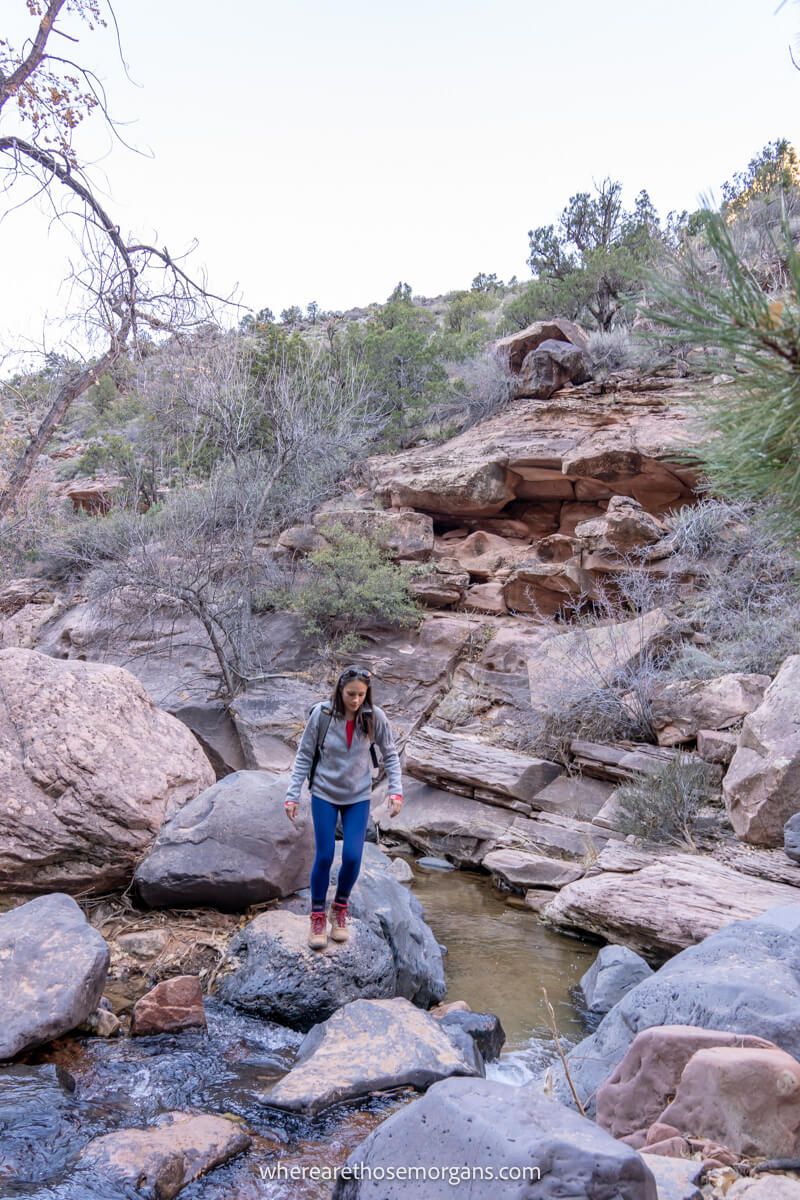
But before long, we started running into obstacles like massive boulders, steep bank climbs and especially creek crossings. We lost count of how many times we crossed from left to right and right to left. The water level was low so we didn’t get our feet wet until much later, but expect to get very wet if the water is high when you hike.
It’s important to note here that for around 3 miles each way you’ll be finding ways to continue hiking upstream. There’s a lot of decision making and short strenuous bursts of energy required to climb a steep sand bank or pull yourself over a boulder. It’s tiring. By the end you’ll be just as tired mentally as physically.
6. Archangel Falls
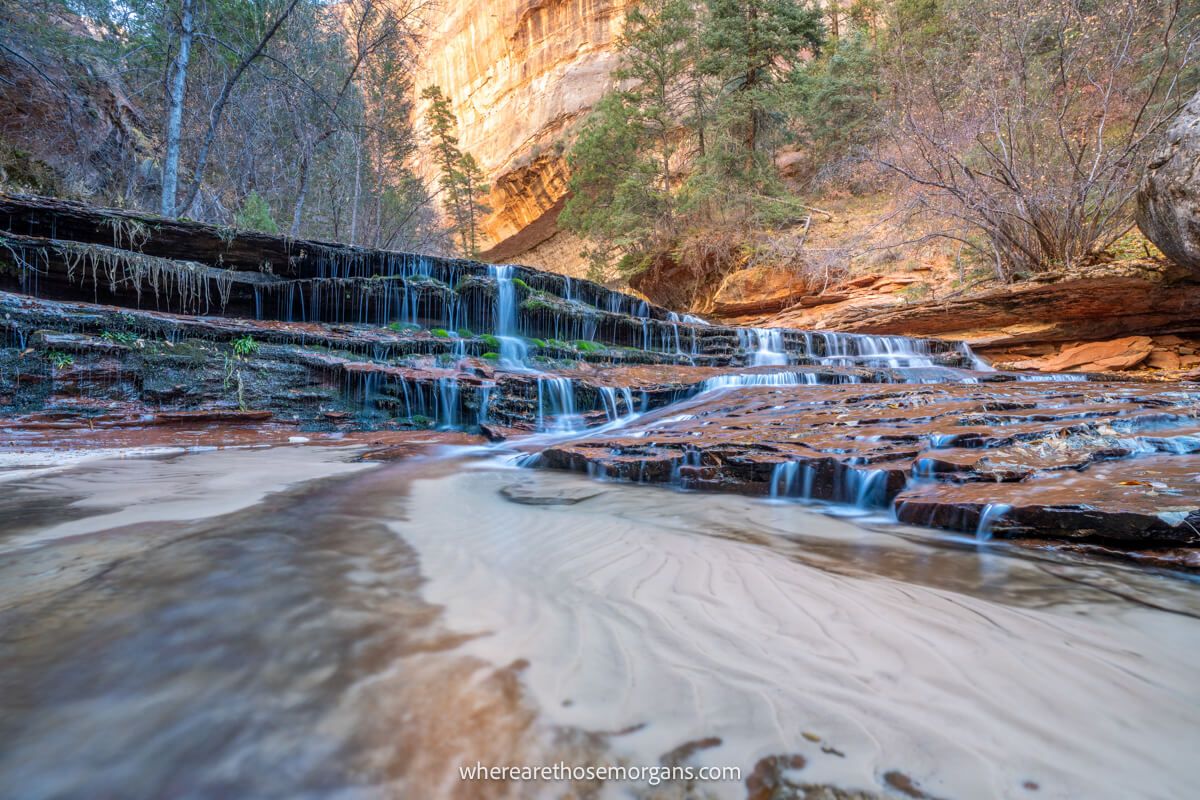
After about 3 miles of creekside path finding, we finally arrived at a very obvious change of topography and scenery. The river widened, we had to navigate enormous boulders and tall canyon walls closed in around us. Up ahead we could see photogenic multi-tiered rock ledges with dozens of tiny waterfalls cascading down and knew we’d made it to Archangel Falls.
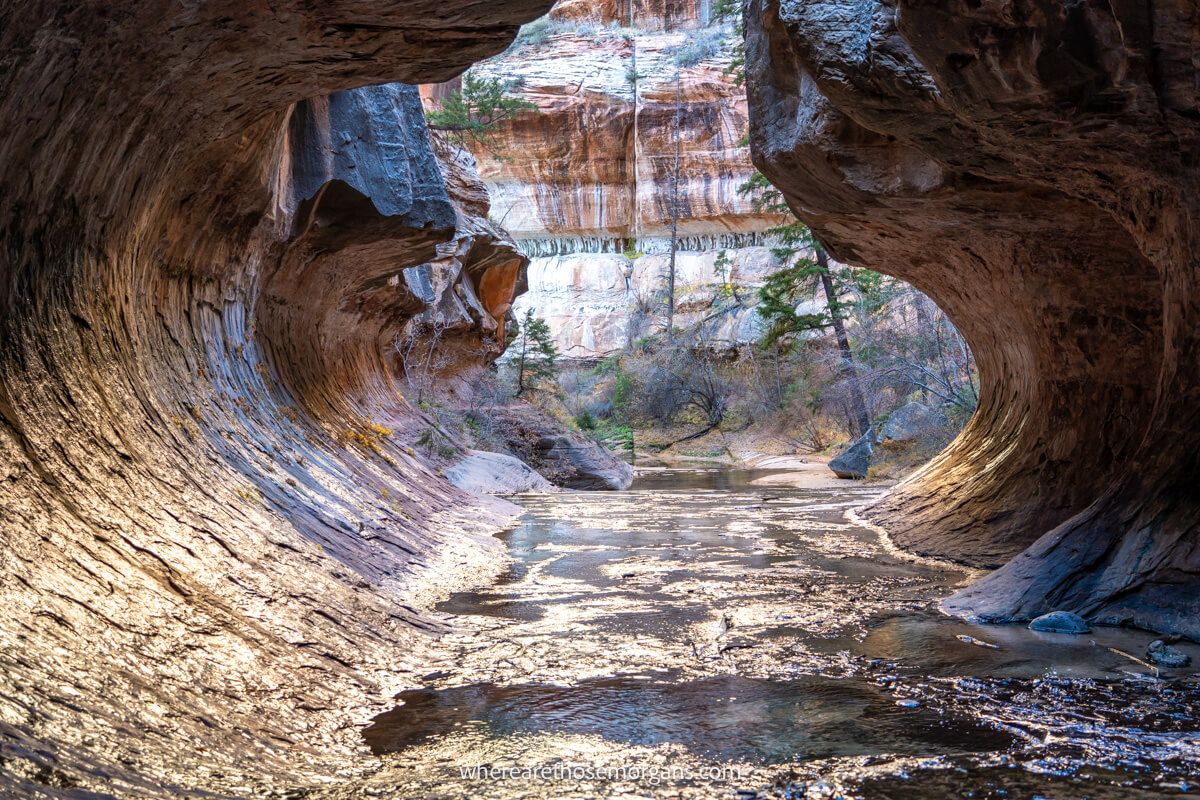
7. Final Approach
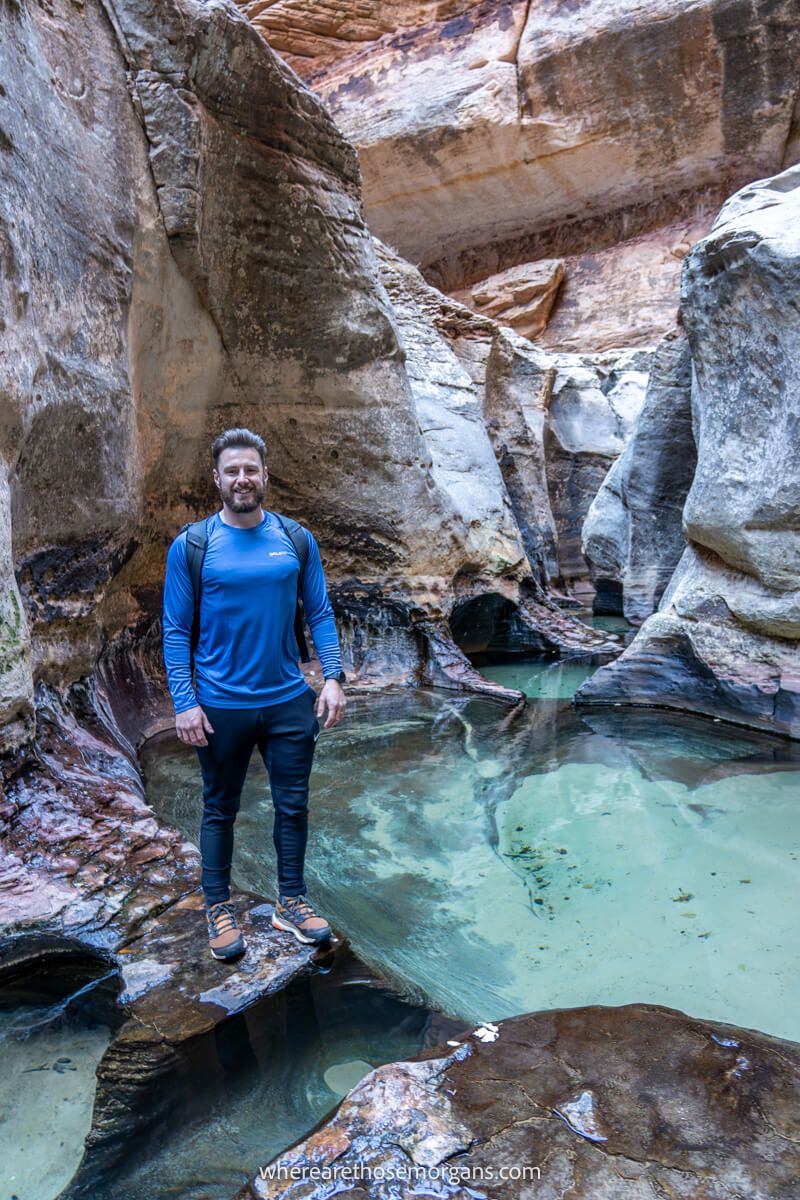
Right after the waterfall, our excitement began to build and the final half mile before reaching The Subway was amazing. The path was wide open and flat, with smooth slippery rocks covered in shallow ankle deep water. Our feet were soaking wet by now but we didn’t care. The scenery was getting better by the minute and we could see a long sweeping meander to the right looking just like a tunnel.
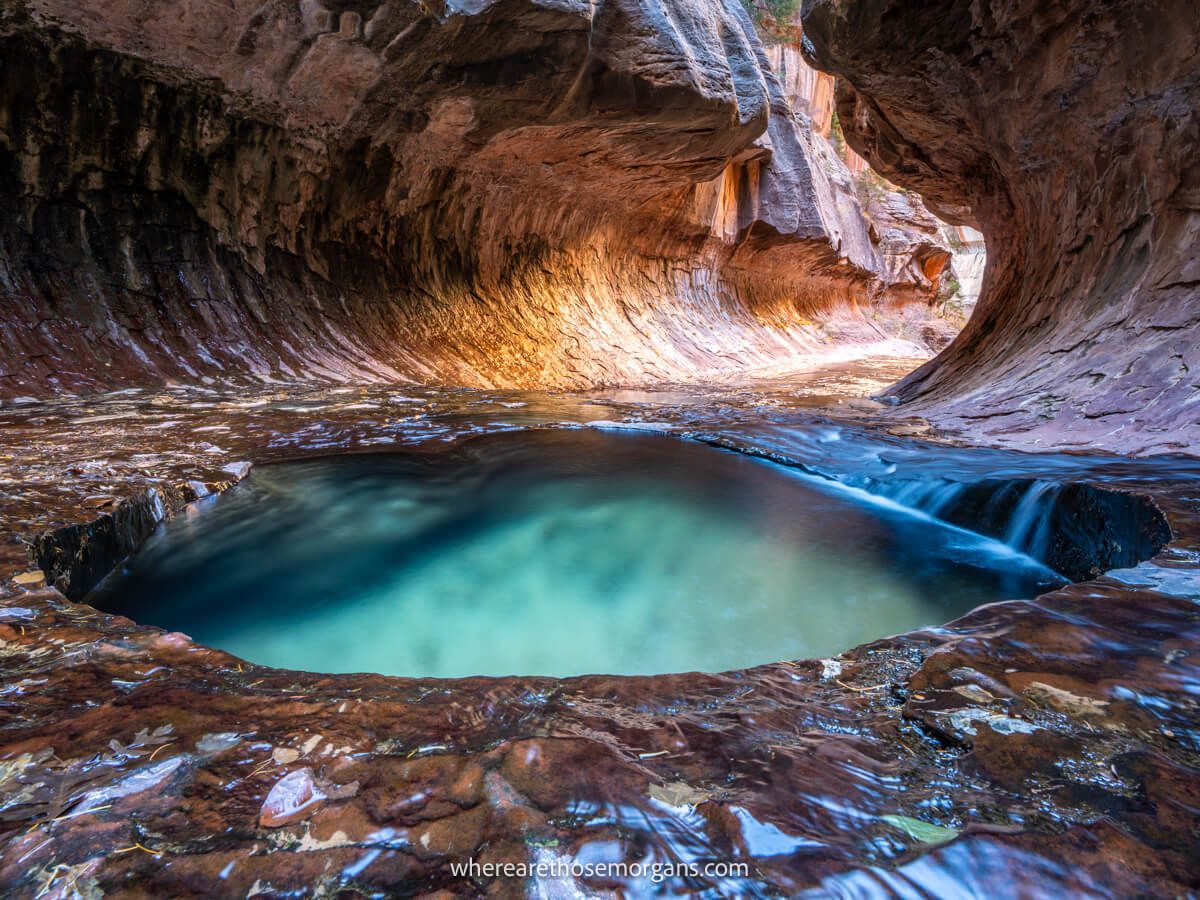
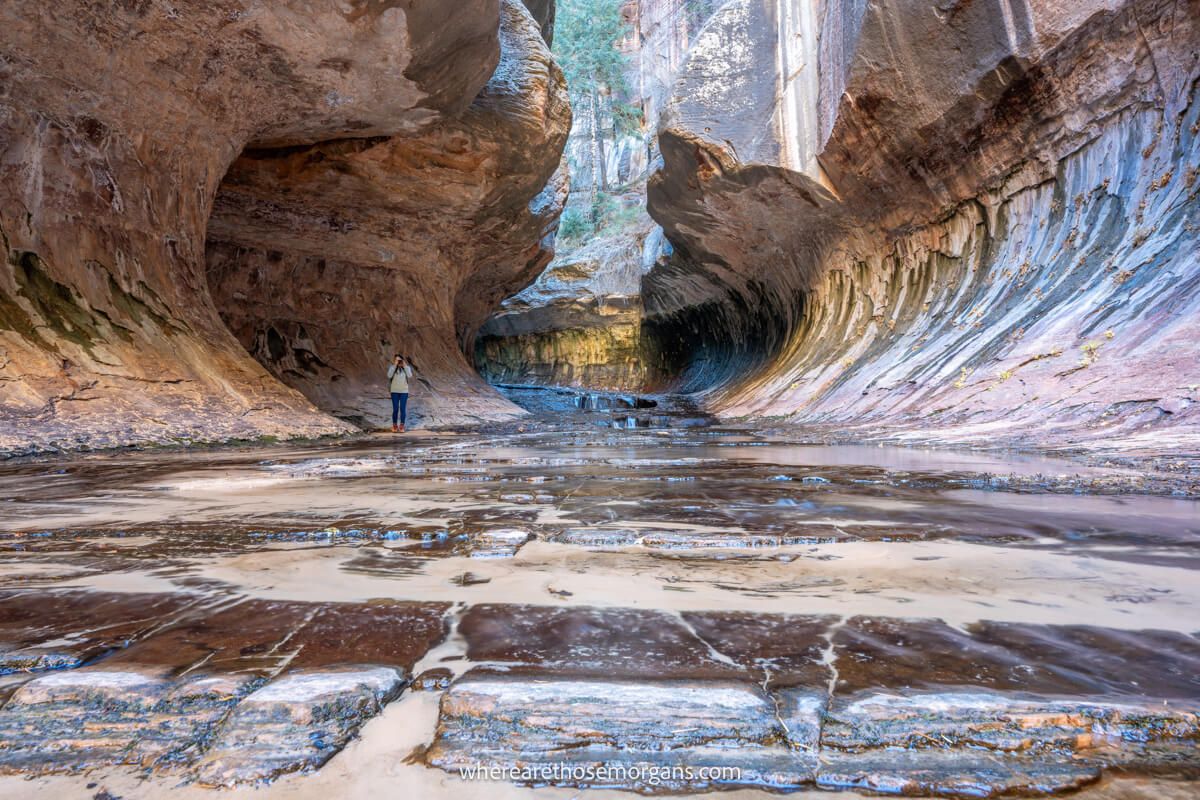
8. The Zion Subway
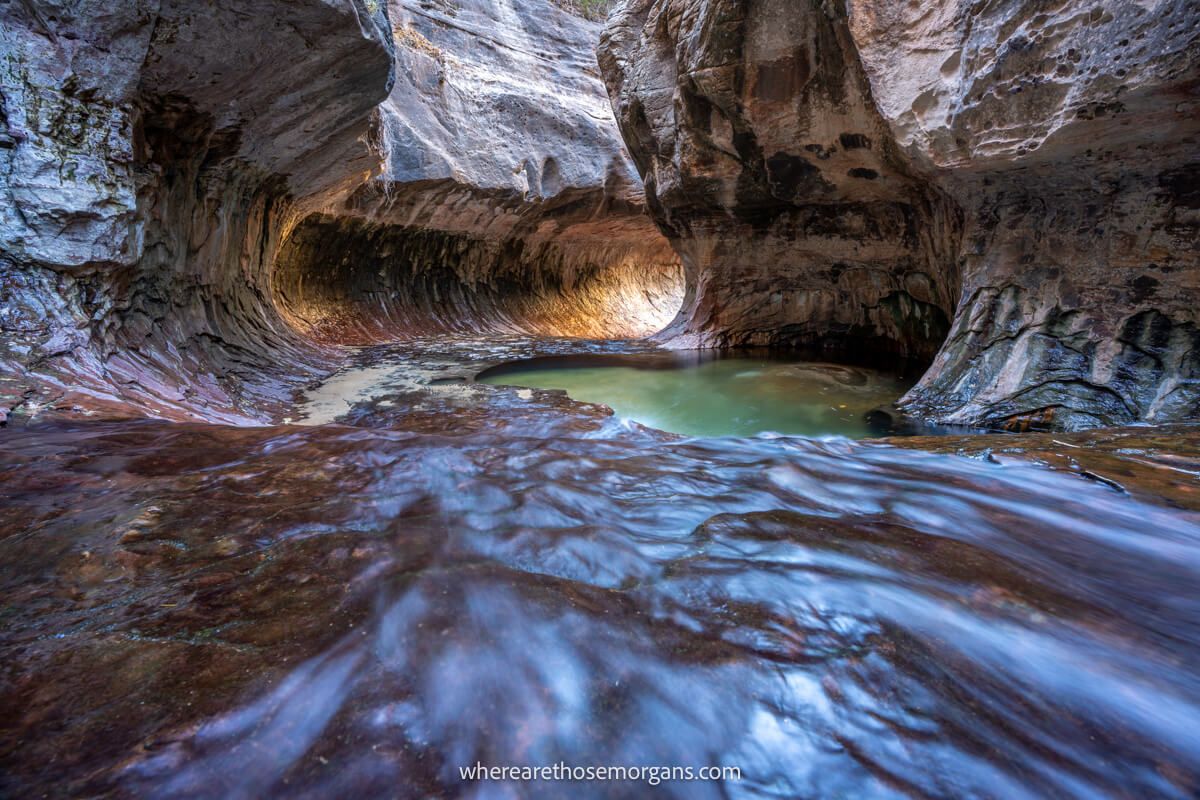
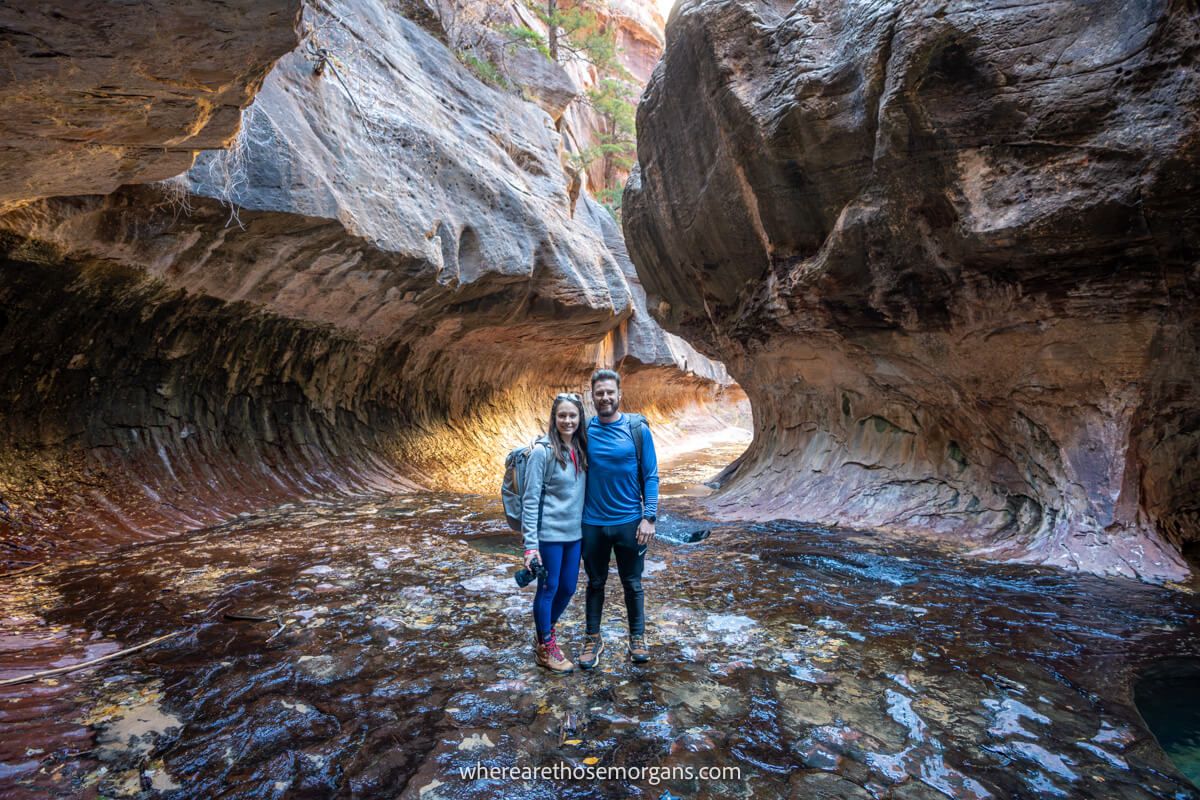
As we inched around that final right meander, the tunnel-shaped Subway was instantly recognizable. The approach was slippery so we had to go slowly and carefully, but we finally made it inside and wow, just wow! We were blown away by an amazing scene of intense light filling the tunnel behind small emerald green pot hole pools. We spent around 30 minutes taking photos and enjoying the formations.
Note: The Subway bottom up day hike ends here. It’s very obvious because to continue you’d have to swim through pools and climb up boulders, which is only permitted on the top down version of the hike. If it’s hot you can take a dip in the pools, but don’t continue hiking upstream. The water was freezing cold in November, so needless to say, we did not have a dip!
9. The Way Back
It got cold inside the tunnel, so we turned around and hiked back to Archangel Falls to eat our lunch. Going down the slick rock was even worse, so we were like Bambi dancing on ice even with proper hiking boots. After lunch, it was a slog back to the climb. But our feet were wet so instead of going around obstacles we went directly through the water, which cut some time.
10. Climb Out Of Left Fork
Admittedly, the hike back became tedious and we couldn’t wait to finally reach the climb. It was still fun gliding between rocks and figuring out the trail, but after doing it all day we were ready for it to be over. The climb out was a beast because we’d spent our energy, but it was shorter than we remembered and it didn’t take long before we were back at the trailhead, ready for dinner and a cold beer.
Best Time To Hike The Zion Subway

We think late fall is the best time to visit Zion in general for a good balance between crowds and hiking temperatures, but we also think it’s the ideal time to hike The Subway because fewer people are applying for permits and water levels are lower.
In summer you’d be competing with more people for those 80 permits, it’s too hot to hike, there’s higher risk of flash floods and Zion is obscenely crowded. Spring would be another good time to hike but water levels are higher.
We hiked The Subway during our visit to Zion in the winter and it was perfect. The temperatures were ideal for a strenuous hike, we had no issues getting a permit, parking was easy and we only saw 2 other groups (a solo hiker and a couple) on the entire trail. Admittedly, we were slightly concerned about daylight hours, which is why we set off straight after daylight broke in the morning.
The Morgan Conclusion
What we like: The hike has a lost world feel and it’s a real adventure. And we like that it’s limited to a maximum of 80 permits each day to keep it that way. The ending is one of the most spectacular climaxes to hike we’ve seen, but maybe that’s because we love unique natural formations and photography. Overall, we’d say it’s one of our favorite hikes in the US.
What we don’t like: The steep descent was pretty sketchy and we could see people having issues. Towards the end, the trail got very repetitive and we got tired of having to figure out how to scramble across rocks and the creek. It’s also a half hour drive from Springdale, parking could be problematic and winning a permit could be hard in peak months.
Is The Subway in Zion worth it? Yes! The Subway is one of the most adventurous hiking trails in Zion and the entire US national park system. It’s also one of the only ways you can escape the crowds in Zion during peak months. The trail is perfect for strong hikers looking for a challenge and the end is stunning. What are you waiting for? Get your permit application submitted today!

We hope our guide to hiking The Subway helps with planning your visit to Zion!
Please let us know if you have any questions in the comments box a little further below.
Happy Travels,
Mark and Kristen
Was this guide helpful? Pin it for your visit!
All Rights Reserved © Where Are Those Morgans, LLC. Republishing this article and/or any of its contents (text, photography, maps, graphics, etc.) in whole or in part is strictly prohibited.
Mark and Kristen spent 6 years traveling the world, visiting over 40 countries across 4 continents and more than 30 US states. They created Where Are Those Morgans in 2018 to help others plan the best possible vacations by writing authentic travel and hiking guides based on their real experiences.
Since the arrival of baby Maya in late 2024, Mark and Kristen’s extensive travels have slowed down but they still take plenty of trips. Where Are Those Morgans now helps millions of travelers each year to visit new places and hike new trails through information-packed blog posts and expert travel guidebooks. Read more about Mark and Kristen.
hi guys! i was able to get a permit for Subway AND Angel’s Landing but for the same day! unfortunately i will not be able to pick up my permits the day before because we land at 515p. any advice to be able to make the best of both hikes the same day?
thanks!
Hi Russ, congrats on getting both permits! Without knowing which time slot you selected for Angels Landing, we’d say you can technically do both hikes in the same day but only if you’re a strong hiker and the Angels Landing time is later in the day. We would recommend starting The Subway right after sunrise just in case anything happens when you’re in the wilderness. We started at 9am which was quite late to be starting The Subway. If you’re back in Springdale by 1-3pm after The Subway, you can grab a big lunch in town and then head up to Angels Landing later in the afternoon before sunset. If your Angels Landing is the earlier time slot we would not recommend going to The Subway later in the day because there are no other people around in case of an accident. Let us know if you have any other questions and we hope you are able to (safely!) do both hikes, they are both awesome. Enjoy!
Hey Mark and Kristen,
Thanks for this guide it was super useful. My partner Sasha and I secured permits for August and are looking forward to doing the hike. Quick question, I’ve seen some videos where people recommended using climbing harness, rappel device, ropes, etc.
What are your thoughts on this? Is it something we could potentially omit?
We are both relatively young and in good shape but don’t definitely don’t want to overestimate our abilities.
Cheers,
Matt
Hi Matt, thanks for getting in touch and we’re glad to hear you have secured your permits for hiking the Subway. You would only climb / rappel and use ropes on the Top Down version of this hike. Check which permit you applied for and won, if it is the Bottom Up version (as per our guide) you will not need to climb at all. Have a great trip to Zion!
@Mark and Kristen Morgan,
Yep, you were right, bottom up, so we didn’t need any of that gear.
Amazing hike, we loved it. The subway and the cascading waterfalls just before the subway were amazing.
Very strenuous hike, but totally worth it. The final ascent back up the cliff face was definitely taxing.
We have angels landing tomorrow so will acquaint ourselves with that.
Hi Matt, glad to hear you had a great time. We completely agree, the subway and the cascading waterfall make this hike worth it. Angels landing is another great hike at Zion, you will not be dissapointed. Have a wonderful hike!