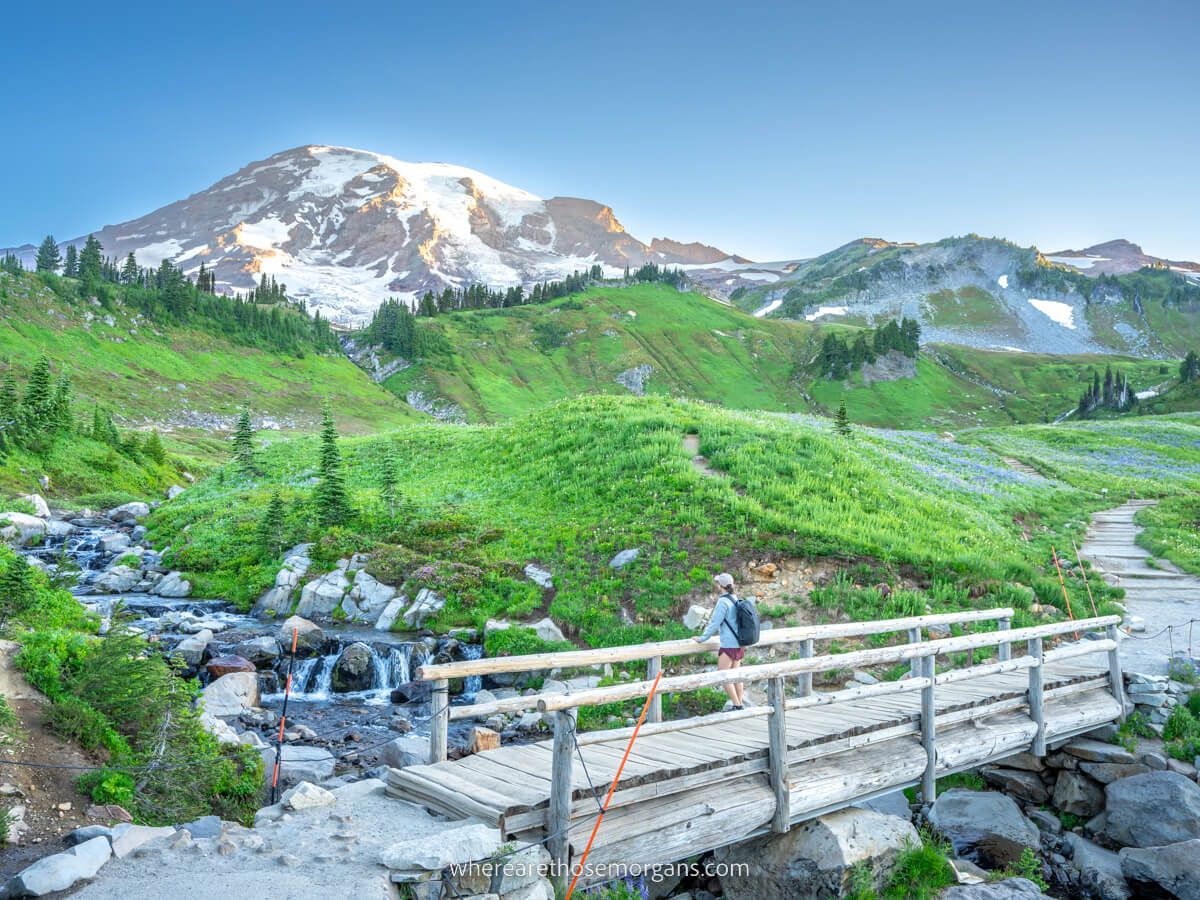
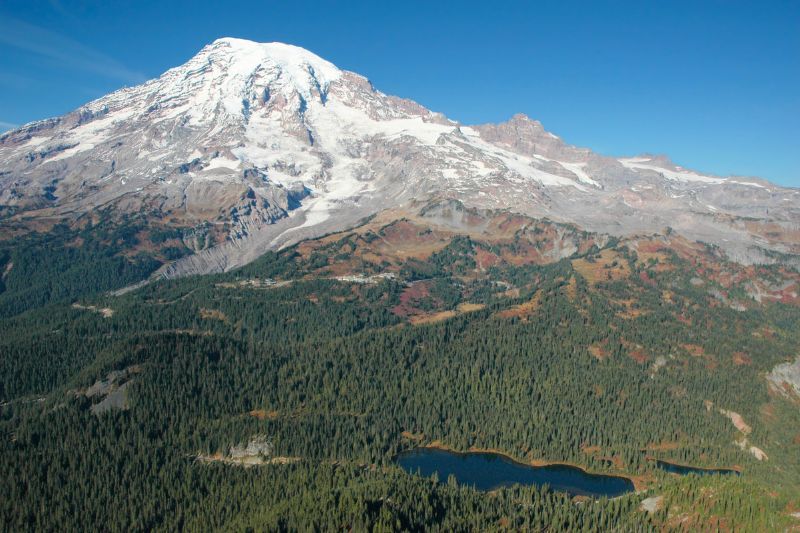
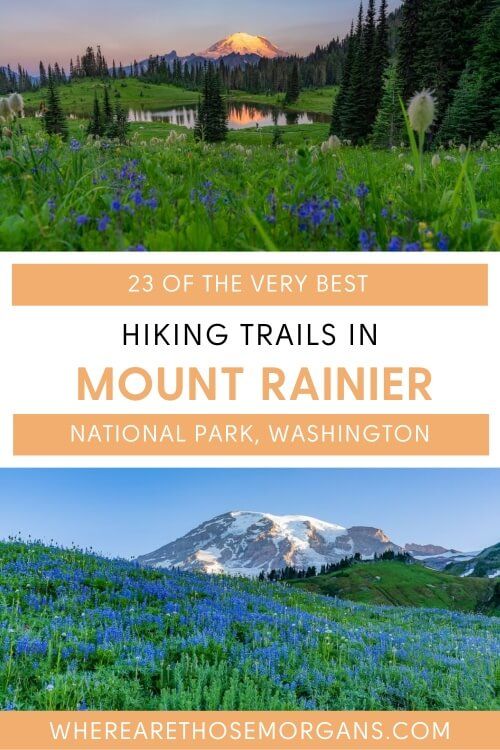
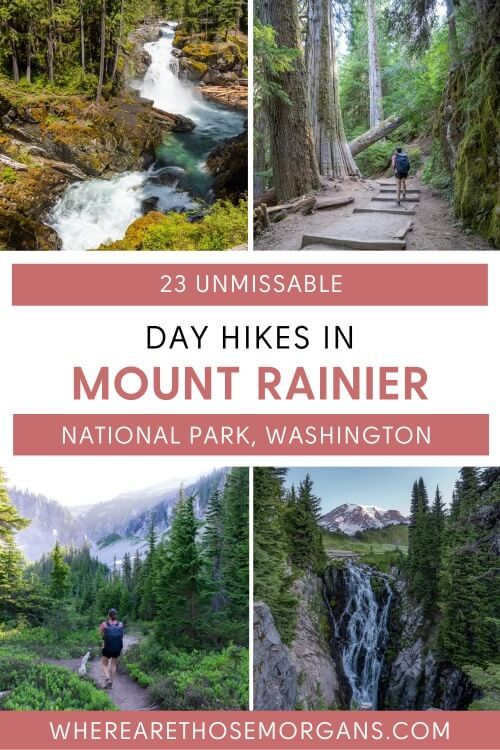
Mount Rainier is one of our favorite places to hike in the US. We spent 6 months living in Washington State and as avid hikers, we simply couldn’t stay away from the stunning national park.
We actually ended up hiking almost all of Mt Rainier’s popular trails, which are spread throughout 5 regions called Paradise, Sunrise, Longmire, Ohanapecosh and Carbon River/Mowich. It’s not the easiest place to get around, so you have to plan your days well.
For us, there’s just something so special about Mt Rainier. We found ourselves gravitating back to the slopes and foothills of the skyline dominating stratovolcano time and time again. When we’re asked about our favorite US national parks, Kristen always says Mt Rainier. Read more about us.
In this guide we show you the unmissable hikes in Mt Rainier listed in order from easy to hard, based entirely on our own experiences. Okay, let’s begin!
Note: This article may contain affiliate links. If you make a purchase using one of these affiliate links, we may earn a small commission at no extra cost to you. Thank you!
Mt Rainier Regions
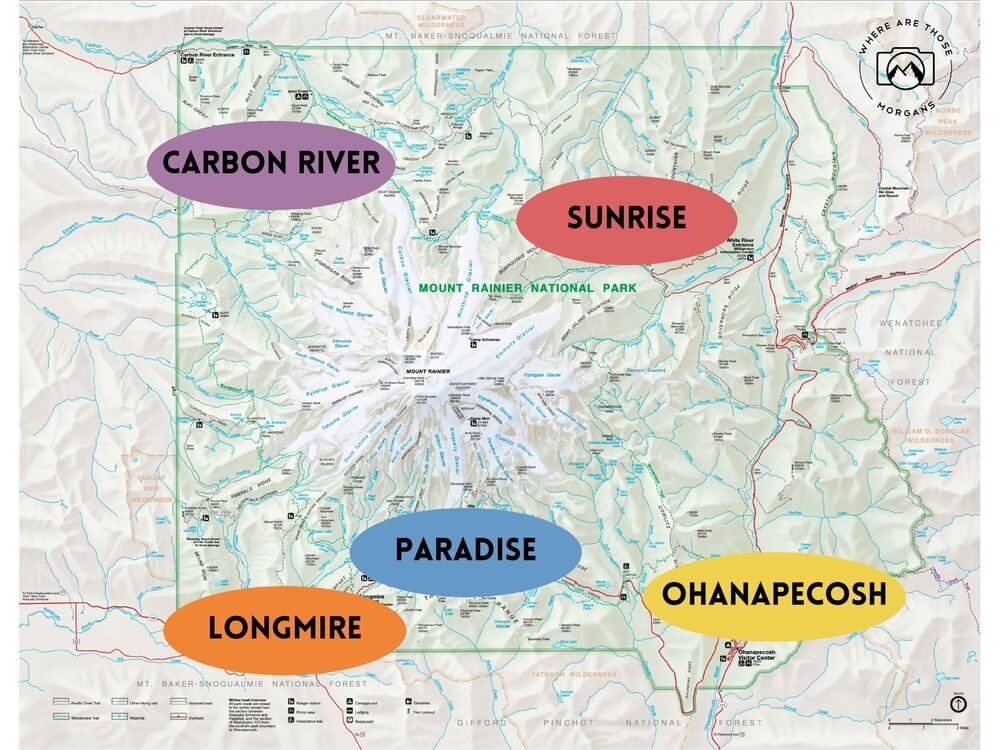
There are 5 major hiking regions in Mt Rainier National Park:
- 1. Sunrise
- 2. Ohanapecosh
- 3. Paradise
- 4. Longmire
- 5. Carbon River
Let’s take a closer look at each region so you know what to expect.
Hiking Tip: The top rated hikes in Mount Rainier are spread throughout all 5 regions, which encircle the volcano. You should plan for at least 2 days if you want to tick off the most popular trails in each region.
1. Sunrise
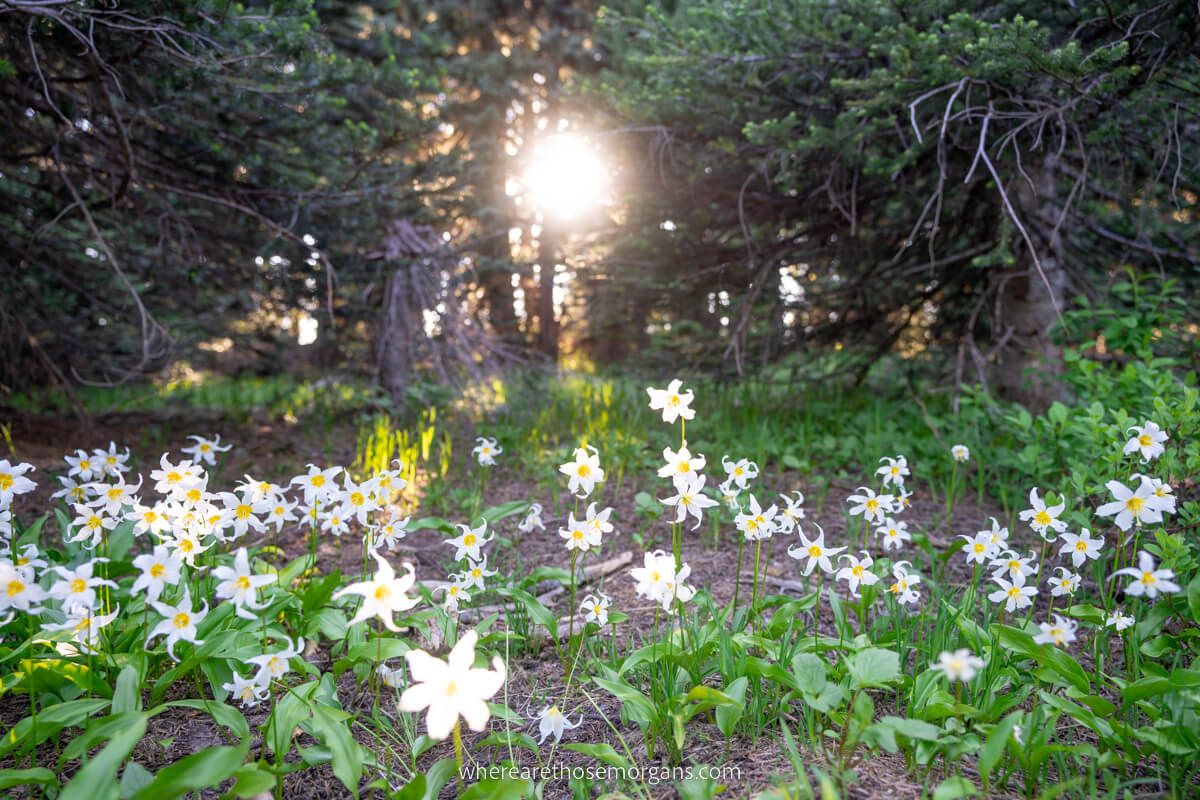
Sunrise is the second most popular area for hiking in Mt Rainier National Park. At 6,400 ft elevation, it’s the highest part of the park you can drive to, and it hosts hikes like Mt Fremont and Burroughs Mountain. Sunrise is also home to some of the most stunning displays of wildflowers in July and August.
2. Ohanapecosh
Ohanapecosh is sandwiched between the two most heavily trafficked areas of Paradise and Sunrise, so it’s always busy. Some of the popular family friendly hikes in Mt Rainier such as Silver Falls and Grove of the Patriarchs begin close to Stevens Canyon entrance station.
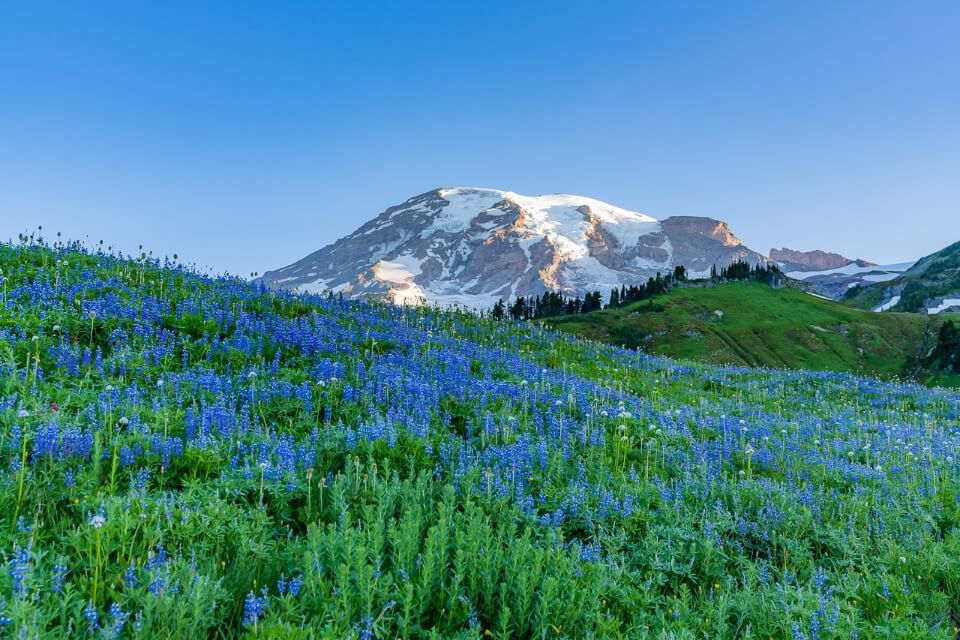
3. Paradise
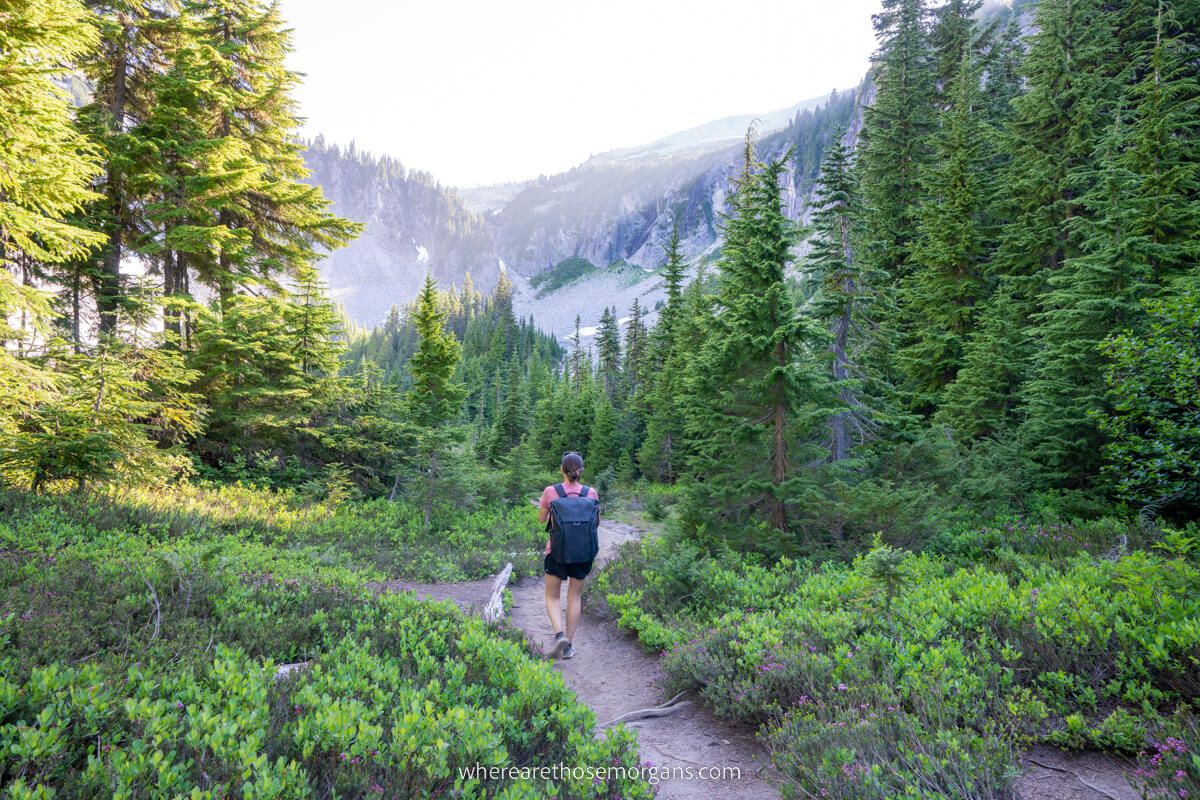
Paradise is the most popular place to hike in Mt Rainier National Park. You’ll find more vibrant wildflowers, the Paradise Inn and the Skyline Loop Trail, which is by far the most famous hike in the park. We even saw skiers pouring down the mountainside here in June.
4. Longmire
Longmire is home to the most photogenic waterfall hikes in Mt Rainier such as Comet Falls and Narada Falls. It’s also the first place you’ll get to after entering the park through the heavily trafficked Nisqually entrance which serves Seattle, Tacoma and Portland.
5. Carbon River
Carbon River (or Mowich Lake) is the closest region to Seattle and it has two amazing hikes called Tolmie Peak and Spray Park, but it’s the least visited region of Mt Rainier because it can only be accessed by a truly dreadful 17-mile road full of pot holes.
The Wonderland Trail
In this guide we’re only going to show you the best day hikes in Mount Rainier. But you should seriously consider hiking the 93-mile long Wonderland Trail if you’re a very strong hiker with 10-14 days available and you’re looking for the ultimate Mt Rainier experience.
Trails Map
Click or touch the map below to activate, zoom in and out, and scroll around. If you’d like to see a bigger version, click the “view larger map” icon in the top right, and if you’d like to see any specific trail, click the arrow and square icon in the top left.
Map Key:
- Red – Sunrise Hikes
- Yellow – Ohanapecosh Hikes
- Blue – Paradise Hikes
- Orange – Longmire Hikes
- Purple – Mowich Lake Hikes
Hiking Tip: Carbon River is completely isolated from the other Mt Rainier’s regions, so you’ll need to plan your time well if you want to access the hikes in this area.
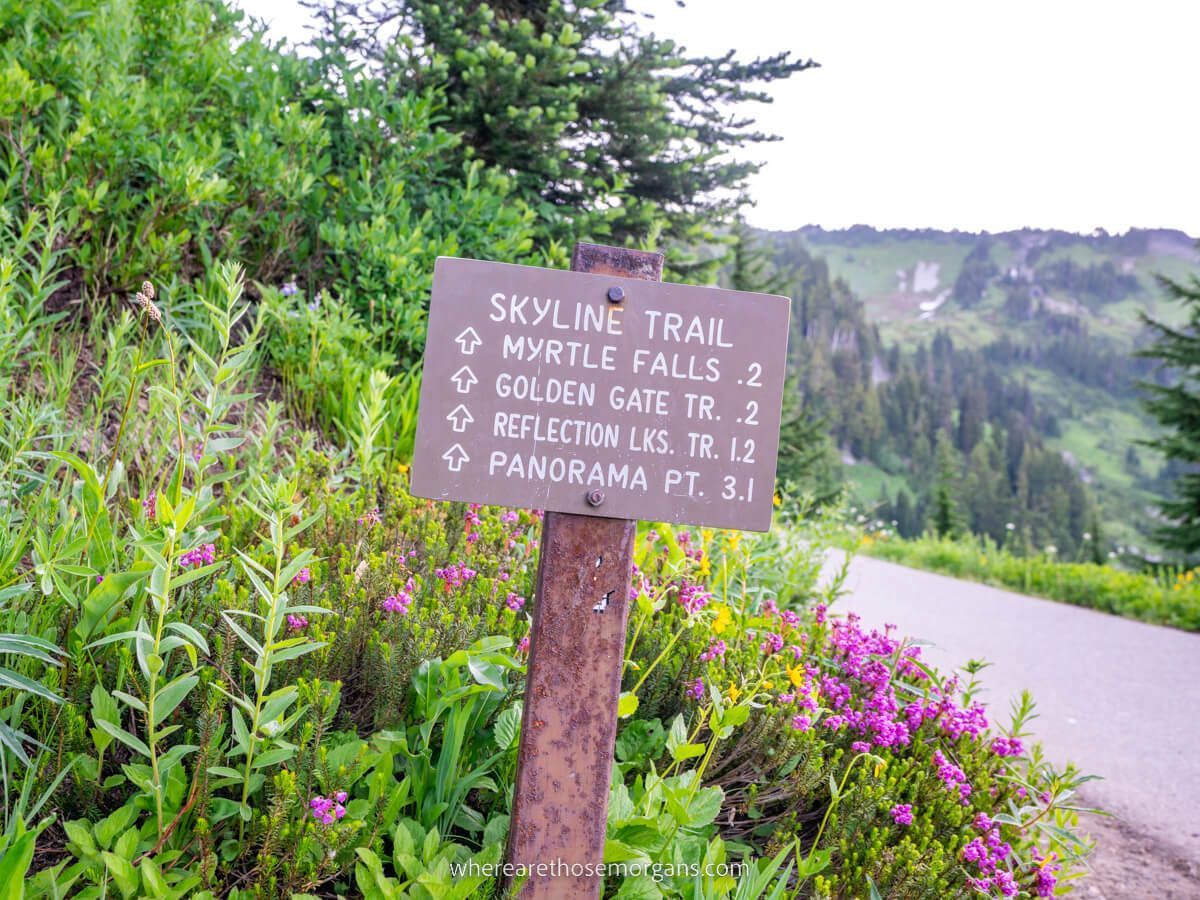
1. Myrtle Falls via Skyline Trail
- Region: Paradise
- Trailhead: Paradise parking lot
- Difficulty: Easy
- Distance: 0.8 miles roundtrip
- Type: Out and back
- Elevation Gain: 170 ft
- Comments: All Trails / WTA
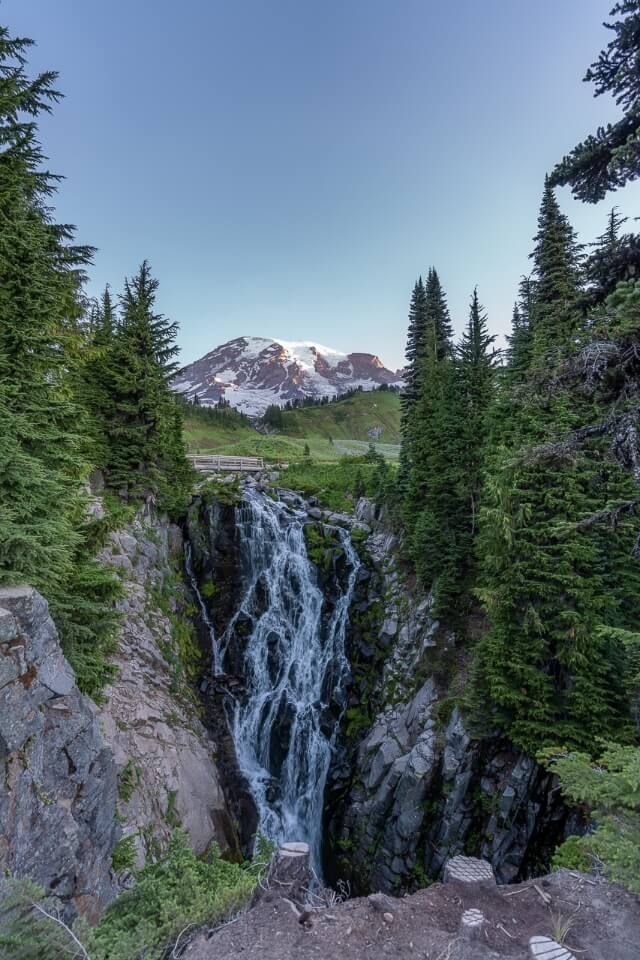
Myrtle Falls Trail is easy, flat, accessible and leads to a picturesque viewpoint over a waterfall flanked by emerald green trees and meadows leading directly to Mount Rainier. If you’re a beginner hiker or you just want a taste of the famous Skyline Trail, you should hike to Myrtle Falls. It was our first stop when we hiked the full Skyline Loop.
2. Nisqually Vista Trail
- Region: Paradise
- Trailhead: Nisqually Vista parking lot
- Difficulty: Easy
- Distance: 1.1 miles roundtrip
- Type: Loop
- Elevation Gain: 200 ft
- Comments: All Trails / WTA
Nisqually Vista Trail is short, paved and free of overcrowding. We walked through beautiful wildflower meadows to plenty of lovely photo spots and a fantastic Mt Rainier viewpoint. It’s not the most exciting hike in the park, but it’s family friendly and we didn’t even break into a sweat.
3. Trail Of The Shadows
- Region: Longmire
- Trailhead: Longmire parking lot
- Difficulty: Easy
- Distance: 0.7 miles roundtrip
- Type: Loop
- Elevation Gain: 30 ft
- Comments: All Trails / WTA
Trail of the Shadows is a gentle forested hike with educational boards explaining the localized flora and fauna. It’s mostly accessible but does have some steeper gradients and gravel track sections. This one is best for avoiding the crowds or if you’re visiting Mt Rainier with younger kids.
4. Tipsoo Lake Loop Trail
- Region: Sunrise
- Trailhead: Tipsoo Lake parking
- Difficulty: Easy
- Distance: 0.8 miles roundtrip
- Type: Loop
- Elevation Gain: 40 ft
- Comments: All Trails
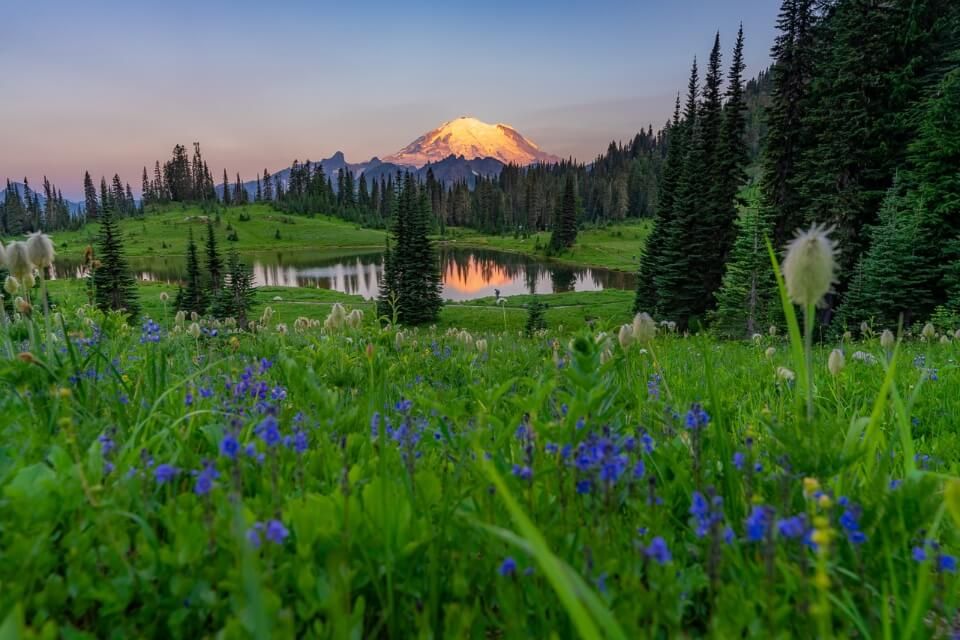
Tipsoo Lake Trail is one of the best bang for your buck hikes in Mt Rainier because it’s easy, short and exceptionally photogenic. We walked around Tipsoo Lake and climbed a shallow bank for a stunning view of wildflowers, the lake and Mount Rainier at sunrise. The bugs are bad, but it’s well worth it!
5. Sunrise Nature Trail
- Region: Sunrise
- Trailhead: Sunrise Visitor Center
- Difficulty: Easy
- Distance: 1.5 miles roundtrip
- Type: Loop
- Elevation Gain: 350 ft
- Comments: All Trails
Sunrise Nature Trail is the perfect introductory hike in the Sunrise region. The loop is ideal for families with younger kids or beginner hikers to see wildflowers in bloom and enjoy higher elevation views over Mt Rainier.
6. Grove Of The Patriarchs Nature Trail

- Region: Ohanapecosh
- Trailhead: Stevens Canyon entrance
- Difficulty: Easy
- Distance: 1.3 miles roundtrip
- Type: Out and back or loop
- Elevation Gain: 50 ft
- Comments: All Trails / WTA
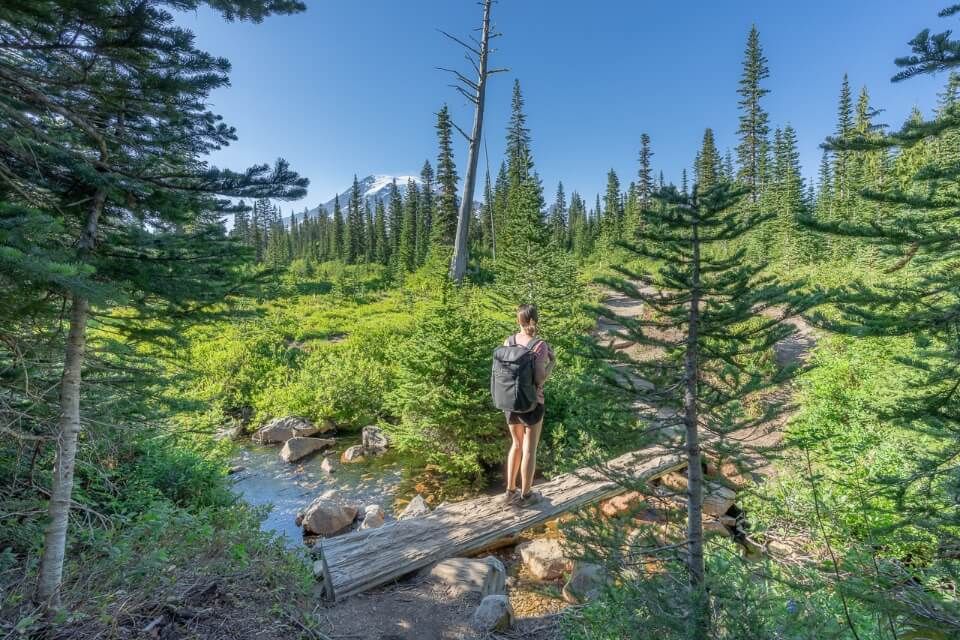
Grove of the Patriarchs Nature Trail is one of the best hikes in Mt Rainier for families with younger kids. The easy path leads through old growth forest filled with gigantic Douglas Fir and Big Cedar trees. We walked across a wooden suspension bridge to an island but it closed in late 2023.
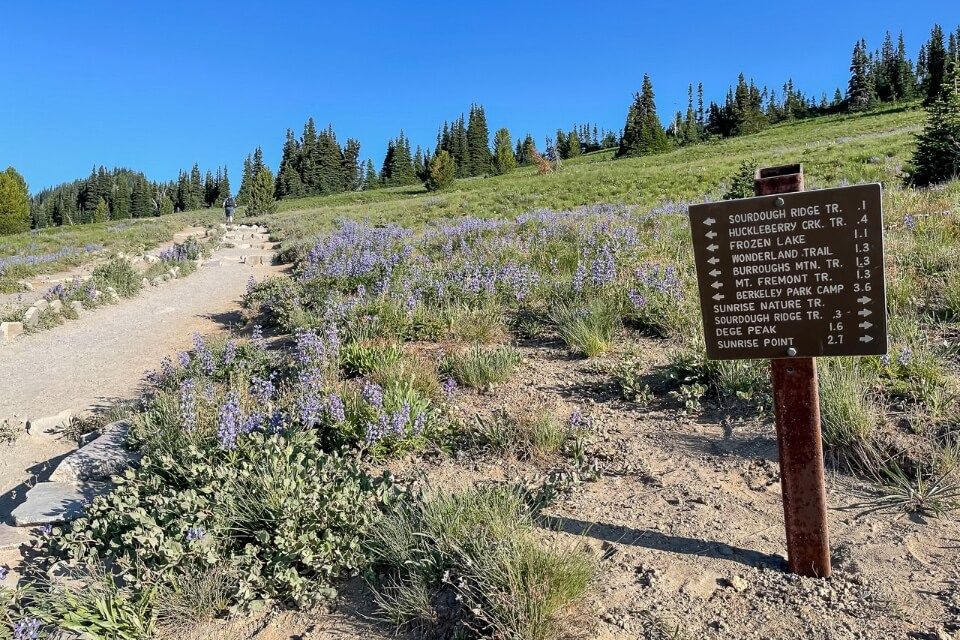
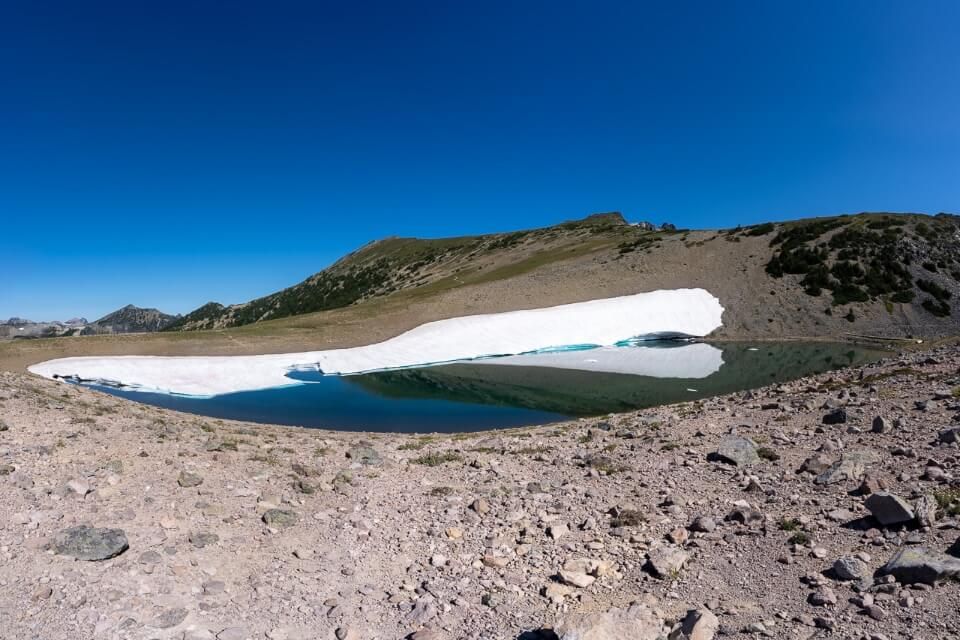
7. Frozen Lake via Sourdough Ridge Trail
- Region: Sunrise
- Trailhead: Sunrise Visitor Center
- Difficulty: Easy
- Distance: 3 miles roundtrip
- Type: Out and back or loop
- Elevation Gain: 550 ft
- Comments: All Trails
Frozen Lake is located at a trail crossroads between Sunrise visitor center and the more difficult trails leading to Mt Fremont or Burroughs Mountain. It’s slightly harder to reach but it’s the perfect landmark to use as a turnaround point if you want closer up views of Mount Rainier without taking on too much.
8. Bench and Snow Lake Trail
- Region: Paradise
- Trailhead: Stevens Canyon Road
- Difficulty: Moderate
- Distance: 2.5 miles roundtrip
- Type: Out and back
- Elevation Gain: 700 ft
- Comments: All Trails / WTA
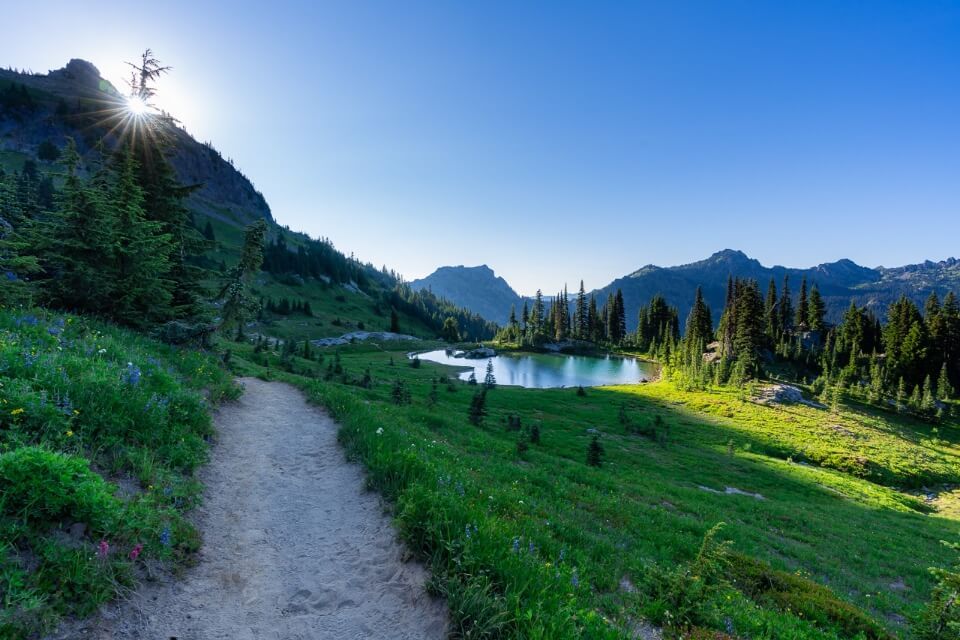
Bench and Snow Lake Trail is a fun, quiet and picturesque hike. The undulating trail leads to Bench Lake which has a stunning Mt Rainier reflection on calm days, and Snow Lake which is popular for swimming and is partly encircled by towering cliffs below Unicorn Peak. It’s buggy but we really like this one.
9. Naches Peak Loop Trail
- Region: Sunrise
- Trailhead: Naches Peak parking
- Difficulty: Moderate
- Distance: 3.3 miles roundtrip
- Type: Loop
- Elevation Gain: 600 ft
- Comments: All Trails / WTA
Naches Peak Loop Trail is one of our favorite hikes in Mt Rainier National Park. Hiking clockwise, you’ll start on a scenic stretch of the Pacific Crest Trail before turning to hike directly towards Mount Rainier with unobstructed views. It’s a stunning hike and it’s even better at sunrise or sunset.
10. Narada Falls Trail
- Region: Longmire
- Trailhead: Paradise parking
- Difficulty: Moderate
- Distance: 2.4 miles roundtrip
- Type: Out and back
- Elevation Gain: 860 ft
- Comments: All Trails
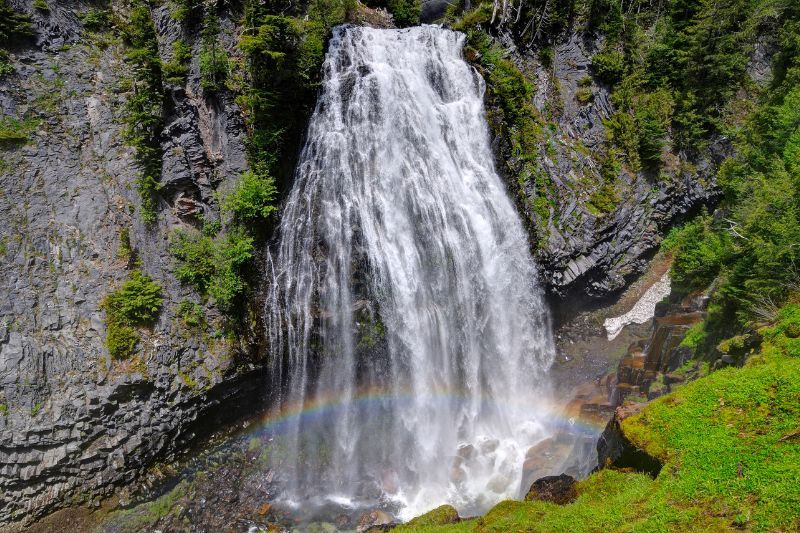
Narada Falls is a powerful 200 ft tall waterfall that can be reached in many ways. You can see 150 ft of the waterfall from its nearby parking lot, you can hike 0.2 miles roundtrip from the parking lot to the base of the waterfall or you can hike 2.4 miles roundtrip from Paradise via Lower Lake Trail.
11. Silver Falls Loop Trail
- Region: Ohanapecosh
- Trailhead: Ohanapecosh Visitor Center
- Difficulty: Moderate
- Distance: 4 miles roundtrip
- Type: Loop
- Elevation Gain: 700 ft
- Comments: All Trails / WTA
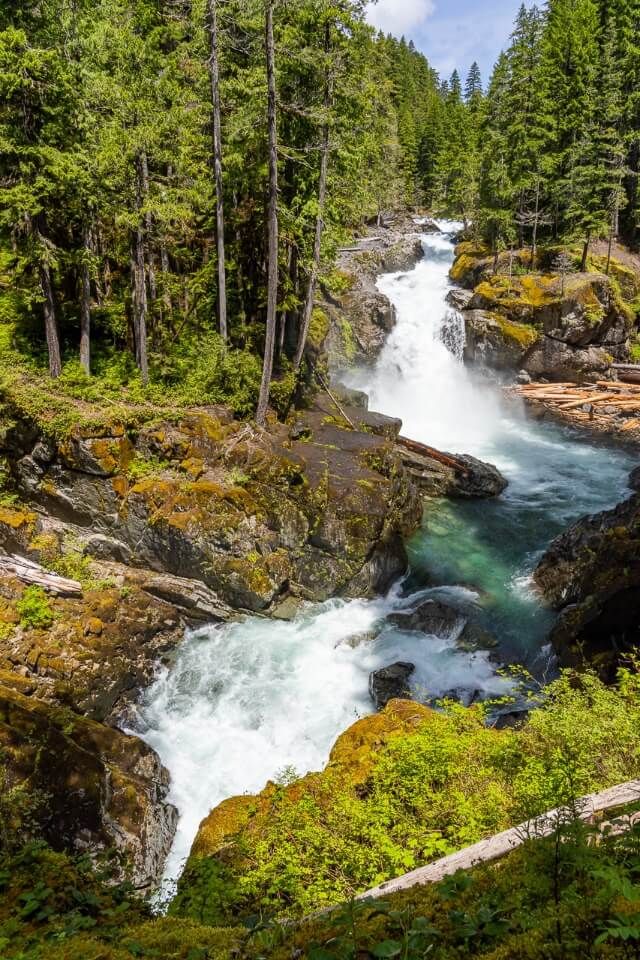
Silver Falls Loop Trail is a fantastic Mount Rainier hike for groups, couples or families who have energetic kids. It’s one of the most popular trails in the national park and after 5 visits we can tell you that parking here can be a real issue, so plan to hike this one earlier or later in the day.
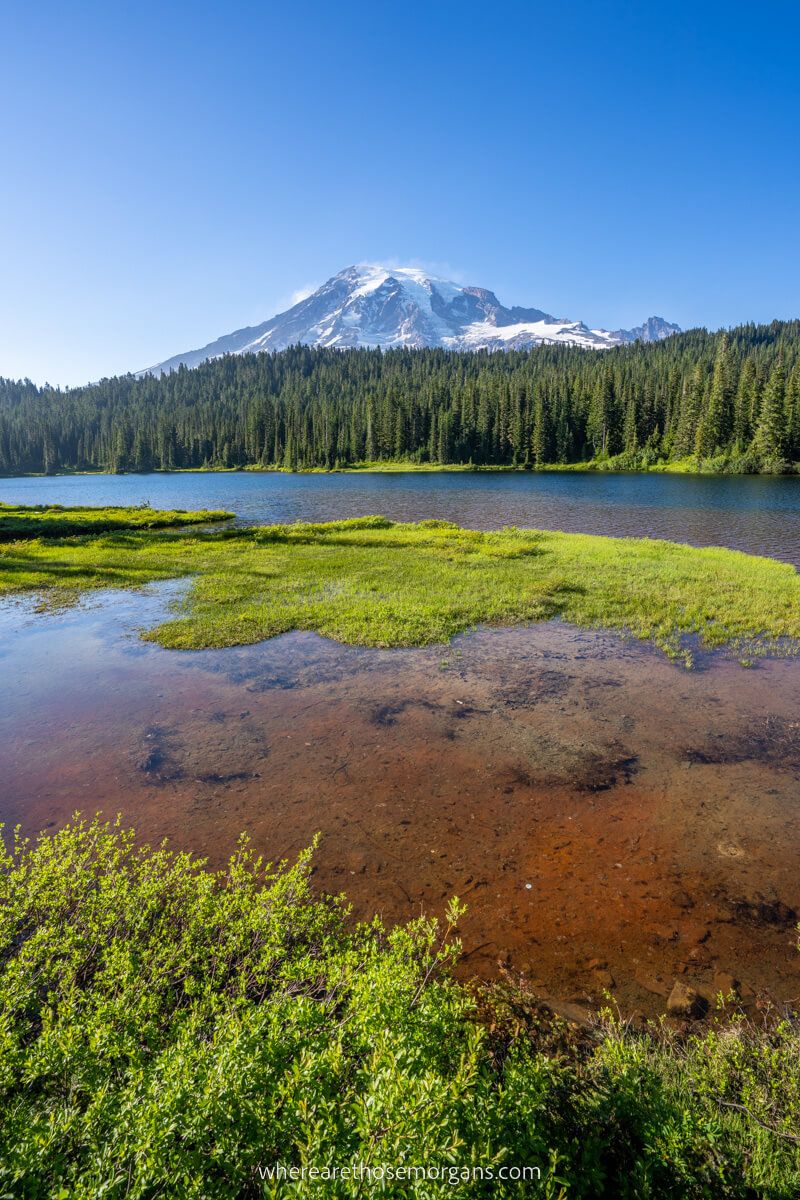
12. Pinnacle Peak Trail
- Region: Paradise
- Trailhead: Reflection Lake
- Difficulty: Moderate
- Distance: 2.6 miles roundtrip
- Type: Out and back
- Elevation Gain: 1,000 ft
- Comments: All Trails / WTA
Pinnacle Peak Trail is one of the best hidden gem hikes in Mt Rainier. The short but steep hike leads to one of the best viewpoints in the entire national park and it’s a comparatively quiet trail. Our favorite hikes in Mt Rainier end with views of the volcano, and they don’t come much better than this one.
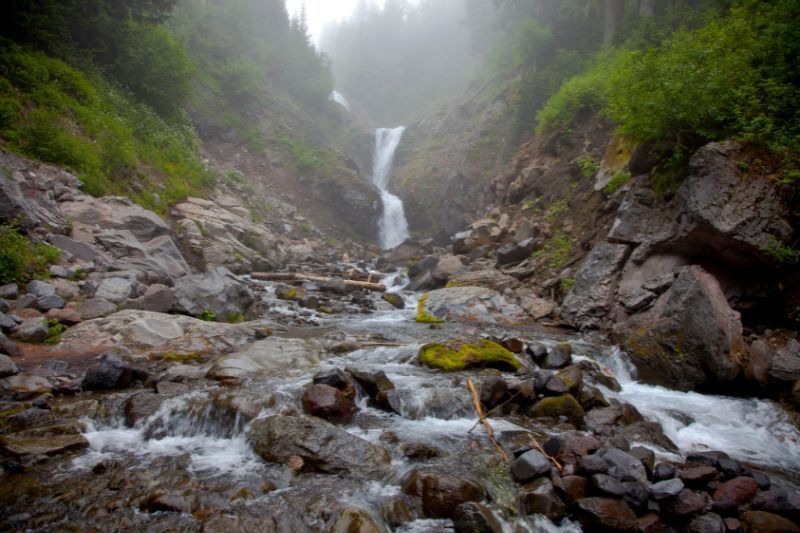
13. Comet Falls Trail
- Region: Longmire
- Trailhead: Comet Falls parking
- Difficulty: Moderate
- Distance: 3.4 miles roundtrip
- Type: Out and back
- Elevation Gain: 1,200 ft
- Comments: All Trails / WTA
Comet Falls Trail is a must hike if you love waterfalls. This hugely popular trail takes you beyond the top of Christine Falls, across logs and boulders, around switchbacks and eventually leads to the powerful Comet Falls. It’s a fun hike with huge reward, but parking can be an issue.
14. Panorama Point via Skyline Trail

- Region: Paradise
- Trailhead: Paradise parking
- Difficulty: Moderate
- Distance: 4.1 miles roundtrip
- Type: Out and back
- Elevation Gain: 1,250 ft
- Comments: All Trails / WTA
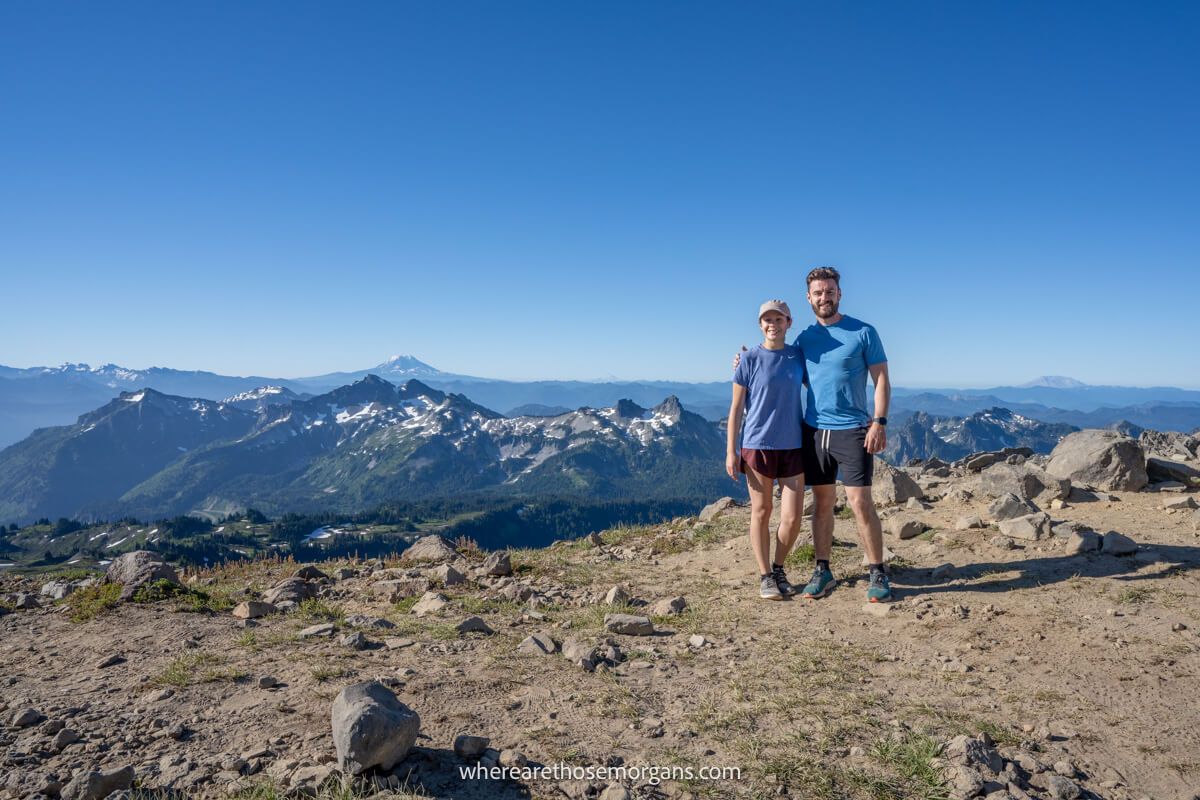
Panorama Point Trail is the best moderately difficult way you can hike a portion of Skyline Trail and experience some of its amazing views. By hiking directly to Panorama Point and back down you’ll cut out a lot of distance and difficulty but still get far reaching views over Washington’s mountain peaks.
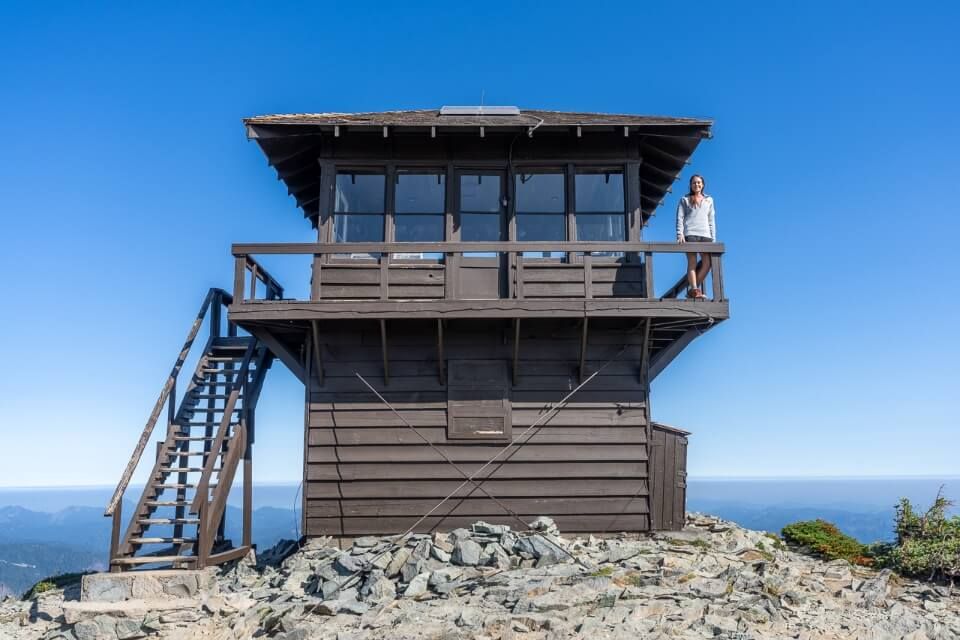
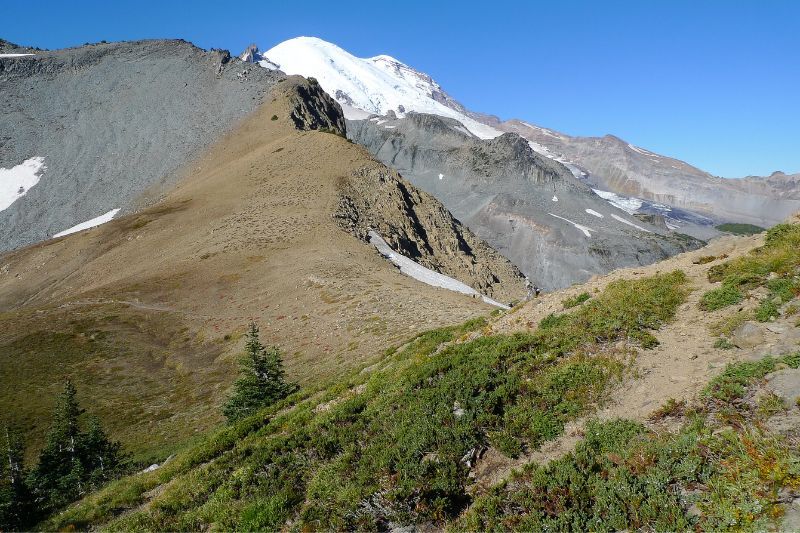
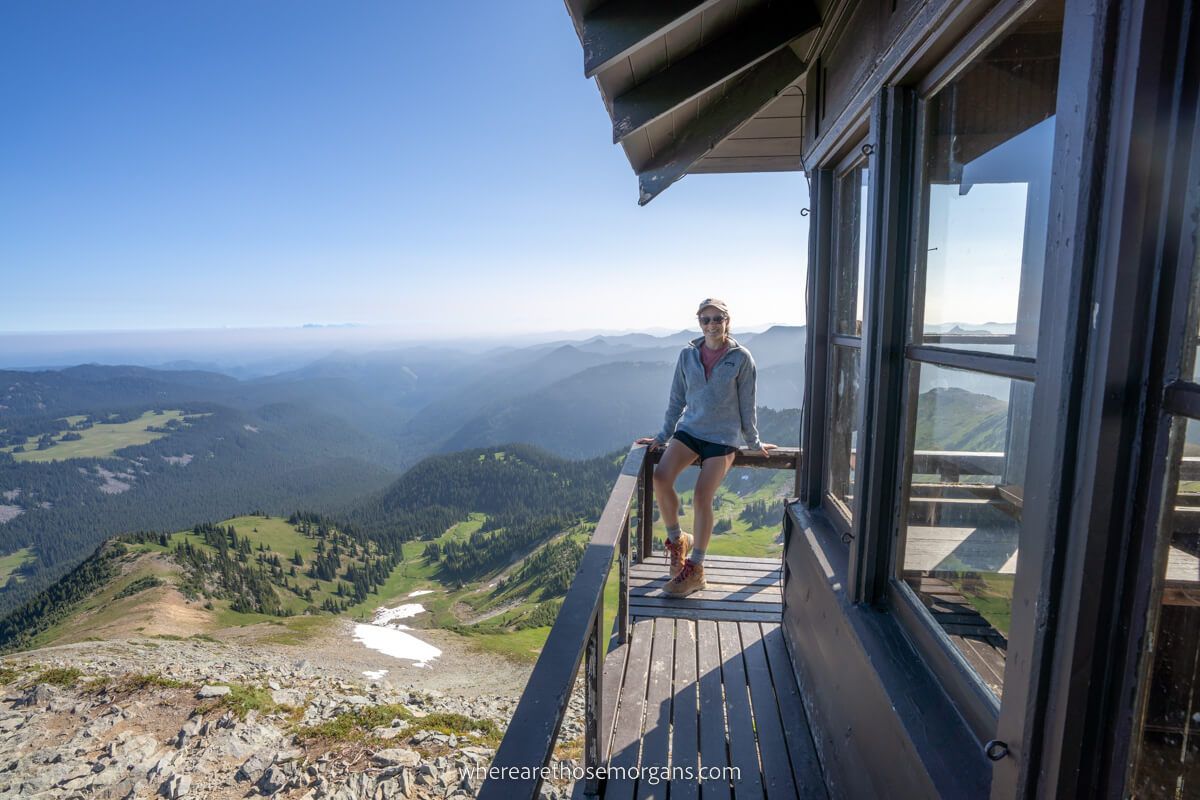
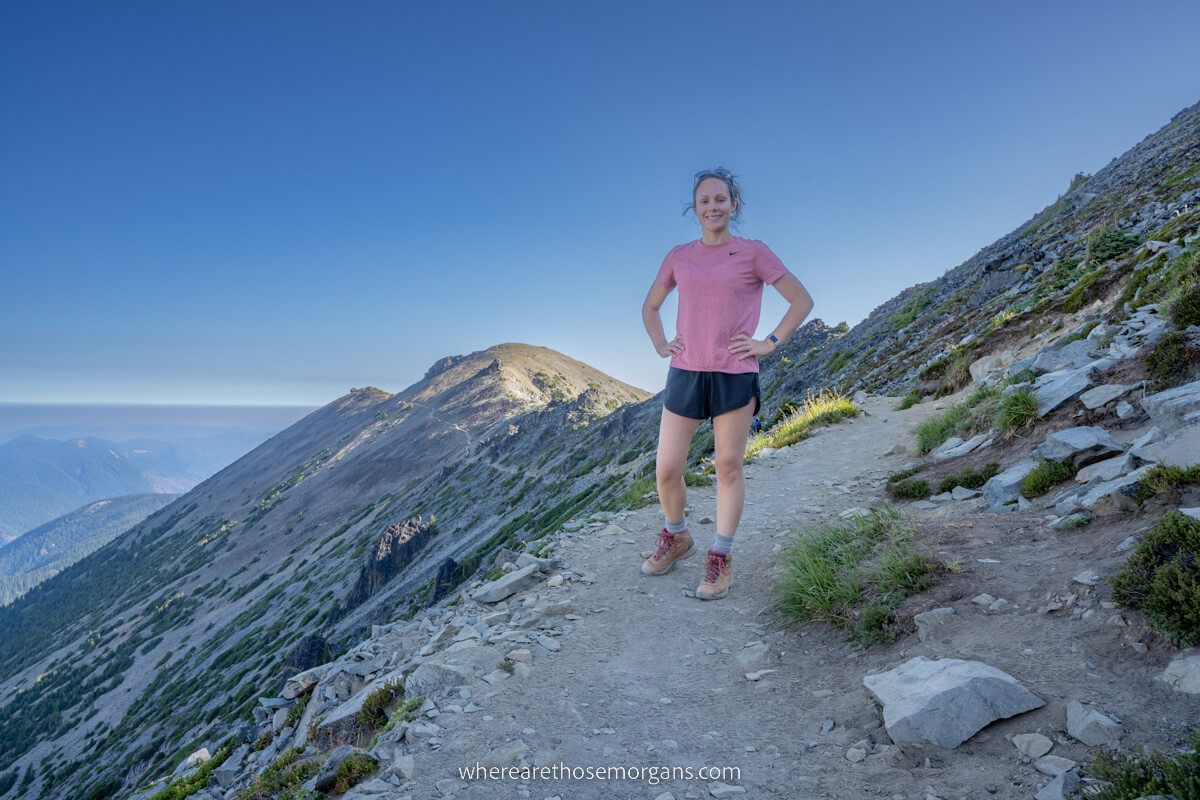
15. Mt Fremont Lookout Trail
- Region: Sunrise
- Trailhead: Sunrise Visitor Center
- Difficulty: Moderate
- Distance: 5.7 miles roundtrip
- Type: Out and back
- Elevation Gain: 1,100 ft
- Comments: All Trails / WTA
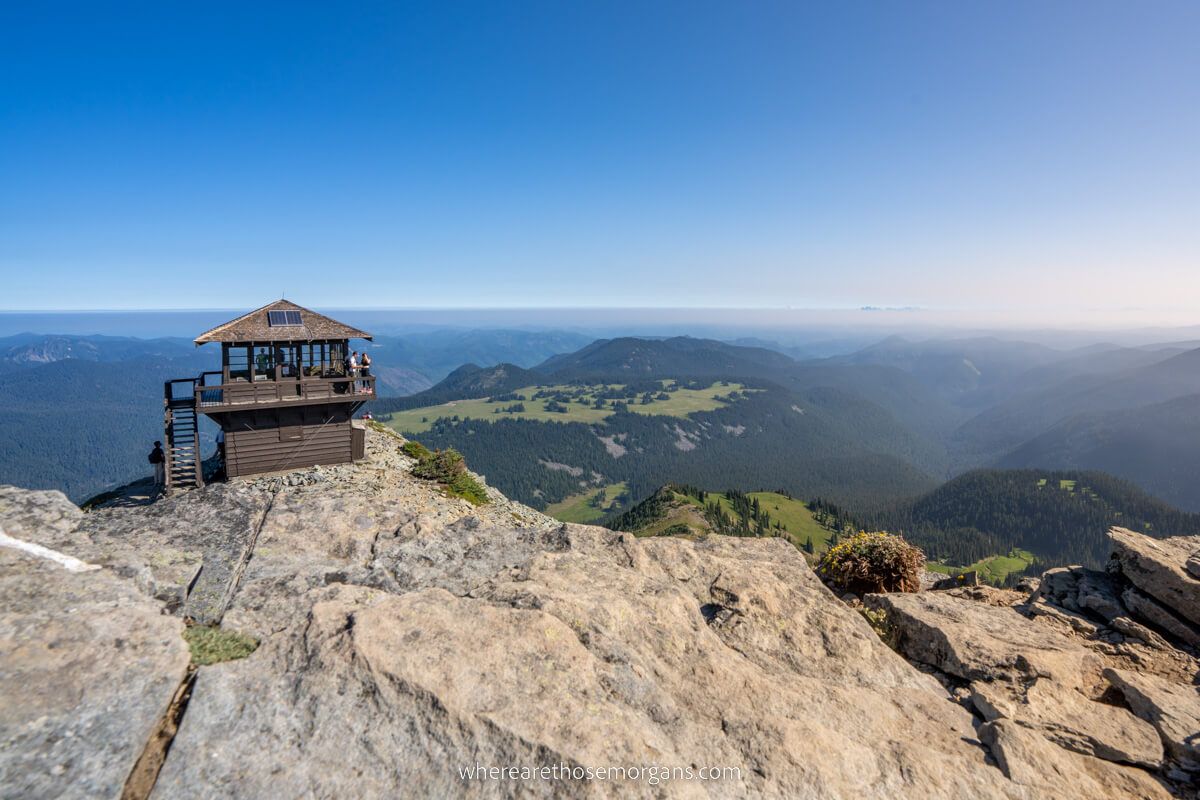
Mt Fremont Lookout Trail is among the most popular hikes in Mt Rainier because it has incredible 360 degree views from a high elevation fire lookout tower. The fun, engaging and picturesque hike is definitely one of our favorites in the park, and it’s one you absolutely shouldn’t miss when you visit.
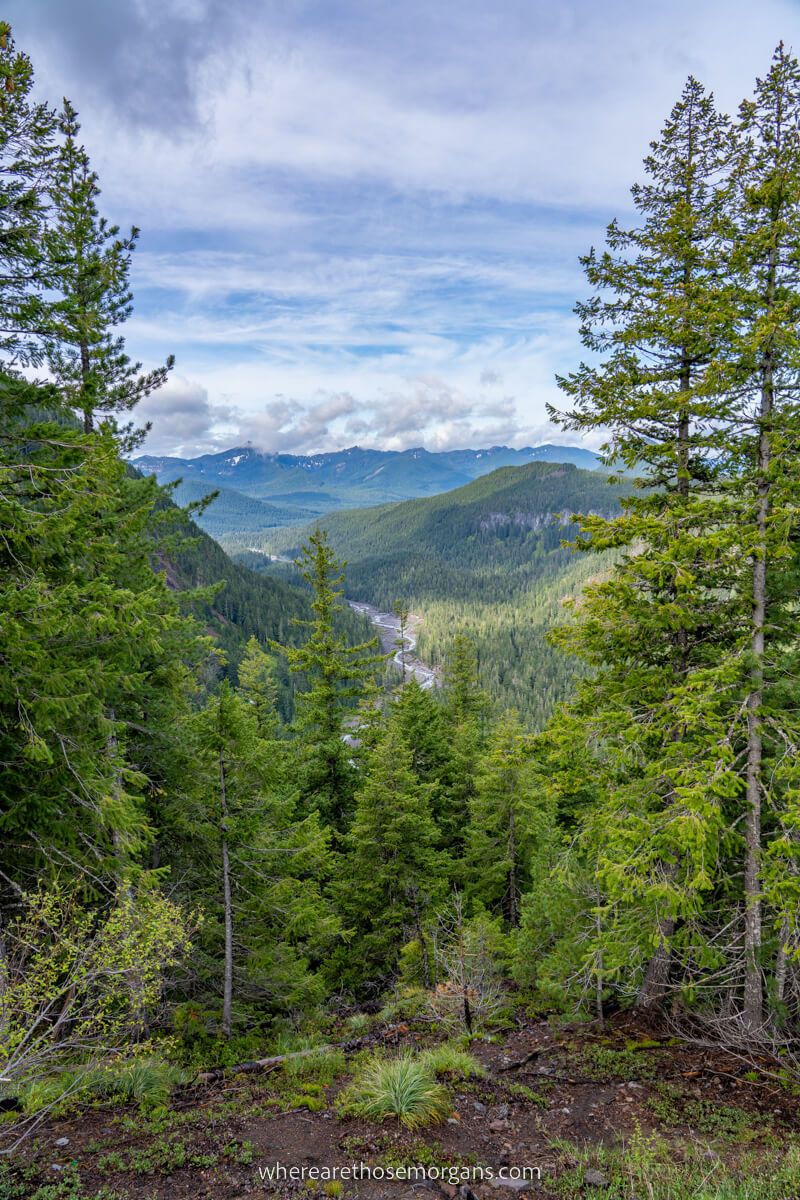
16. Rampart Ridge Loop Trail
- Region: Longmire
- Trailhead: Longmire parking lot
- Difficulty: Moderate
- Distance: 4.6 miles roundtrip
- Type: Loop
- Elevation Gain: 1,350 ft
- Comments: All Trails / WTA
Rampart Ridge Loop Trail is a quieter hike leading through old growth forest to Mt Rainier views and the remains of a lava flow from a time when the volcano erupted. It begins on the southwest side of Trail of the Shadows, gains elevation on switchbacks and eventually returns on Wonderland Trail.
17. Glacier Basin Trail
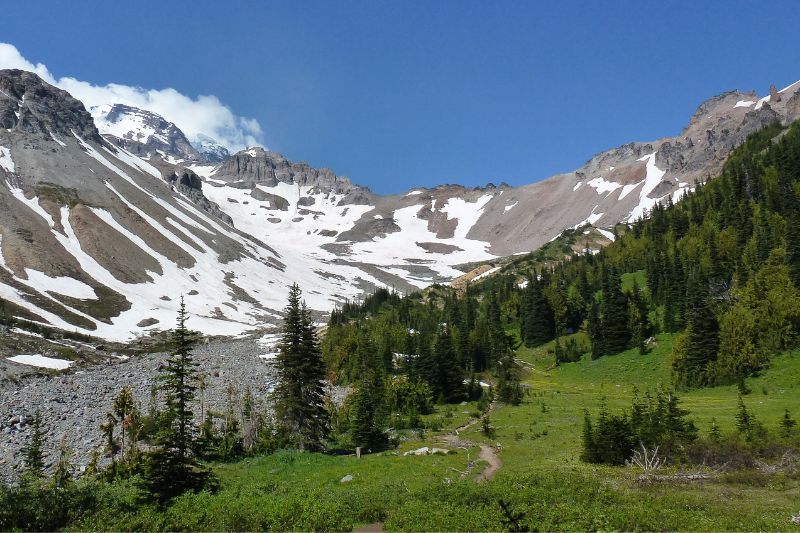
- Region: Sunrise
- Trailhead: White River Road
- Difficulty: Moderate
- Distance: 7+ miles roundtrip
- Type: Out and back
- Elevation Gain: 1,300 ft +
- Comments: All Trails / WTA
Glacier Basin Trail follows a river fork until it reaches a glacier basin close to the northeast slopes of Mount Rainier. It’s incredibly picturesque throughout but the best part of this hike is a spur trail leading to views over Emmons Glacier, the largest ice sheet in Mt Rainier and the contiguous 48 states.
18. Tolmie Peak Lookout Trail

- Region: Carbon River
- Trailhead: Mowich Lake
- Difficulty: Moderate
- Distance: 7 miles roundtrip
- Type: Out and back
- Elevation Gain: 1,300 ft
- Comments: All Trails / WTA
Tolmie Peak Trail is another of our favorite day hikes in Mt Rainier National Park. You’ll hike a diverse and scenic trail which leads to a fire lookout tower with superb views over Eunice Lake and Mount Rainier. It’s better later in the afternoon so you’re not staring straight into the sun.
19. Spray Park Trail
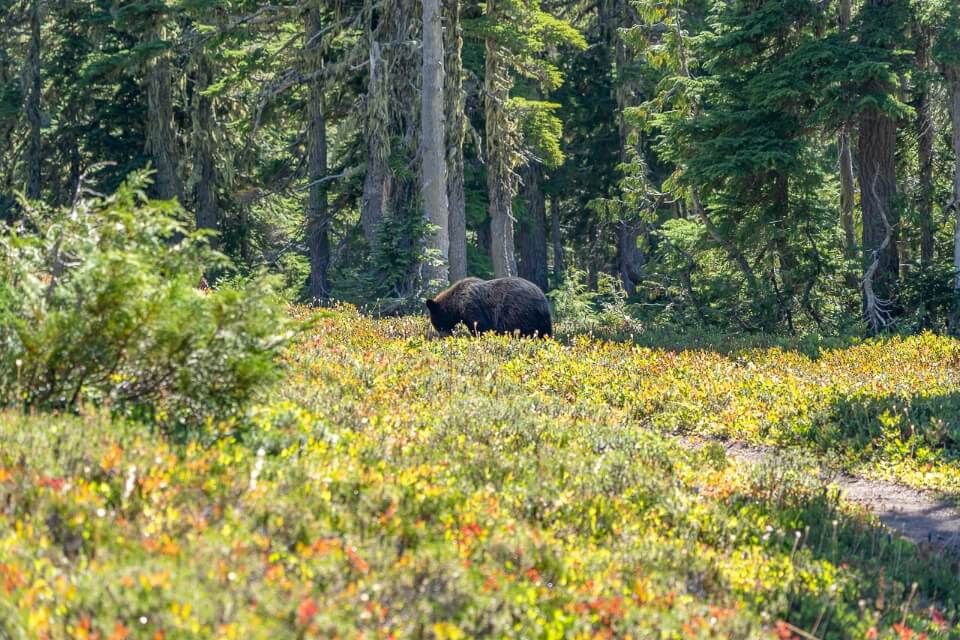
- Region: Carbon River
- Trailhead: Mowich Lake
- Difficulty: Moderate
- Distance: 6-8 miles roundtrip
- Type: Out and back
- Elevation Gain: 1,700 ft
- Comments: All Trails / WTA
Spray Park Trail is a true hidden gem hike in Mount Rainier. It’s much quieter than nearby Tolmie Peak, and it leads to the awesome Spray Falls waterfall as well as a number of beautiful meadows filled with wildflowers. We once saw a black bear eating berries just 30 ft from the trail.
20. Skyline Loop Trail
- Region: Paradise
- Trailhead: Paradise parking
- Difficulty: Hard
- Distance: 5.5 miles roundtrip
- Type: Loop
- Elevation Gain: 1,700 ft
- Comments: All Trails / WTA
Skyline Loop Trail is the star attraction of hiking at Mt Rainier National Park. It’s tough, diverse and unbelievably picturesque with far reaching views over volcanoes like Mt Adams, Mt St Helens and Mt Hood from the summit. The trail is always busy so our advice is to begin hiking as early as possible.
By setting off as daylight broke and hiking anti-clockwise, we had the whole trail to ourselves until we reached the summit ridge line. It was an amazing experience for us, and it’s the one hike you should prioritize in Mt Rainier.
21. Burroughs Mountain Loop Trail
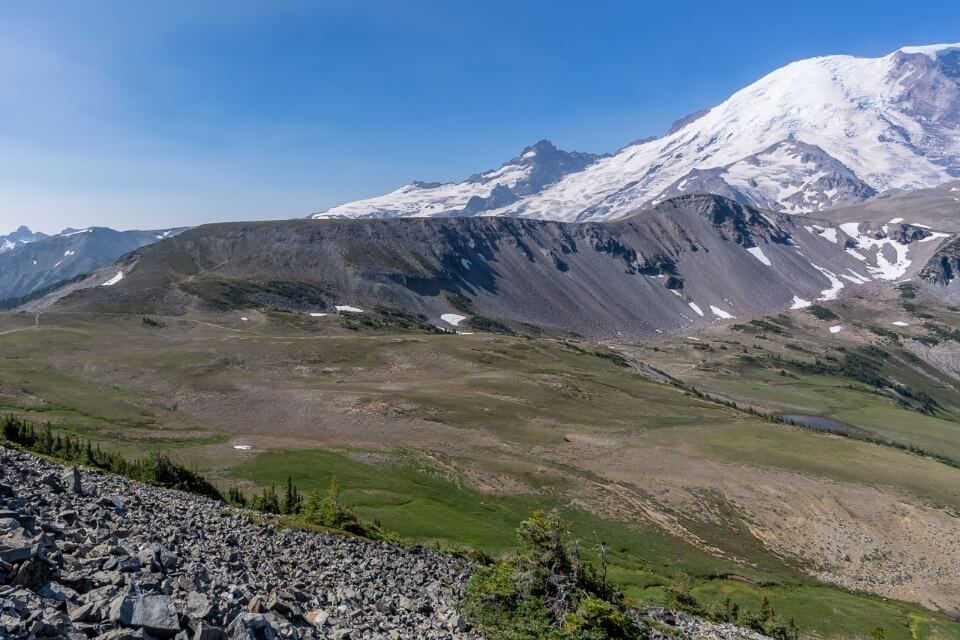
- Region: Sunrise
- Trailhead: Sunrise Visitor Center
- Difficulty: Hard
- Distance: 4.7, 7.0 or 9.2 miles roundtrip
- Type: Out and back or loop
- Elevation Gain: Up to 2,500 ft
- Comments: All Trails / WTA
Burroughs Mountain Loop Trail is another incredibly popular hike in Sunrise. You can hike to First, Second or Third Burroughs, each step is harder as you get closer to Mount Rainier. Stronger hikers often combine Burroughs Mountain with Mt Fremont for two major hikes in one go.
22. Summerland Trail to Panhandle Gap
- Region: Sunrise
- Trailhead: White River Road
- Difficulty: Hard
- Distance: 10.5 miles+ roundtrip
- Type: Out and back
- Elevation Gain: 2,900 ft
- Comments: All Trails / WTA
Summerland Trail to Panhandle Gap is a long and challenging but extremely popular Mount Rainier day hike. You’ll hike alongside Fryingpan Creek and through Summerland Meadows which has stunning wildflowers in season. If you have energy left, climb to Panhandle Gap for incredible views.
23. Shriner Peak Lookout Trail
- Region: Ohanapecosh
- Trailhead: WA-123 roadside
- Difficulty: Hard
- Distance: 8.5 miles roundtrip
- Type: Out and back
- Elevation Gain: 3,500 ft
- Comments: All Trails / WTA
Shriner Peak Lookout Trail is the perfect hike for very strong hikers looking to get off the beaten path in Mount Rainier. The trail is hard and has a huge elevation gain, but it leads to a fire lookout tower and you’ll barely see another soul. We’ll add this to our list for next time!
3 Day Mount Rainier Hiking Example Itinerary
You know the best easy, moderate and hard trails in each of the 5 regions in Mt Rainier. But how do you piece the hikes together into an efficient itinerary?
After 5 long weekends hiking in Mount Rainier, here’s how we think strong hikers should plan an action packed 3 days ticking off the best trails in the park.
Carbon River – Day 1
- Early start and drive to Mowich Lake
- Hike Spray Park as far as the third or fourth meadow
- Eat a packed lunch in the parking lot (no food can be purchased here)
- Hike Tolmie Peak in the afternoon for best light
- Drive to Ashford or Longmire and check into a hotel
Longmire, Paradise and Ohanapecosh – Day 2
- Very early start to hike Comet Falls Trail
- Stop at Narada Falls parking lot and walk down to the viewpoint quickly
- Drive to Paradise and hike Skyline Trail
- Walk around Nisqually Vista
- Hike Bench and Snow Lakes
- Drive down Stevens Canyon road
- Hike either Silver Falls Loop or Grove of the Patriarchs
- Sleep in Ohanapecosh or Packwood
Sunrise – Day 3
- Drive to Chinook Pass
- Hike Naches Peak Loop Trail to Tipsoo Lake at dawn
- Drive up to Sunrise visitor center
- Hike Burroughs Mountain Loop
- Then directly join the trail to Mt Fremont Lookout
- Leave the park via Enumclaw
This is just an example and it should be used as a reference to help you create the perfect Mount Rainier hiking itinerary for your goals.
Hiking Tip: If you only have 2 days in Mt Rainier, our advice would be to cut the first day from our example itinerary because Mowich Lake is much harder to access.
When To Hike In Mt Rainier

The best time of year to hike in Mount Rainier National Park is between the end of July and the end of September because the trails will be free of snow. But you should keep an eye on weather conditions in June and October because you might be able to hike certain trails when the park is much quieter.
We lived in Washington State between April and October, and despite a record breaking heat dome we couldn’t hike Skyline Trail until the middle of July. We tried in June and the trail was covered in 10 ft of snow.
Mt Rainier is one of the most popular US national parks, so the short hiking season means it’s always busy in the park. Our advice is to avoid holiday weekends at all costs, and try to plan your trip for weekdays if possible.
Hiking Tips

- Always check live road conditions before visiting the park
- Certain roads close at the beginning of November for winter
- Avoid hiking between 12:00pm to 3:00pm on excessively hot days
- Plan your hikes for early morning or late afternoon to avoid crowds
- Group your hikes together by region to maximize efficiency
- Always have a backup hike in case parking is full at your first choice
- You can use your America the Beautiful Pass for entry to the park
- Pack food, snacks, water and electrolyte drinks for lunches
The Morgan Conclusion
Mt Rainier is one of the most popular US national parks for hiking. There are lots of excellent trails for beginners and experienced hikers. Skyline Loop, Mount Fremont and Tolmie Peak are the three best hikes in Mt Rainier according to All Trails.
We have to agree with the thousands of hikers who ranked the top 3 trails. And we would add Naches Peak Loop and Spray Park to round off our personal top 5 hikes in Mount Rainier. It’s one of Kristen’s favorite places in America, and we’ll definitely be back for more hiking!
Want more Washington content? Head to our Washington Travel Guides to explore National Parks, popular road trips and best things to do around Seattle.
We hope our list of the top hikes in Mt Rainier National Park helps with planning your visit to Washington State!
Please let us know if you have any questions in the comments below.
Happy Hiking,
Mark and Kristen
Find this guide helpful? Pin it for your visit!
All Rights Reserved © Where Are Those Morgans, LLC. Republishing this article and/or any of its contents (text, photography, maps, graphics, etc.) in whole or in part is strictly prohibited.
Mark and Kristen spent 6 years traveling the world, visiting over 40 countries across 4 continents and more than 30 US states. They created Where Are Those Morgans in 2018 to help others plan the best possible vacations by writing authentic travel and hiking guides based on their real experiences.
Since the arrival of baby Maya in late 2024, Mark and Kristen’s extensive travels have slowed down but they still take plenty of trips. Where Are Those Morgans now helps millions of travelers each year to visit new places and hike new trails through information-packed blog posts and expert travel guidebooks. Read more about Mark and Kristen.