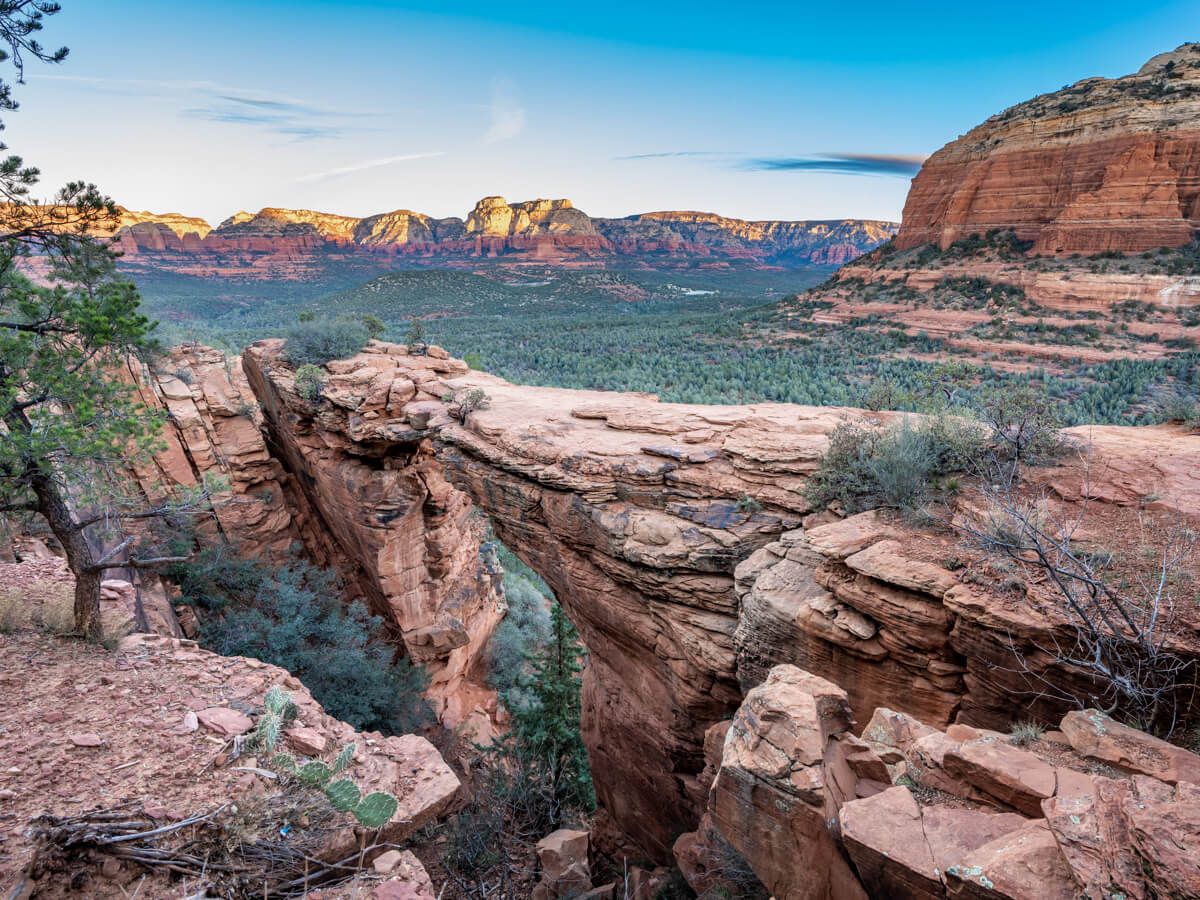
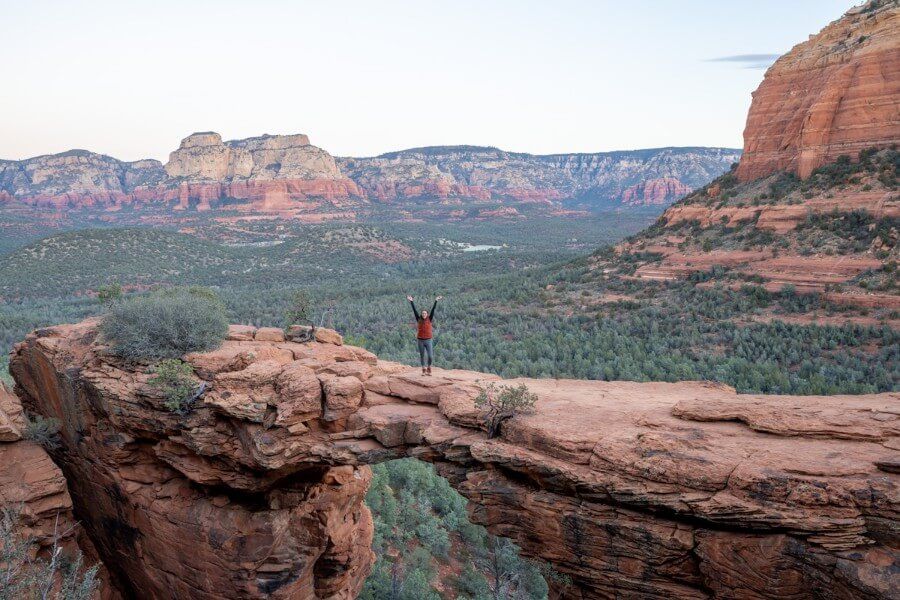
Devils Bridge Trail is a moderately difficult 4-mile roundtrip hike in Sedona, Arizona. The exceptionally popular trail begins at one of three trailheads and leads to Sedona’s largest natural sandstone arch after a total elevation gain of 400 feet. It has a fantastic summit view and a must-have Instagram photo, but you might be surprised to hear that we don’t think Devils Bridge will be everyone’s cup of tea.
In this guide we explain everything you need to know about hiking Devils Bridge Trail in Sedona, based on our experiences. Read more about us.
We hiked to Devils Bridge in time for sunrise during our 8-day Sedona trip at the end of 2021. But instead of hiking from the chaotic trailheads at Dry Creek or Mescal, we drove our Jeep rental all the way up Dry Creek Road to Devils Bridge Trailhead proper. And that definitely got us a few confused looks from other hikers who were already walking up the road in the pre-dawn darkness!
Admittedly, we expected to be first at Devils Bridge because we visited Sedona in December during the low season and arrived well before sunrise. But there were already 5 groups ahead of us waiting with cameras and phones for a turn to strut along the sandstone catwalk. We can only imagine what that line would be like in peak season.
Note: Our content is reader supported and contains affiliate links. If you make a purchase through one of these links, we may earn a small commission at no extra cost to you and it helps us keep this site running.
SEDONA Planning
📖 Ultimate Sedona Guidebook: Get our complete 50+ page offline PDF with everything you need for Sedona.
📞 Personalized Sedona Planning Call: Book a 60 minute call with Mark to have your questions answered, optimize your itinerary, avoid tourist traps and get our best insider tips.
💡 Still Planning? Read our essential first-timer’s guide to visiting Sedona.
Devils Bridge Trailhead Parking

Dry Creek Trailhead and Mescal Trailhead are the two traditional places to park for hiking Devils Bridge in Sedona. Almost everyone will park at one of these two trailheads. The only way to park directly at Devils Bridge Trailhead is by driving a 4WD vehicle up Dry Creek Road.
Assuming you’re driving a normal car, arrive early to give yourself the best chance at getting a space. Once all the spaces at Dry Creek and Mescal are taken, you’ll have to join the dozens of cars parked along the main road.
Here are the Google Maps parking locations:
Tip: We rented a Jeep to drive Sedona’s Jeep trails, but it also came in handy for hiking Devils Bridge and Soldier Pass Trail because we could access areas most others couldn’t.
Hiking Statistics
Okay, let’s take a closer look at the hiking statistics from each trailhead:
1. Devils Bridge Trailhead (4WD Only)
- Distance: 1.8 miles roundtrip
- Elevation Gain: 400 feet
- Difficulty: Moderate
- Time: 1.5 – 2 hours
2. Dry Creek Trailhead
- Distance: 4 miles roundtrip
- Elevation Gain: 450 feet
- Difficulty: Moderate
- Time: 3 hours
3. Mescal Trailhead
- Distance: 4 miles roundtrip
- Elevation Gain: 500 feet
- Difficulty: Moderate
- Time: 3 hours
Trail Map
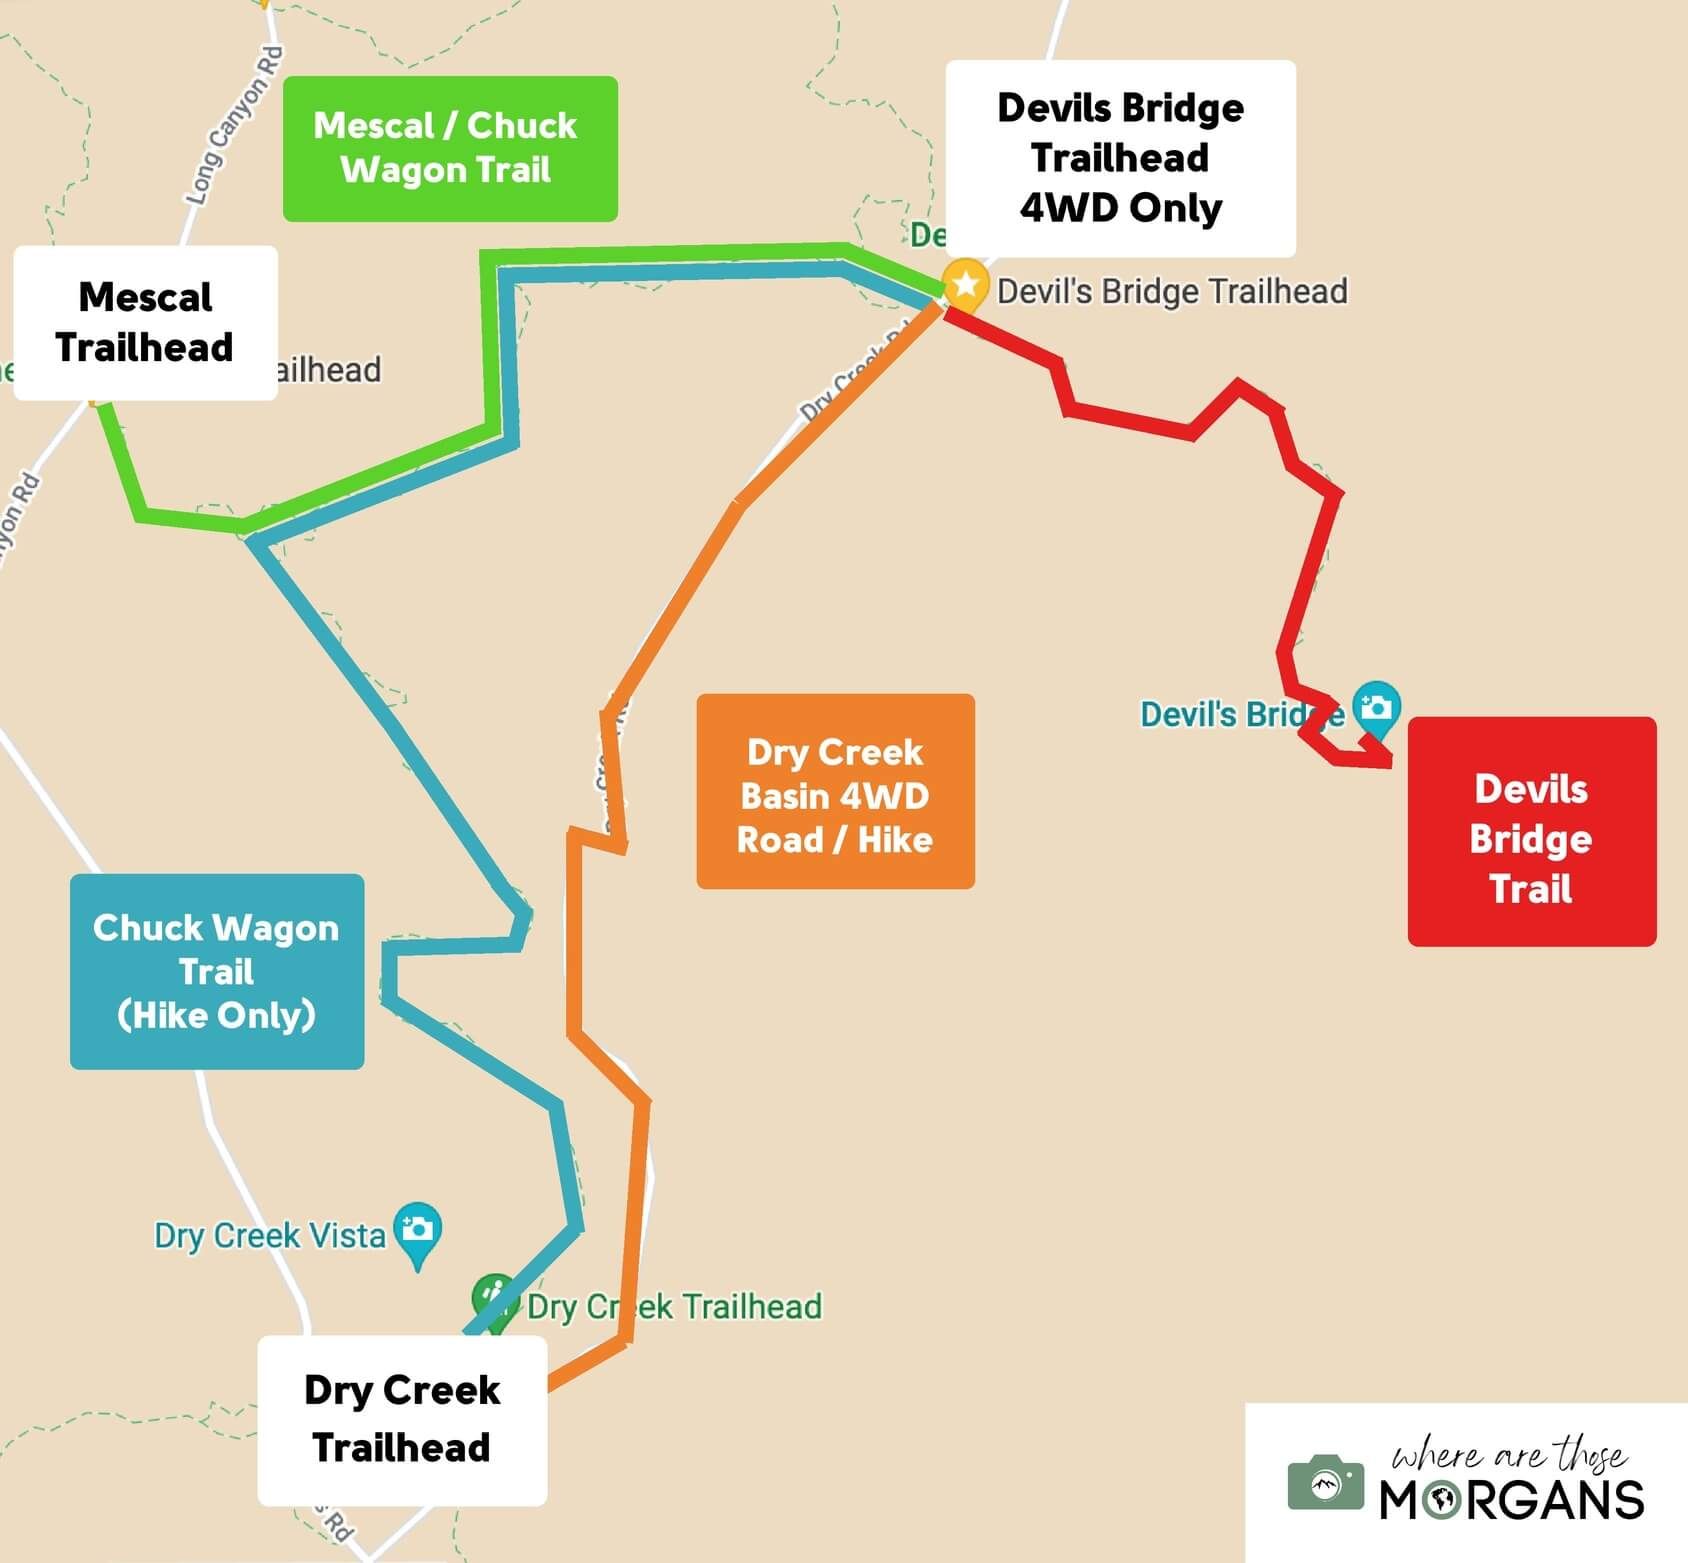
Map key:
- Orange Line – Dry Creek Basin 4WD only road
- Blue Line – Chuck Wagon Trail from Dry Creek Trailhead
- Green Line – Mescal Trail from Mescal Trailhead
- Red Line – Devils Bridge Trail
The map we created above shows the various trailheads and routes you can use to reach Devils Bridge Trail in Sedona.
Very few visitors can make it to the trailhead proper (and we only could because we spent a small fortune hiring a Jeep), so you should decide between parking at Dry Creek or Mescal Trailhead.
Both parking lots fill very early and stay busy all day, especially in peak visiting months in spring and fall.
Hiking Walkthrough
Let’s get into our step-by-step walkthrough so you know exactly what to expect.
1. Find A Parking Space
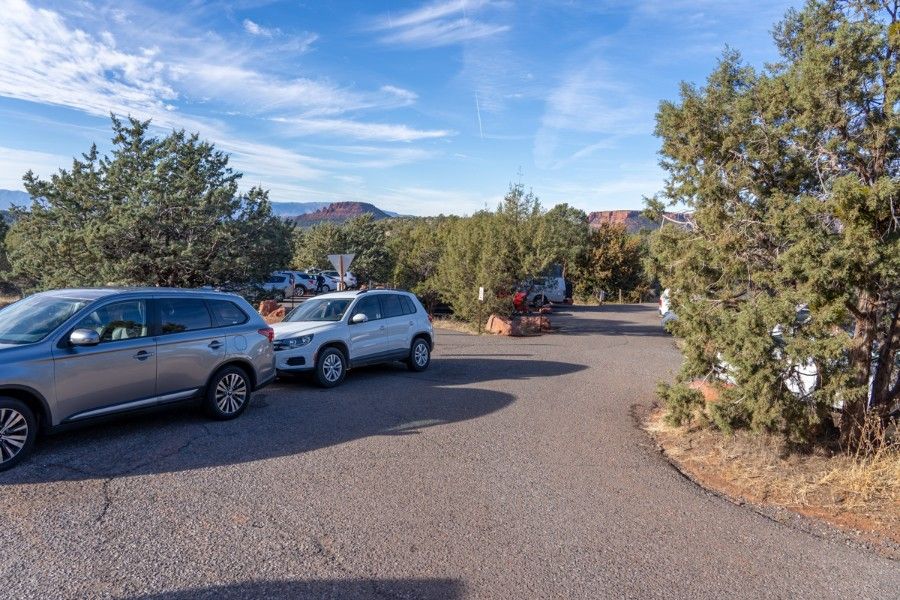
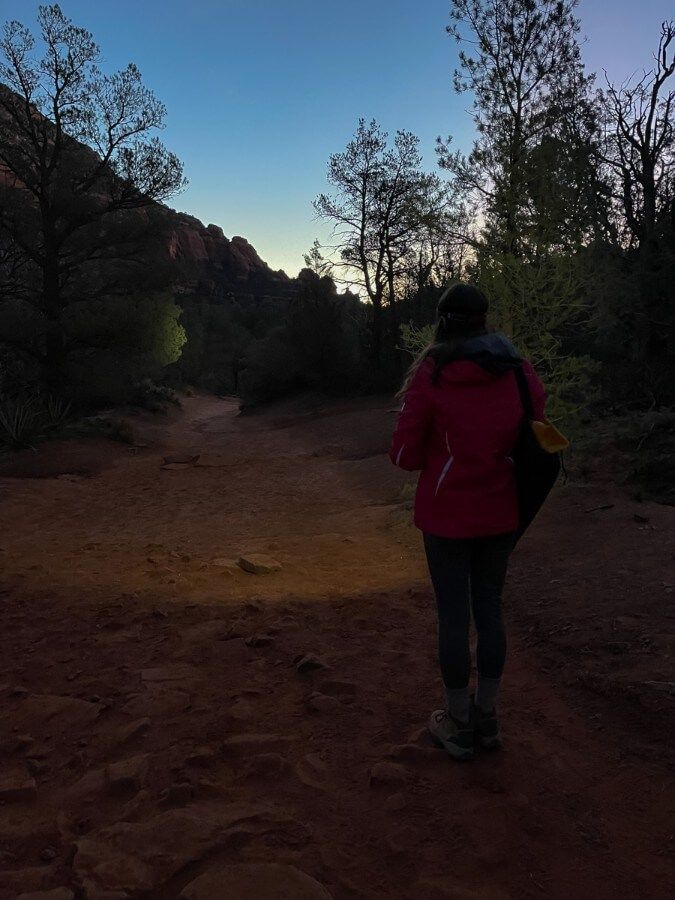
We woke up early in our West Sedona hotel, grabbed a bite to eat and a hot coffee, jumped in our Jeep rental and drove to Devils Bridge Trailhead in total darkness. After passing by Dry Creek Trailhead, we got onto Dry Creek Road which turned out to be a 4WD road for high clearance vehicles with a bunch of hikers walking along the rough and rocky surface aiming for Devils Bridge.
We took the photo above of Dry Creek Trailhead parking lot after we’d finished at around 9:00am. It was already full on a weekday morning in December, so we recommend arriving super early if you want to hike for sunrise.
2. Hike (Or Drive) To Devils Bridge Trailhead
If you don’t drive along Dry Creek Road, you’ll need to park at one of the two trailheads and take any of the following connecting paths:
- Mescal Trailhead – Hike Mescal to Chuck Wagon and Devils Bridge
- Dry Creek Trailhead – Hike Chuck Wagon to Devils Bridge
- Dry Creek Trailhead – Hike Dry Creek Basin 4WD road
After driving Dry Creek Basin 4WD road in our Jeep, we highly recommend you avoid hiking the 4WD road from Dry Creek Trailhead. The road is rough, muddy and you’ll share it with Jeeps. Instead, you should hike Chuck Wagon Trail from Dry Creek or park at Mescal Trailhead because the connecting path is shorter.
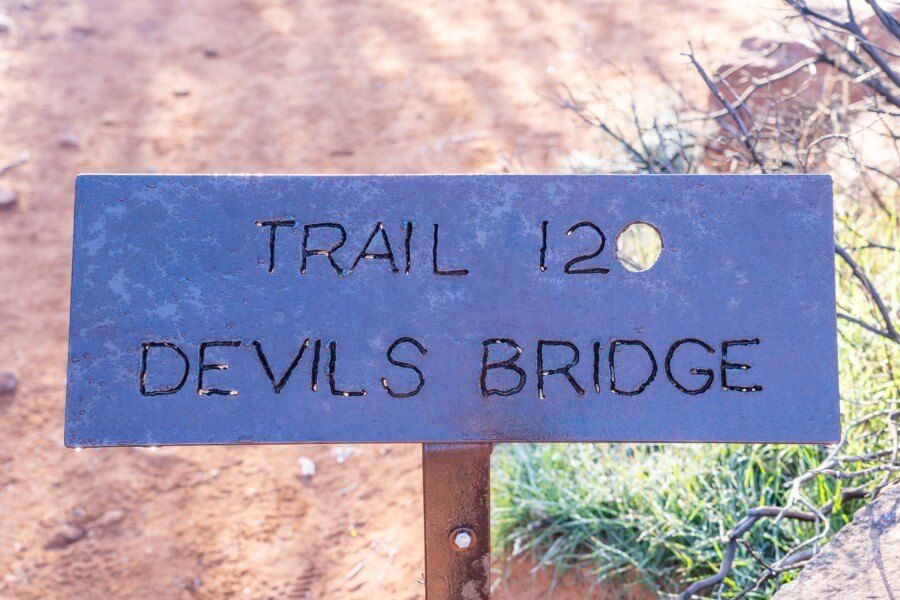
3. Join Devils Bridge Trail
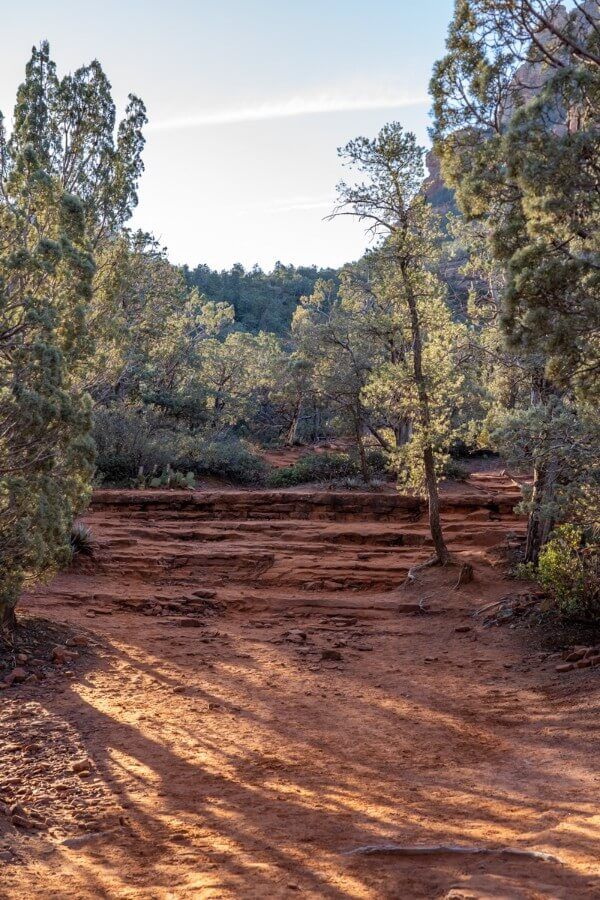
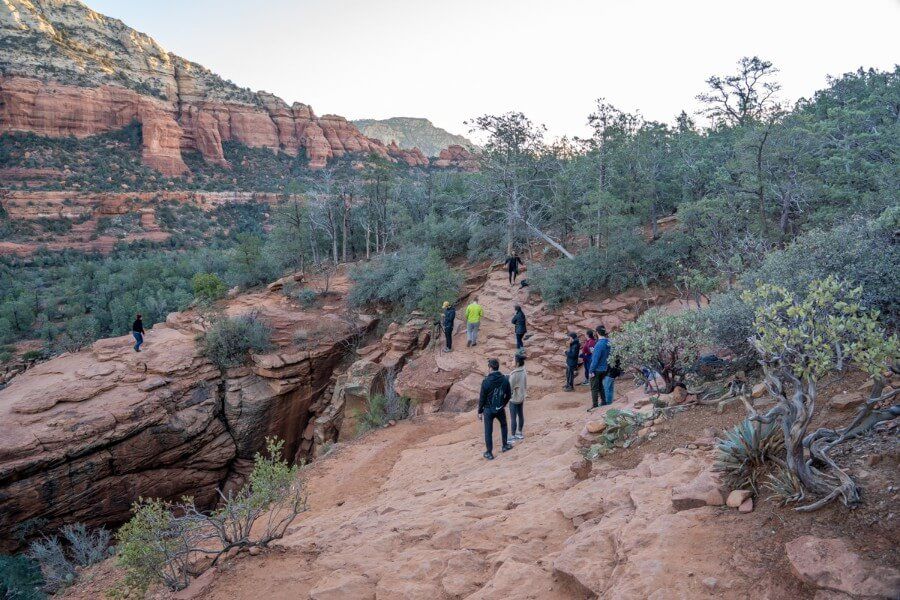
The hard part is over as soon as you reach Devils Bridge Trail. From here we found the whole experience more enjoyable and the scenery became picturesque. We began the trail proper on a really easy and flat dirt packed path leading into trees.
Then after following a wide and heavily beaten path for a little over half a mile, we gradually began to gain elevation.
Need help planning your trip to Sedona?
Our Sedona travel guidebook gives you hidden gem hiking trails, secret caves, vortex sites, ancient ruins, wineries, jeep trails, photo spots, where to eat and stay, 1-5 day itinerary ideas and much more. Plus, you’ll get an exclusive map to use in Sedona!
View Guidebook
4. Climb The Rocky Steps
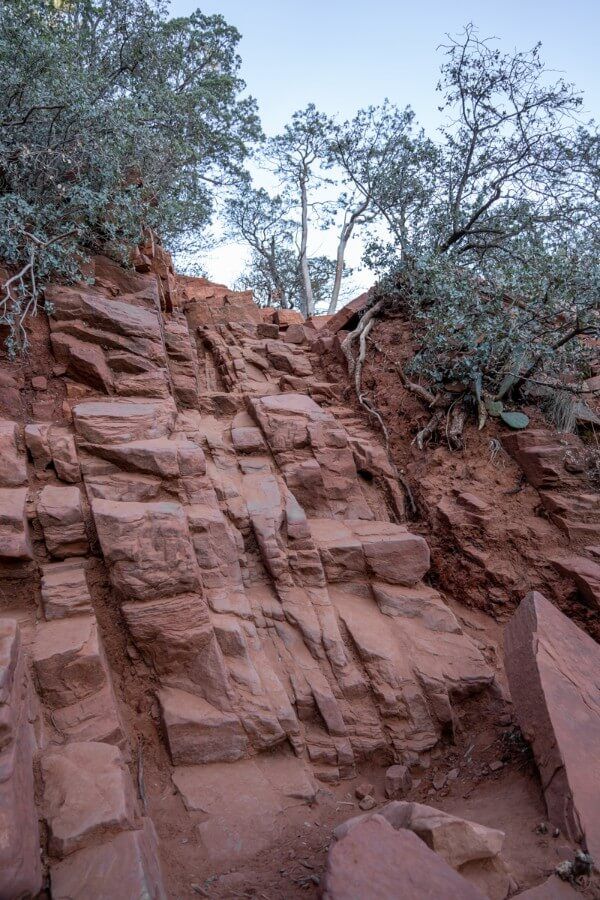
The first major trail change arrived after 0.7 miles. We reached a very light scramble up a series of uneven rocks as you can see in our photo above. Luckily, the rocks were shaped just like steps.
This section of the hike was narrow and on the way back down we had to stop a few times to allow other hikers to pass up when the trail was much busier. The steps were a bit slippery because there was a light film of ice on the ground when we hiked in winter.
5. Sharp Left Turn
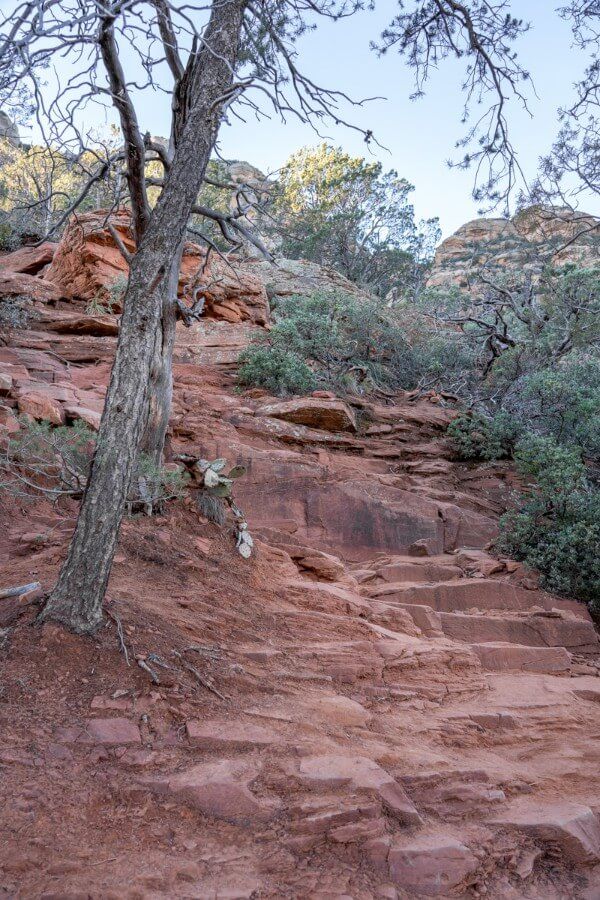
After scrambling up the uneven rocks, we spiraled around a sharp left turn onto another rock staircase. This section was also steep with uneven rocks and tree roots so we took extra care here.
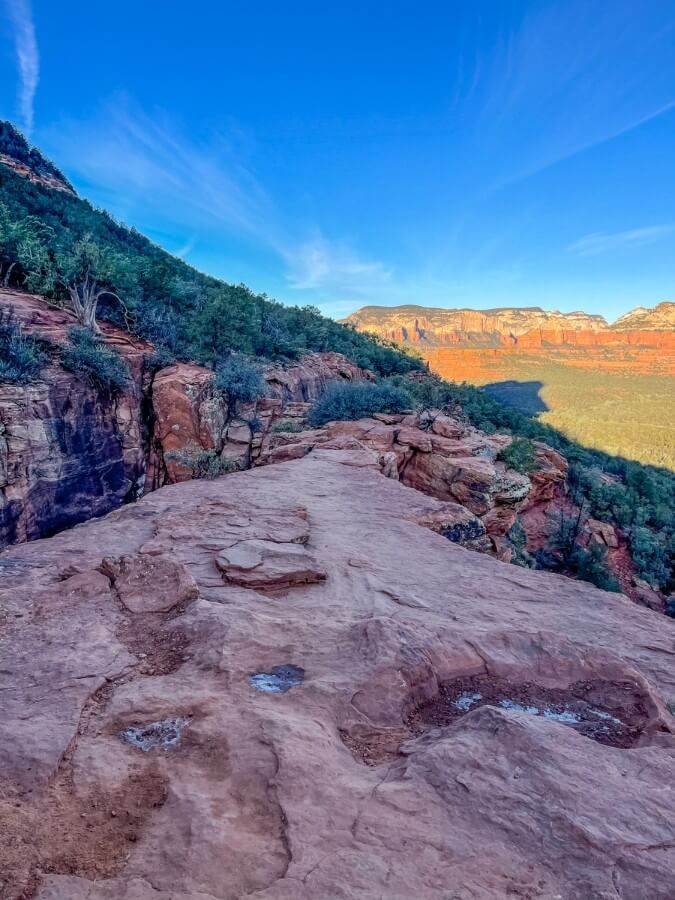
Once we summited the rocky sections, we were already level with Devils Bridge. All we needed to do now was walk 100 yards along a ridge for our first glimpse of the bridge.
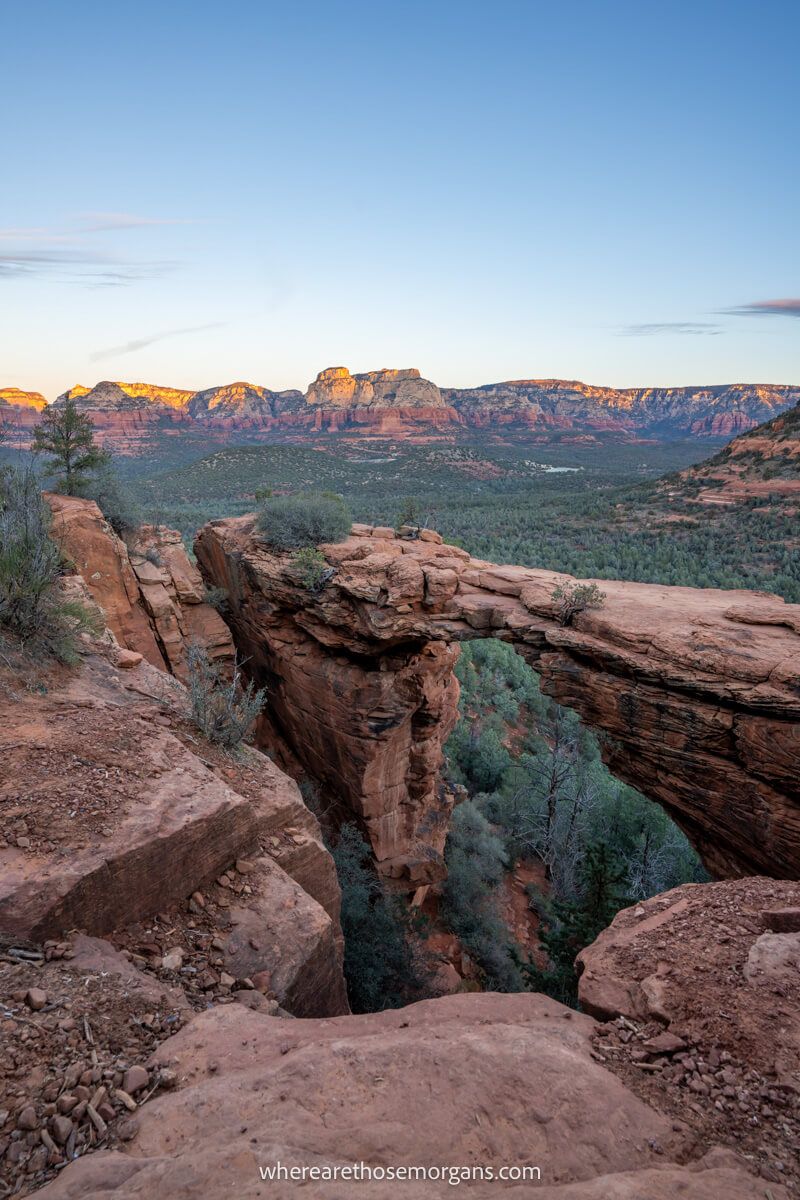
6. Arrive At Devils Bridge
As we approached Devils Bridge, we arrived from the opposite side of the access point and classic photo spot. It was apparent how narrow the bridge was as we got closer, and the drop-offs looked pretty serious in the low light.
We continued walking around the rocks in an arc like a crescent moon, and reached the line of hikers waiting for a photo on the bridge. It turned out we were the only people keen to beat the crowds!
7. Wait For Our Turn
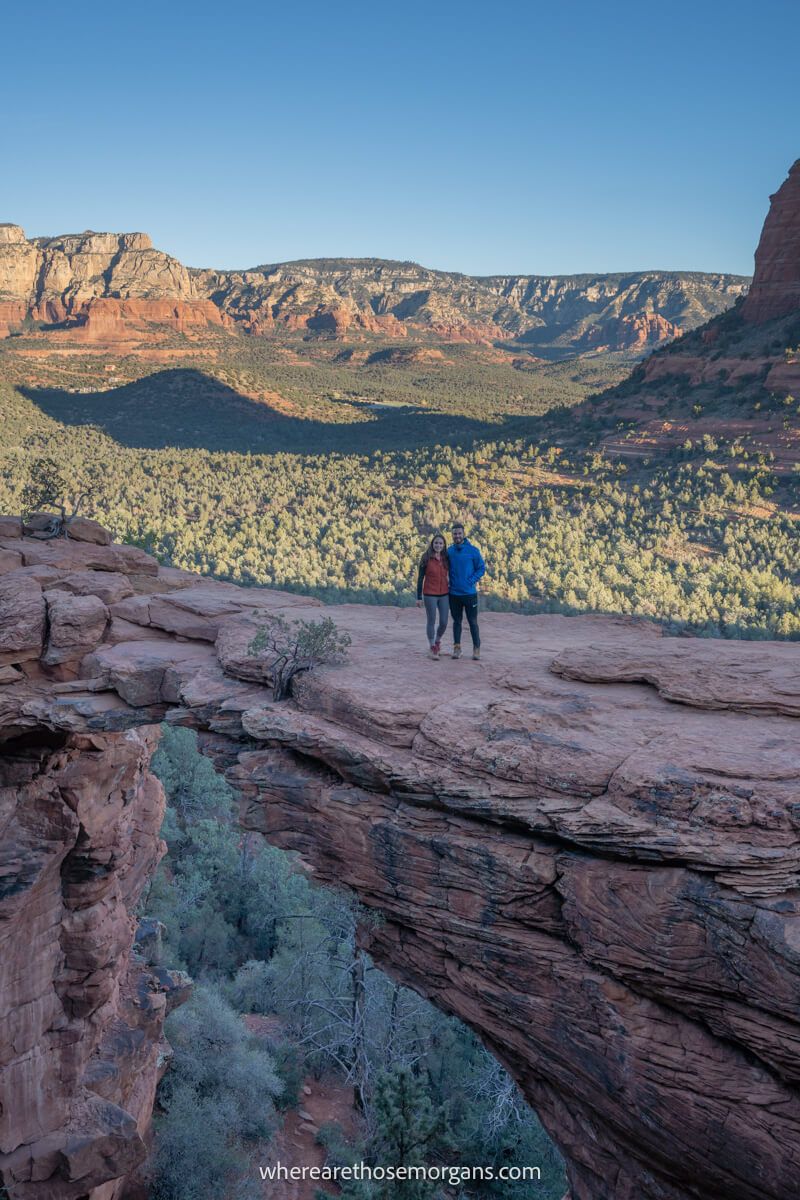
Now, we just had to wait for our turn to walk out onto the bridge for a photo. The earlier you arrive the better chance you have of being closer to the front of this line, but there is also a sunrise rush to consider.
We took the photo above as we were leaving. It was 30 minutes after sunrise and there were around 15 other people in total which wasn’t too bad, but remember it was a weekday in December so it will be much busier in peak season.
8. Walk Out On To The Bridge
We acted fast when it was our turn to walk out onto the bridge. There were a bunch of others waiting and watching so we just had to get on with it and not be shy about it.
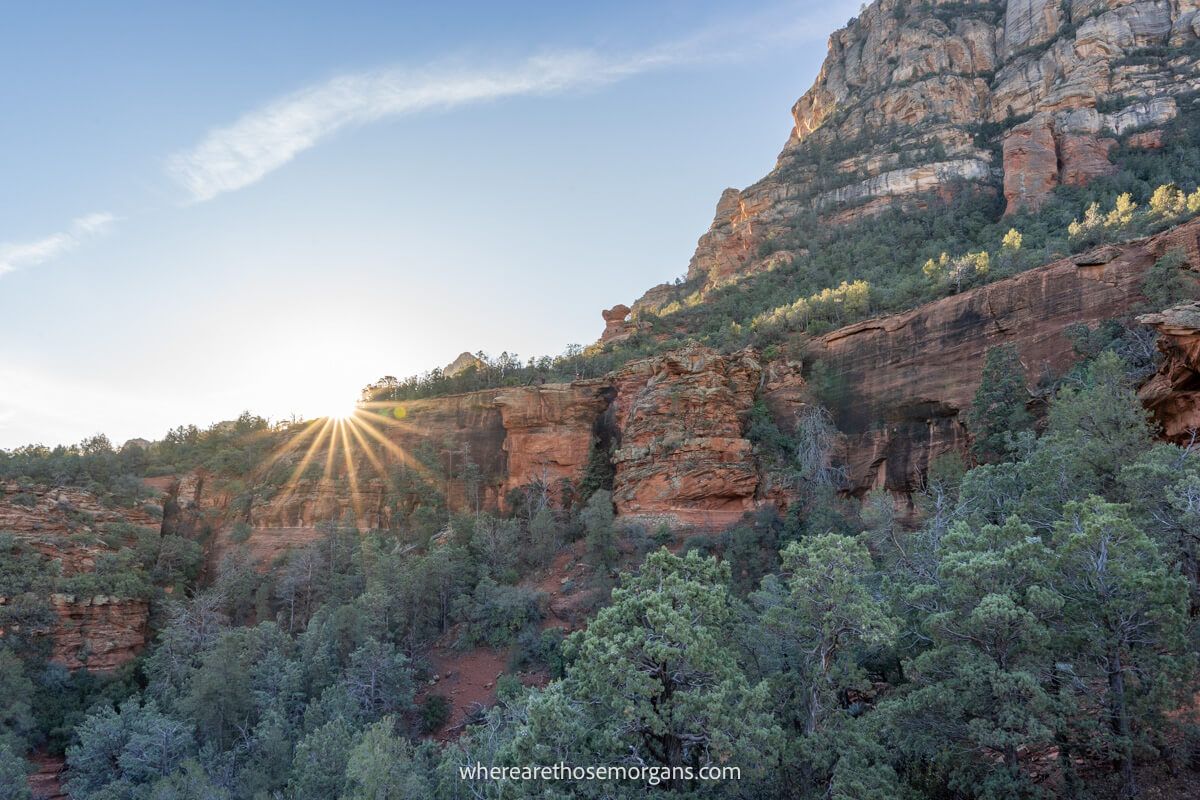
By the time our turn came around, the sun had already risen and the light was making its way slowly towards the Devils Bridge area. At least while waiting we were able to enjoy the sunrise!
Our advice is to strike up conversation with other hikers who will take your photo if you take theirs in return. Almost everyone will be respectful and friendly, especially around sunrise.
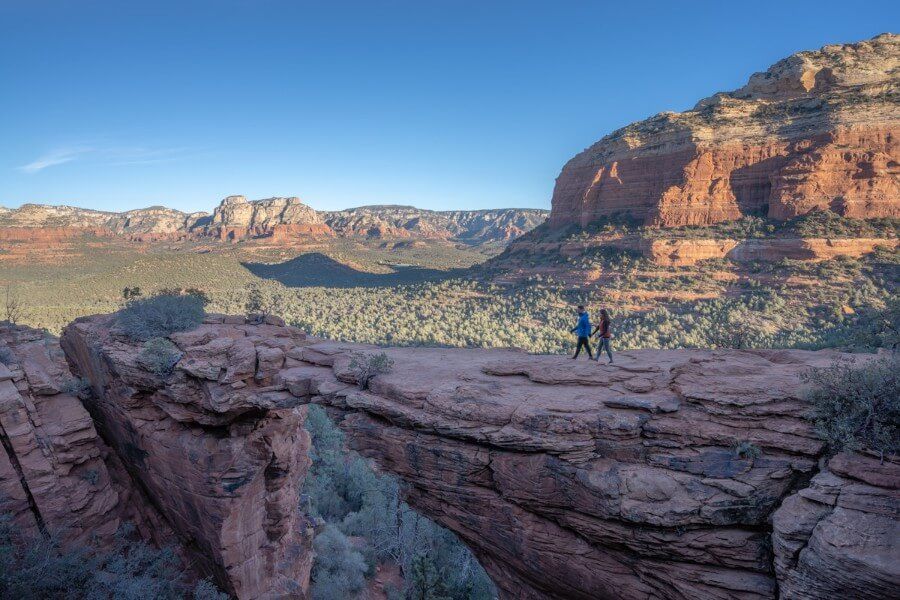
9. Brave The Narrow Section
As we walked out onto the constantly narrowing bridge, we became even more acutely aware of the significant drop-offs to both sides. Devils Bridge is 50 feet long but it’s only 6 feet wide at its narrowest point in the center, so it definitely gets the heart rate up.
The worst part for us wasn’t how narrow the bridge was or how far the drop was, it was how long it takes to actually reach the photo spot in the middle with everyone impatiently watching and waiting!
10. Quickly Snap Loads Of Photos
This is one of those times where you have to get your own photos but also have to be aware that others are waiting. We got busy with our camera shutter snapping photos of the walk out, the poses and the walk back.
It wasn’t too chaotic when we were at Devils Bridge, so we went out onto the bridge once before the sunrise and then again around 25 minutes after sunrise. The second time we had someone take our photos for us.
Overall we enjoyed taking photos at Devils Bridge, but we think there are better sunrise and sunset photo spots in Sedona.
11. Hike Back To Your Car
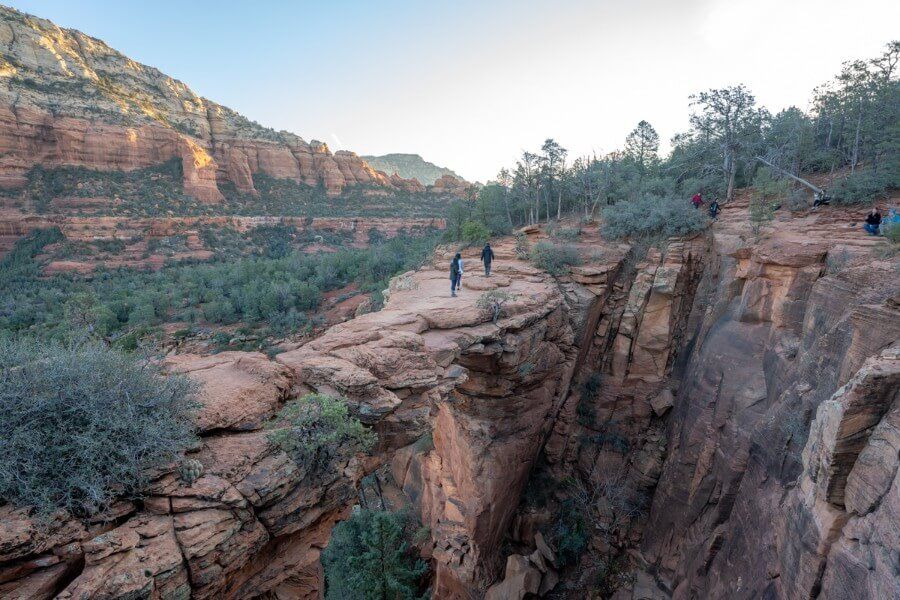
After we got our photos, it was time to head back to our car. But there was one more stop to make on the way down.
Once we were down the rocky scramble section, we looked for a spur trail leading out out a few feet to the right. It ended up at a huge flat rock with fantastic views looking back up at the arch underneath Devils Bridge.
Pros And Cons
Here are our pros and cons to hiking Devils Bridge Trail in Sedona:
Pros:
✅ Devils Bridge is incredibly photogenic
✅ Fun to watch people at the bridge
✅ Sunrise hike beats the crowds
Cons:
❌ Extremely popular and busy trail
❌ Parking is always problematic
❌ Long line for the classic bridge photo
Sedona Shuttle
If you don’t intend to hike Devils Bridge Trail at sunrise, we highly recommend you consider taking the Sedona shuttle later in the morning to avoid the stress of finding a parking spot during the day.
You can park for free at Posse Grounds park and ride, jump on the #12 Dry Creek shuttle and relax. Here’s more information about the shuttle.
Best Time To Hike Devils Bridge Trail
The most comfortable time of year to hike Devils Bridge Trail is spring or fall when temperatures are perfect for hiking at dawn. But they’re also the busiest seasons in Sedona so you’ll have a harder time parking and the bridge will be jam-packed.
Summer and winter are quieter periods in Sedona, which means you have more chance getting parked at the trailheads without issue. The trade-off is very hot summers and very cold winters.
Sunrise is the best time of day to hike Devils Bridge Trail. Not only do you avoid parking issues and the hottest part of the day, but you also stand a better chance of getting the iconic Devils Bridge photo without having to wait in a seriously long line. Check sunrise times the night before and make sure you summit before sunrise time.
We’d avoid the middle of the day between 9:00am-3:00pm, but we actually think later in the afternoon around sunset would be another great time to hike because the crowds will have thinned out. Just don’t forget a headlamp if you go up for dawn or dusk.
Tip: Two other amazing hikes to consider for sunrise in Sedona are Doe Mountain Trail and Chimney Rock Little Sugarloaf Loop Trail.
What To Pack
- Footwear – Footwear with good grips and traction will help with the rocky steep section and give you more confidence when walking out onto the bridge. If it has rained your shoes may get dirty and wet.
- Water – Hiking at sunrise means you can take less water than you would during the day. However, it’s important to remember this is a 4 mile roundtrip trail and if you’re hiking later in the day you’ll need to carry more water.
- Sun protection – Sunglasses, sun hats, long layers and sunscreen are vital if you are visiting Sedona in summer. However, you will be protected from the sun for the vast majority of the hike to Devils Bridge if you hike for sunrise. Later in the day you will need sun protection.
- Winter – We hiked Devils Bridge Trail for sunrise during winter in Sedona. You might need to start in coats, gloves and hats to begin but take a backpack for storage once the morning warms.
Our Top 5 Tips
- Don’t forget to pack a headlamp if you hike for sunrise
- Park on the roadside near Dry Creek Trailhead if you arrive late and lots are full
- Use a hiking app for offline navigation
- Don’t forget your camera and tripod for low light sunrise photography
- Rent a Jeep so you can park at Devils Bridge Trailhead
The Morgan Conclusion

Devils Bridge Trail is one of the most incredibly busy hiking trails we’ve ever seen. It was fine when we hiked for sunrise, but later in the day when we drove past Dry Creek Trailhead and saw cars parked a long way down the main road we were glad we did it at dawn. And remember this was in December.
Because of its Instagram and Tik-Tok fame, Devils Bridge is wildly overcrowded and at times has massive lines at the summit. Sure, the view is awesome and the photo is cool, but is it really that great? We don’t think so.
Is Devils Bridge Trail worth it?
Honestly, we think Devils Bridge Trail is only worth it if you’re very interested in photography or social media. Otherwise, there are better hikes in Sedona with easier parking and far fewer crowds. The iconic bridge photo is great but overall we were left underwhelmed by hiking trail as a whole.

Next Steps
We hope our Devils Bridge Trail guide helps with planning your trip to Sedona.
Don’t forget you can book a travel planning video call with us if you’d like our expert help organizing your trip to Sedona. We can answer any questions you have or walk through a personalized itinerary to make the most of your time.
Still researching for your trip?
- What to know about a first trip to Sedona
- Here are the top things to do in Sedona
- Here’s exactly where to stay in Sedona
- These are the unmissable hikes in Sedona
- Here’s our 1-5 days in Sedona itinerary
- This our ultimate 7-day Sedona itinerary
Finally, if you’ll be visiting more places on the same trip, we recommend reading our Arizona travel guide for more helpful tips and advice.
Happy Travels,
Mark and Kristen
Find this guide helpful? Pin it for later!


All Rights Reserved © Where Are Those Morgans, LLC. Republishing this article and/or any of its contents (text, photography, maps, graphics, etc.) in whole or in part is strictly prohibited.
Mark and Kristen spent 6 years traveling the world, visiting over 40 countries across 4 continents and more than 30 US states. They created Where Are Those Morgans in 2018 to help others plan the best possible vacations by writing authentic travel and hiking guides based on their real experiences.
Since the arrival of baby Maya in late 2024, Mark and Kristen’s extensive travels have slowed down but they still take plenty of trips. Where Are Those Morgans now helps millions of travelers each year to visit new places and hike new trails through information-packed blog posts and expert travel guidebooks. Read more about Mark and Kristen.
Je suis de Sorel-Tracy, Qc, I go there with my aunt and Lake Havasu also. My aunt lives Las Vegas, 5 times in airplane et the last time, I drove with my van, 3,550 Miles. I like to drive. Now, she past away and me too I have 81 years old. I am happy to see your deserts and yours mountains.There was 18 years. Thank you to you. Sorry for my english.
Hi Noella, sounds like a fabulous trip and definitely one to remember! We are happy to help you relive those precious memories and thanks so much for your comment.