
Winning a coveted permit to hike The Wave set our hearts racing, but actually laying eyes on those vibrant and swirling sandstone patterns in Arizona’s Vermilion Cliffs seriously blew our minds. We’ve completed a lot of day hikes in the US since we started traveling professionally in 2018, and we can honestly say The Wave is up there with the most unique landscapes we’ve ever seen. We rarely use words like jaw-dropping, but this place left our jaws trailing across the ground.
We were near the end of our 2-month road trip from Seattle to Sedona in December 2021, and Kanab was our next stop after leaving Zion. Back then, dozens of applicants would turn up at a gym in Kanab each morning hoping to win a next day hiking permit. Luckily, we struck gold on our first attempt, sat through a safety briefing and drove to Wire Pass Trailhead early the next morning to hike The Wave.

Hi, we’re Mark and Kristen Morgan. We left our scientific careers in 2018 to become travel writers and photographers, and since then our expert guides have helped millions of travel planners take better trips. Read more about us.
Why trust us with your Wave hike? We navigated the fun trail and photographed the stunning landscapes at the end. We know the trail well, it’s one of our favorites. As always, every photo in this guide is ours.
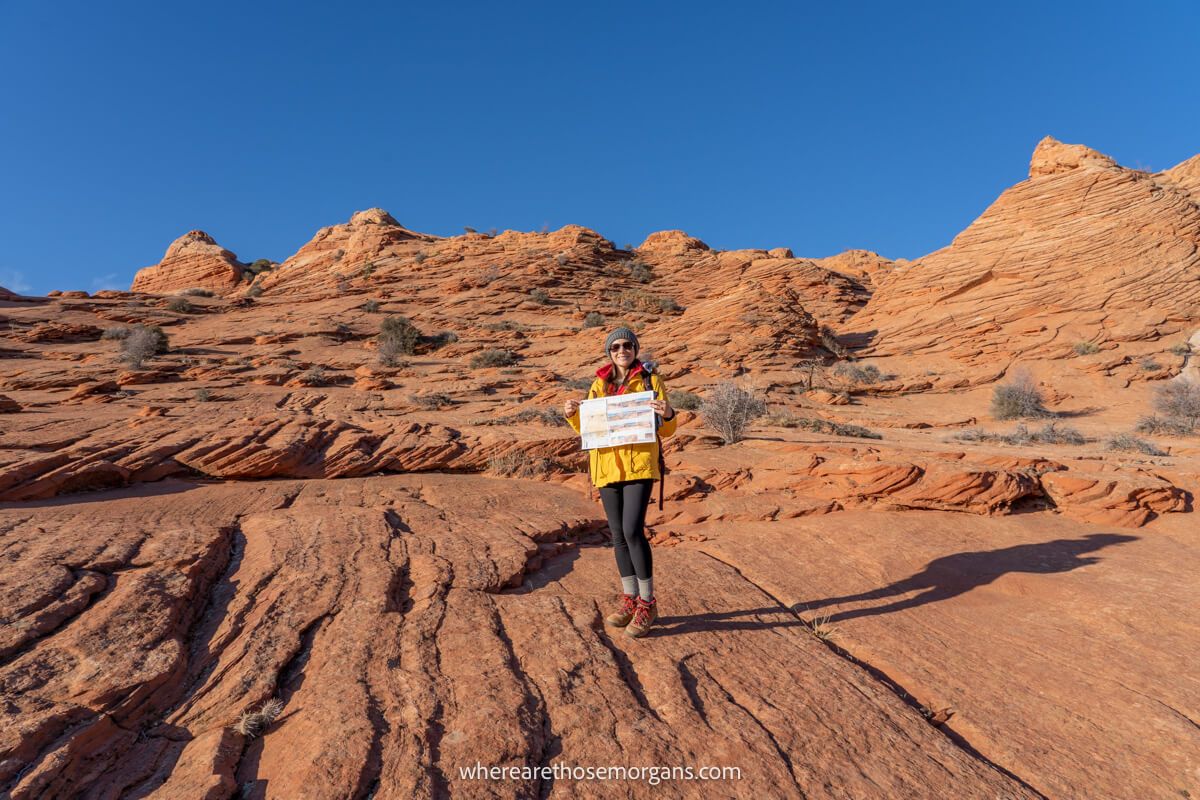
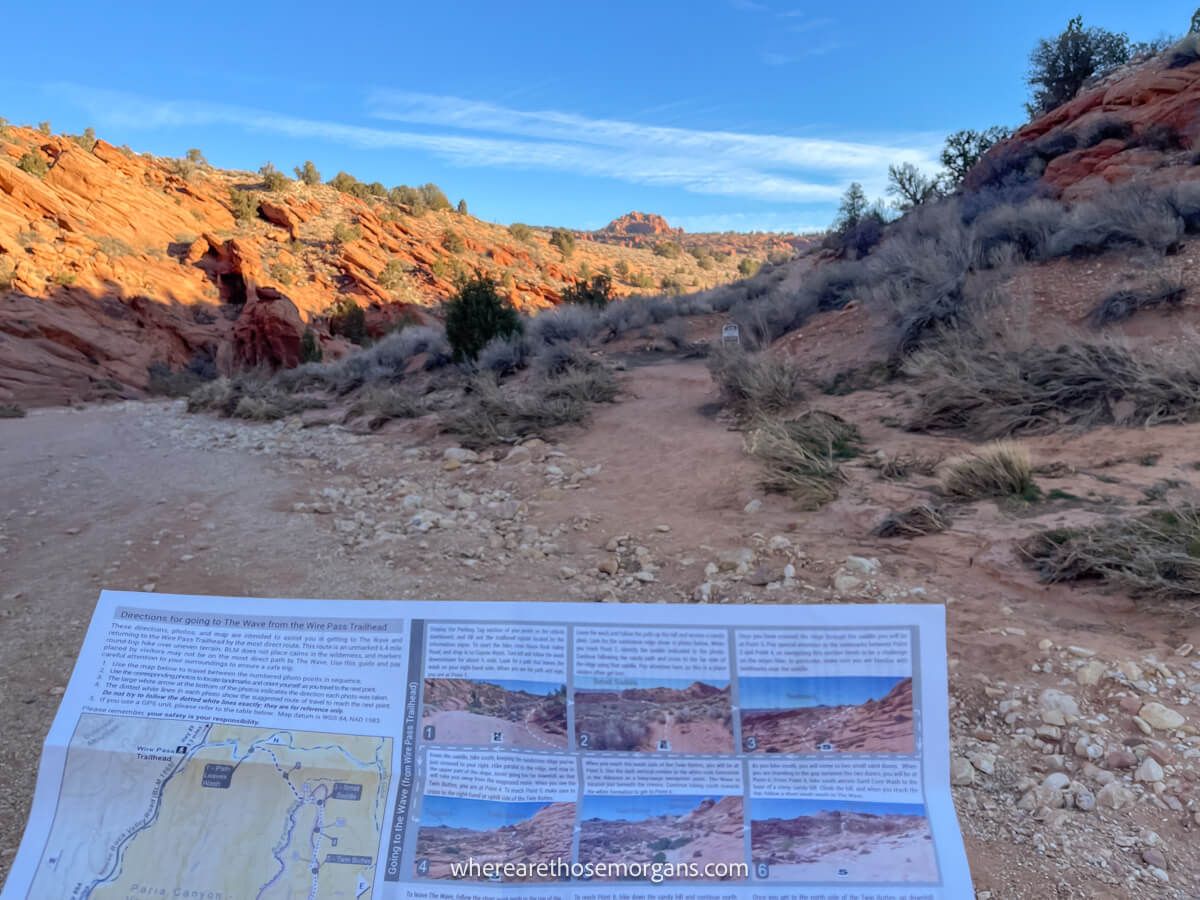
Honestly, the trail was easier than we expected. Maybe the intense permit process and safety brief hyped it up? Anyway, we drove to the trailhead in darkness, began hiking at first light, followed instructions on a paper map provided by the BLM and arrived to find just one other person at The Wave. And it was genuinely spectacular. Photos (including ours in this guide that we think are pretty awesome!) don’t do this place justice. You just have to see it in person.
In this guide we walk you through planning the hike, getting to the trailhead (including why it closes), our entire hiking experience, photography tips, and mistakes we made so you can avoid them. Let’s dive in.
Note: Our content is reader supported and contains affiliate links. If you make a purchase through one of these links, we may earn a small commission at no extra cost to you and it helps us keep this site running.
Planning Your Hike To The Wave
Let’s start with the most important things you need to know about planning for this amazing hike.
Do You Need A Permit?
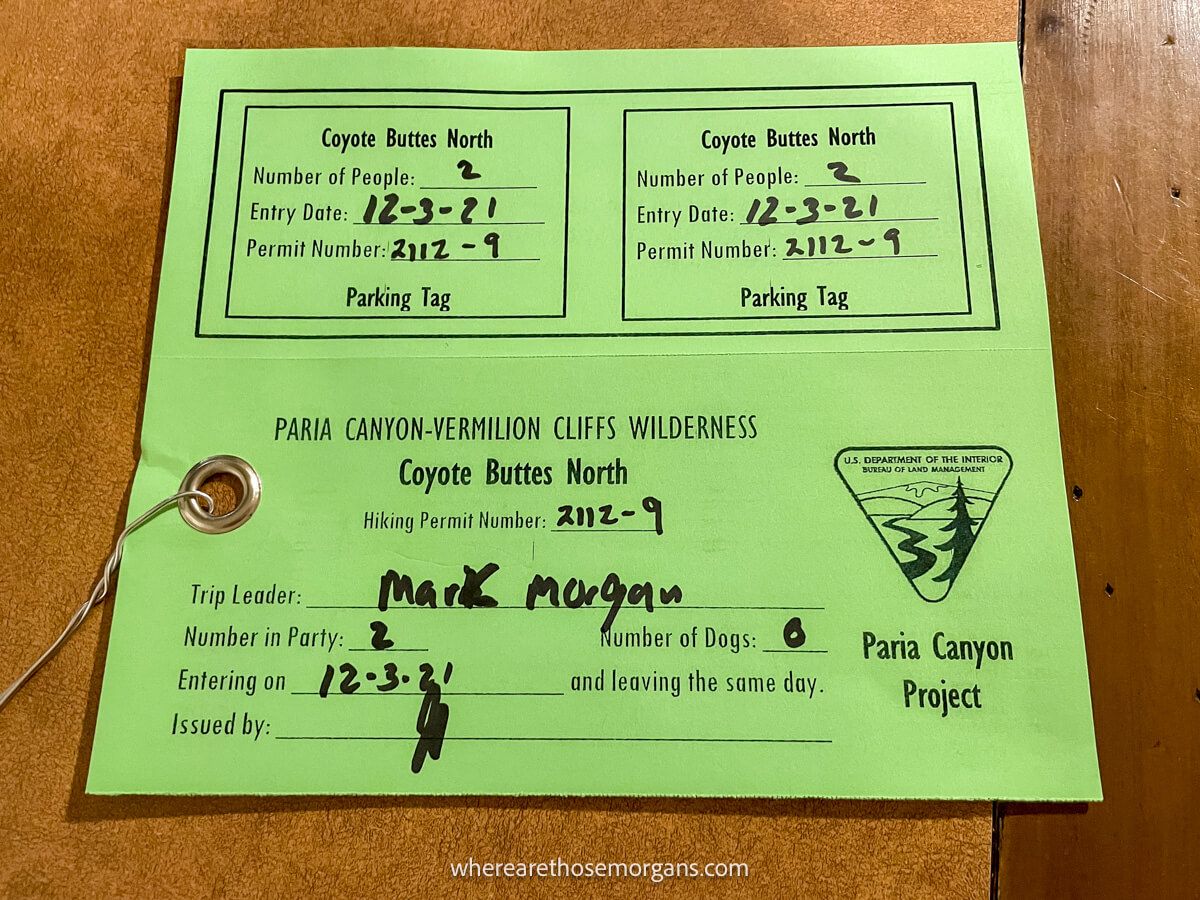
Every group must carry a hiking permit during the hike and display a parking tag in their car. Our photo above shows the green permit and parking pass we were given after winning a permit in the next day lottery. We didn’t see any rangers the day we hiked, but we talked to others in Kanab who did have passes checked by rangers.
You can win a permit to hike The Wave through this advanced lottery which runs 4 months out (example – apply January for May) or through this daily lottery which runs 2 days out (example – apply Friday for Sunday). We won ours in the old format in Kanab’s gymnasium, but this is no longer relevant to you.
The Wave is the most difficult hiking permit to win in the US because it’s limited to a maximum of 64 hikers per day and thousands of people apply for each day, so the chances of winning are slim. When successful, permits cost $9 per hiker and $7 per dog. If you’re still trying to win the lottery, see our full permit application guide to learn more about how to give yourself the best chance.
Best Time To Hike The Wave
Our honest answer? Anytime you can win a permit. We’d be happy to hike The Wave any time of year if it meant winning a permit. But if we had the option to be picky, here’s what we recommend:
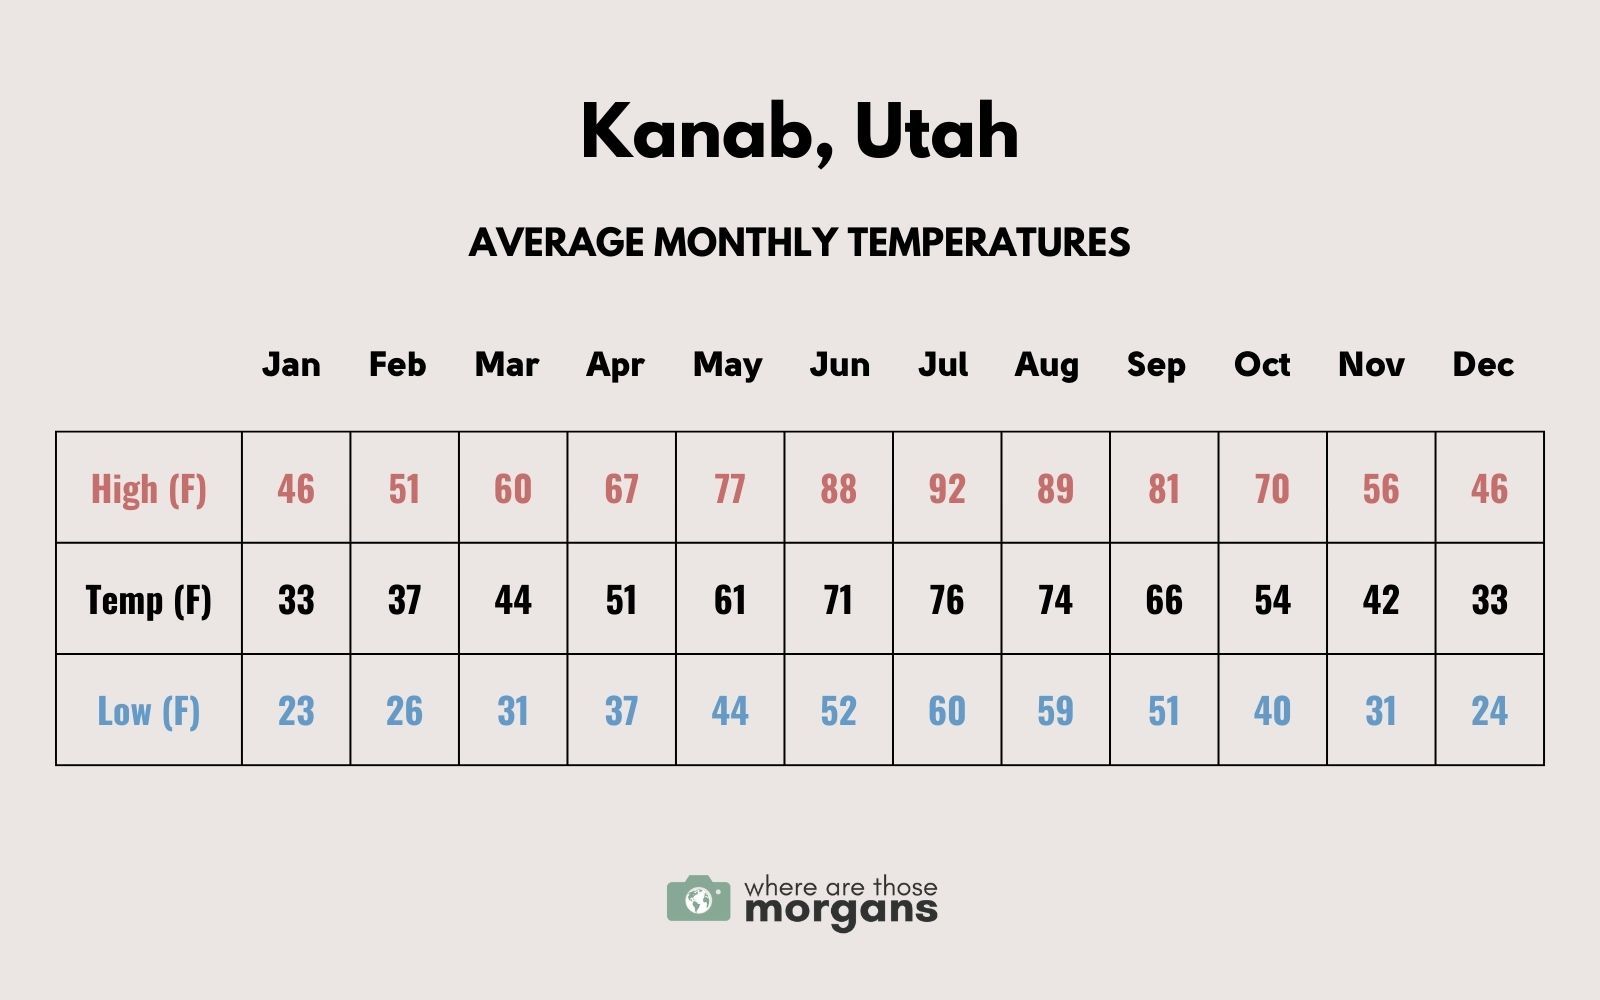
Best months: April and May offer comfortable temperatures and the lowest chance of rain (which can close the trailhead access road), so they’d be our first choice. The downside? These favorable conditions mean more permit applications and even tougher odds of winning.
Avoid: July and August are hot, cloudy and have the highest risk of rain. They are the last two months of the year we would try to win permits.
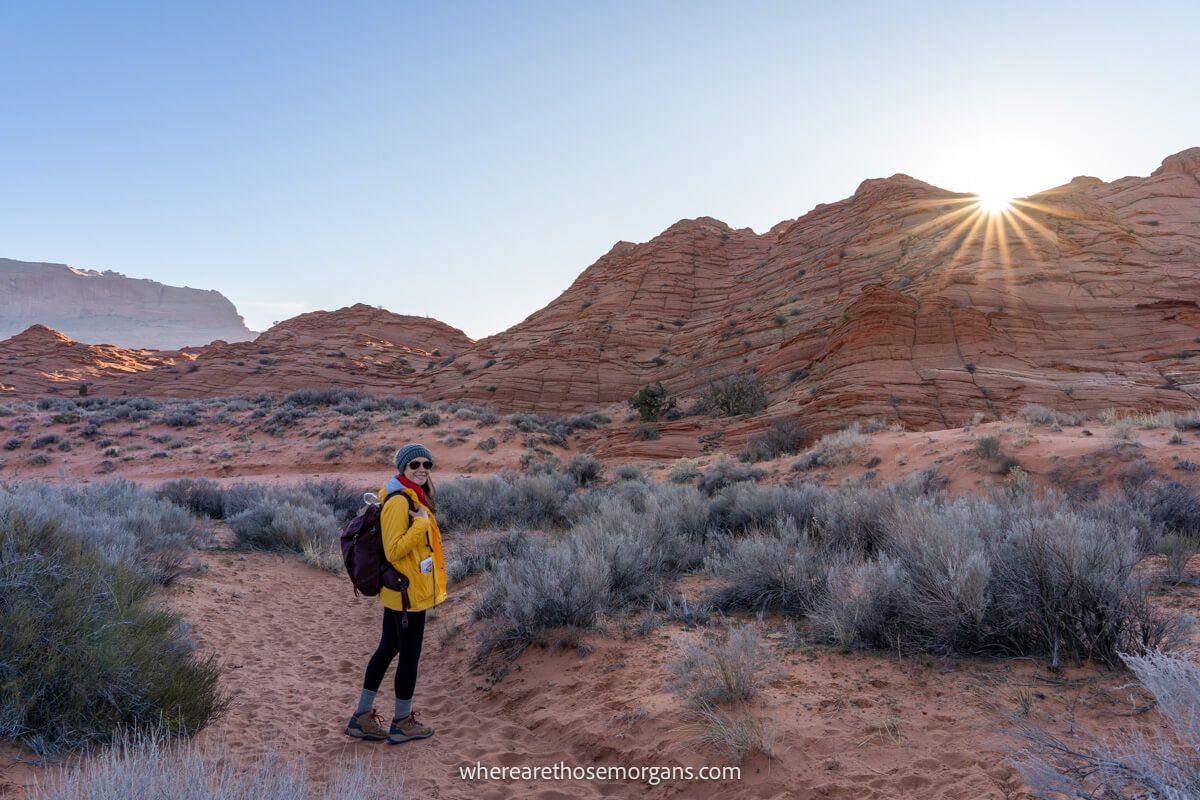
Our experience: We hiked it in December and had perfect conditions – cold at sunrise but warmed quickly under clear skies, no clouds and bright sunshine. Winter months see fewer permit applications, which improved our chances slightly.
Time of day: Permits have no time restrictions, so you can hike anytime within 24 hours. Most of the 64 daily hikers go early morning, meaning afternoons and especially evenings are quieter. We started 20 minutes after sunrise and had The Wave almost exclusively to ourselves.
What To Bring
Layers: We hiked on a cold morning in December with coats, hats, gloves and boots. But by the time we reached The Wave, it was warm enough for Mark to strip down to shorts and t-shirt. So layers are key, and a backpack big enough to hold warmer layers is just as important.
Water and snacks: We each carried 2L of water in our backpacks and honestly it was only just enough. In hindsight we should have carried 3L each because despite being December, this hike is totally exposed in a desert. Luckily, we planned ahead and carried plenty of snacks which sustained us until we got back to the trailhead.
Sun protection: We wore sunglasses throughout the hike, and Kristen also wore a baseball cap. The exposure was relentless and if we’d have hiked in the afternoon we probably would have put on sunscreen. If you hike outside of winter, sun protection is crucial at 5,000+ feet elevation in Arizona.
Camera gear: We had both our cameras, a 24-105mm lens and 16-35mm wide angle lens, plus our tripod, gimbal and spare fully-charged batteries. It was a bit much, but this is our job!
Physical Difficulty
Trail statistics:
- Distance: 6.4 miles round trip (minimum)
- Type: Out and back
- Difficulty: Moderate
- Time: 3-5 hours
- Elevation Gain: 450 ft (minimum)
- Trailhead: Wire Pass
- Dogs Allowed: Yes
Our take on distance and elevation: We clocked in at just over 7 miles round trip and almost 1,000 feet elevation gain on our Gaia GPS app because we explored extra formations around The Wave. Our hike from Wire Pass to The Wave only had 450 ft elevation gain, but we climbed much steeper gradients near The Wave to reach the bonus extra areas.
Our take on difficulty: We found The Wave to be an easy hike technically – there were no steep climbs or dangerous drop offs. The challenges were navigation, exposure, loose sand and uneven rock formations, but none of them caused us any major problems. It took us 5 hours in total because we spent a long time exploring and taking photos at the end, but the actual hike itself only took an hour each way.
Who can do this hike: Honestly, we think anyone with basic fitness can handle the physical aspect. But you need to be comfortable with desert hiking in the sun, hours of exposure, carrying plenty of water and most importantly route finding – we used a paper map with instructions for navigation because we didn’t think the cairns were obvious and our offline map was disrupted by the topography.
Tip: At the end of the hike around The Wave we highly recommend climbing higher and exploring further, but this will add technical difficulty, distance, elevation and time to your hike.
Getting To Wire Pass Trailhead
Driving directions: The Wave Trailhead is located at Wire Pass (here’s the Google Maps location), which also doubles as the trailhead for Buckskin Gulch. Wire Pass is located 8.3 miles down House Rock Valley Road from highway 89, which connects to both Kanab and Page. The trailhead is effectively a large gravel parking area with plenty of spaces, vaulted toilets and a wilderness register which every hiker must sign.
When it closes: House Rock Valley Road is the only way in and out of accessing Wire Pass Trailhead, but it’s made of clay and gravel which effectively turns into sludge when wet. If it rains heavily and the road becomes impassable, you will not be able to hike The Wave and you can’t change your date. It’s incredibly unfortunate, but it does happen. We were happy to have a dry approach for our hike in December.
What to do: Keep an eye on weather forecasts for Kanab. If it looks clear you should be fine in a two-wheel drive car. If it was going to be wet, we might renting a high clearance four-wheel drive to see how bad it is. But even high clearance vehicles won’t make it after significant rainfall. Here’s the BLM site for more about Wire Pass.
Where to stay: We’ve stayed at hotels in Kanab UT and Page AZ, and from experience we can assure you they’re both great places to use as a base for exploring the region. They both have affordable hotels and quality places to eat, and they’re about the same distance from Wire Pass Trailhead. If we had to choose, we preferred Kanab because it had a more relaxed vibe and everything was walkable within the town.
Our top recommendations for Kanab:
Our top recommendations for Page:
Trail Map
Are you feeling nervous about figuring out the route? We were pretty anxious about it before we hiked because of the safety briefing and what we’d read online. Honestly, it turned out to be so much easier than we expected to follow the map directions and find The Wave.
But just in case you want to really know the route before arriving, we took a screenshot of the landscape on Google Maps and edited it with directions and landmarks, which will help orientate you with the hike.
Important: Skip past the map below if you think you’ll be fine with the directions because it will take the fun and thrill out of pathfinding on the day of your hike.
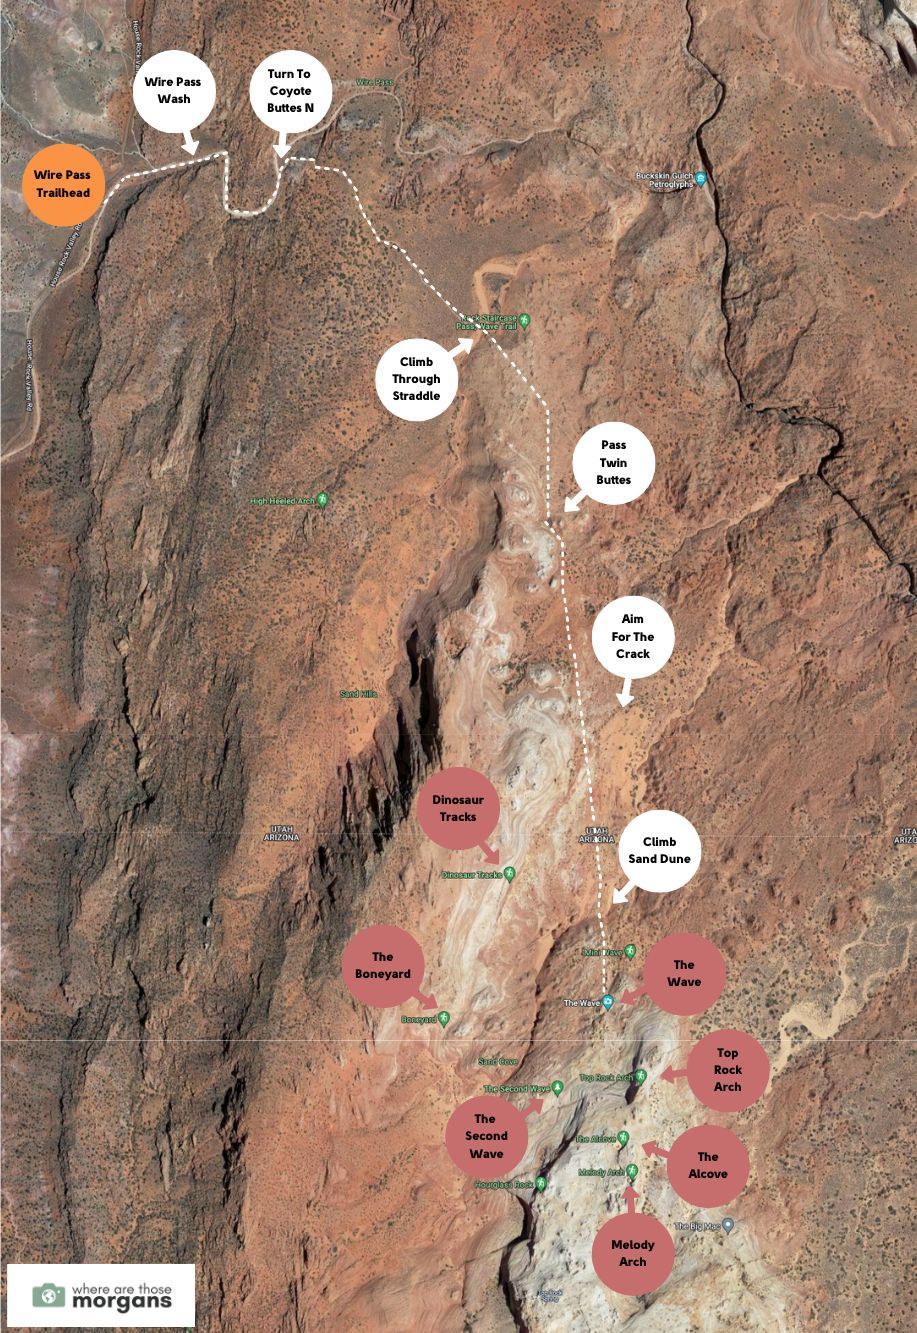
Map key:
- Orange – Wire Pass Trailhead
- White – Key directions and landmarks
- Red – Major photo spots at the end
- Dotted line – Hiking route to The Wave
Note: Only use our map above if you want to learn the route before your hike. And do not use it during your hike because you should be using the paper map provided by the BLM.
Complete Hiking Guide: Wire Pass To The Wave
Okay, let’s walk step by step through our hike so you know exactly what to expect:
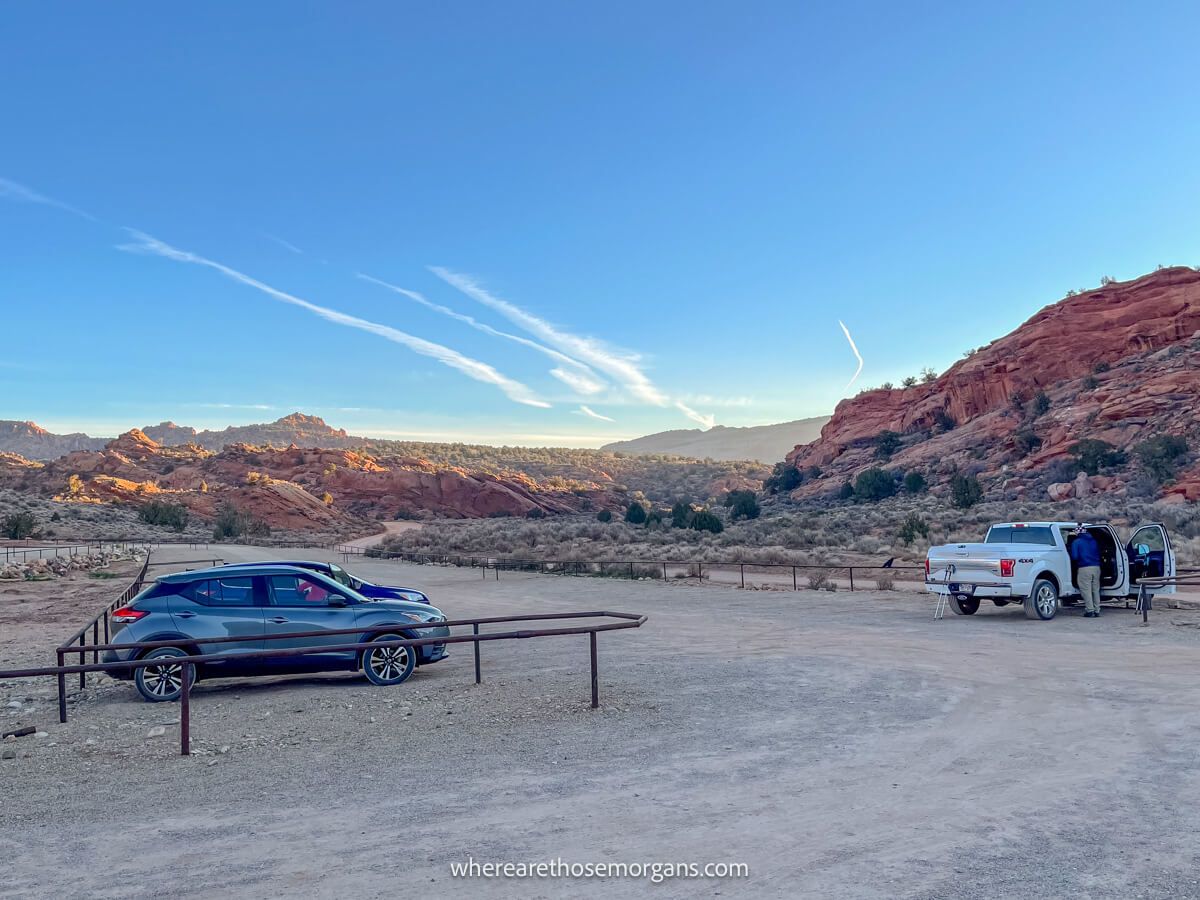
1. Park & Register
We wanted to arrive at Wire Pass Trailhead right as daylight was breaking to beat the morning rush of hikers, but also avoid pathfinding in the dark with a paper map.
The sunrise time for Kanab was 7:27 AM, so we set a 6:00 AM alarm, threw our hiking gear on and demolished a quick breakfast at our hotel, hopped in the car by 6:30 AM, turned off Highway 89 onto House Valley Rock Road as darkness began to fade, and bumped our way down the dirt trail to Wire Pass. Fortunately there hadn’t been any rain so the access road was passable.
In the end we arrived at 7:35 AM as the third car in the lot. One group was heading into Buckskin Gulch and the other car had one hiker who was on the trail to The Wave before us. It wasn’t the end of the world, but we really wanted to be the first people there so we could get clear photos. Looking back, we wish we’d started 30 minutes sooner.
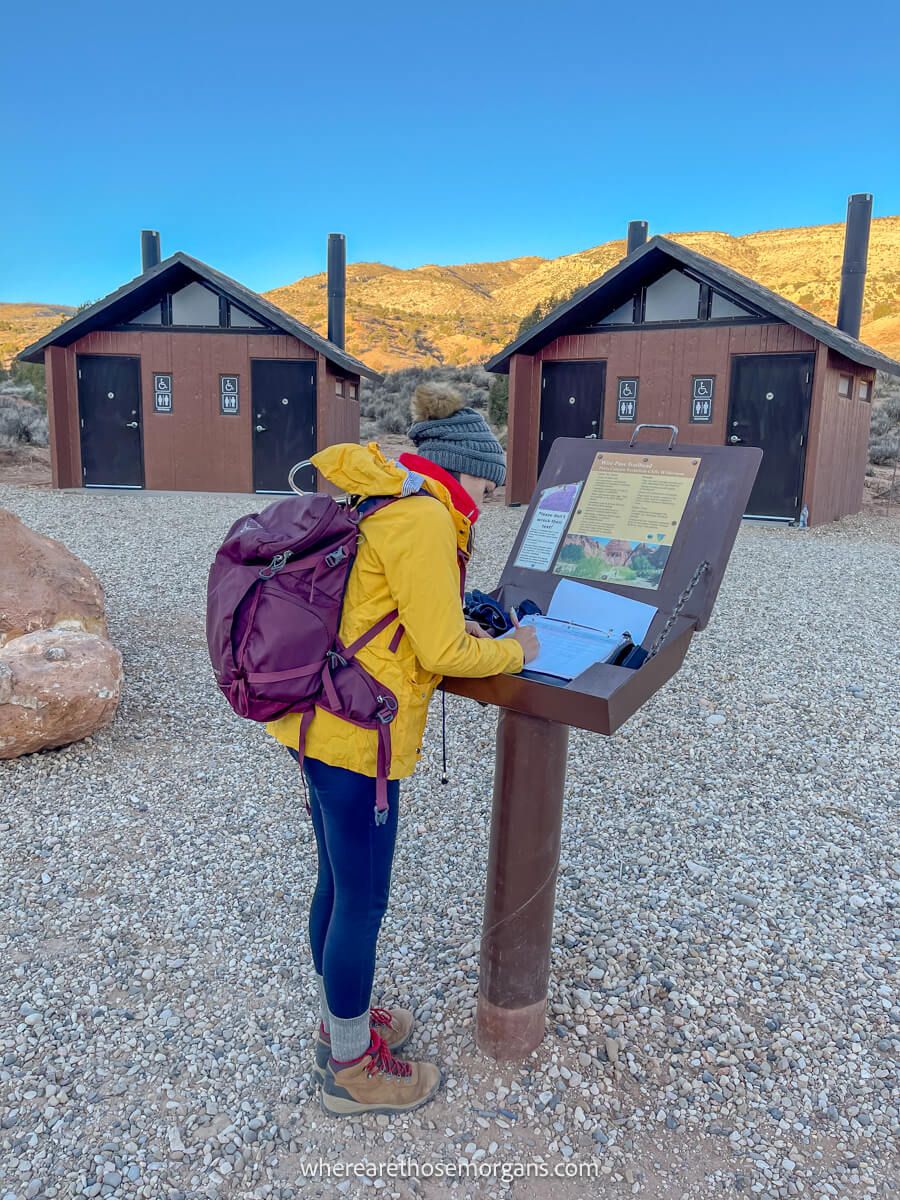
We left our parking permit on the dashboard of our SUV, grabbed our gear and attached the green permit tag we received at the safety briefing to Mark’s backpack. Next, we quickly used the vault toilets and then we filled in the hiker registration book at the trailhead before setting off with our paper map.
2. Wire Pass Wash
It was cold so we wrapped up with coats, gloves and hats. But thankfully, it was also clear and the sun quickly illuminated the region with bright sunlight so we were easily able to follow our paper map from the get-go.
We walked east out of the parking lot and crossed House Rock Valley Road to a narrow dirt path with a brown wooden sign. After 150 feet we reached a very obvious dry creek bed. We turned left (heading north) and followed the meandering creek bed for around half a mile until we saw a sign marked with Coyote Buttes North. Here, we turned right and walked up a steep bank (see our photo above).
Tip: If you miss this right turn you’ll end up entering Buckskin Gulch, so make sure you keep an eye out for the spur trail leading off to the right side of the dry creek.
3. The Saddle
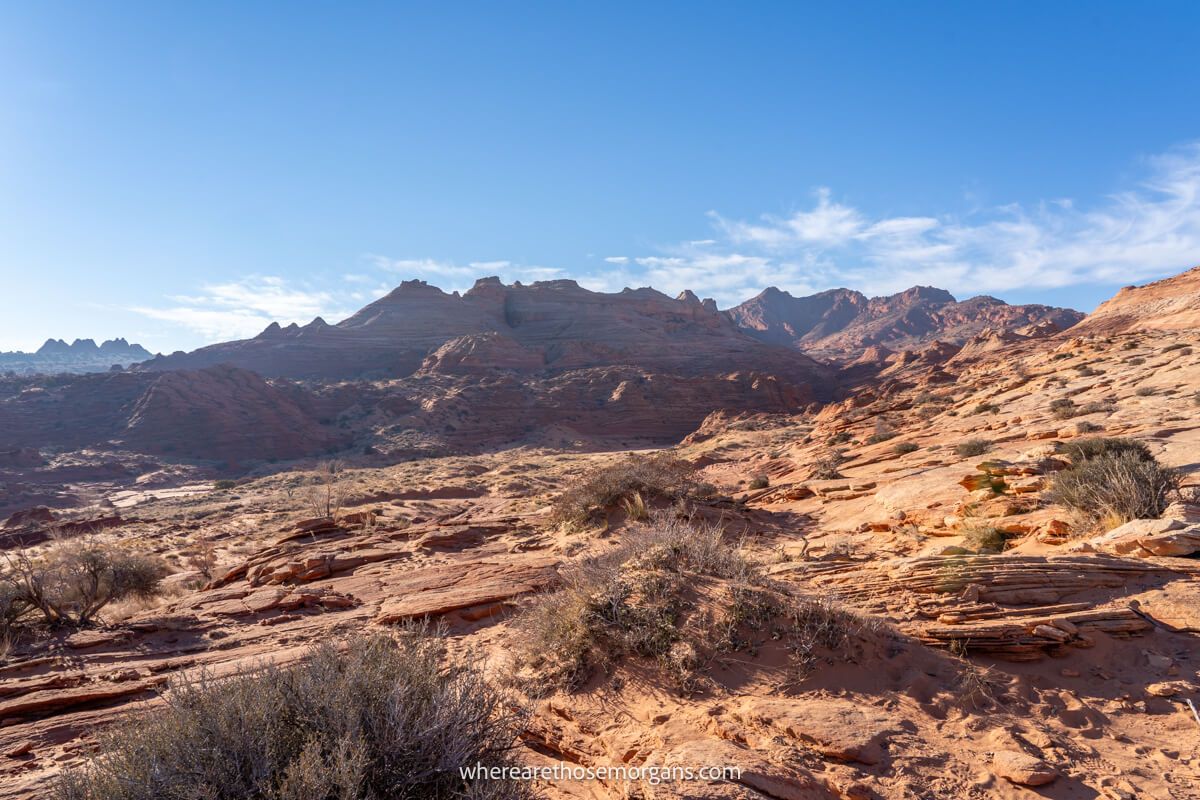
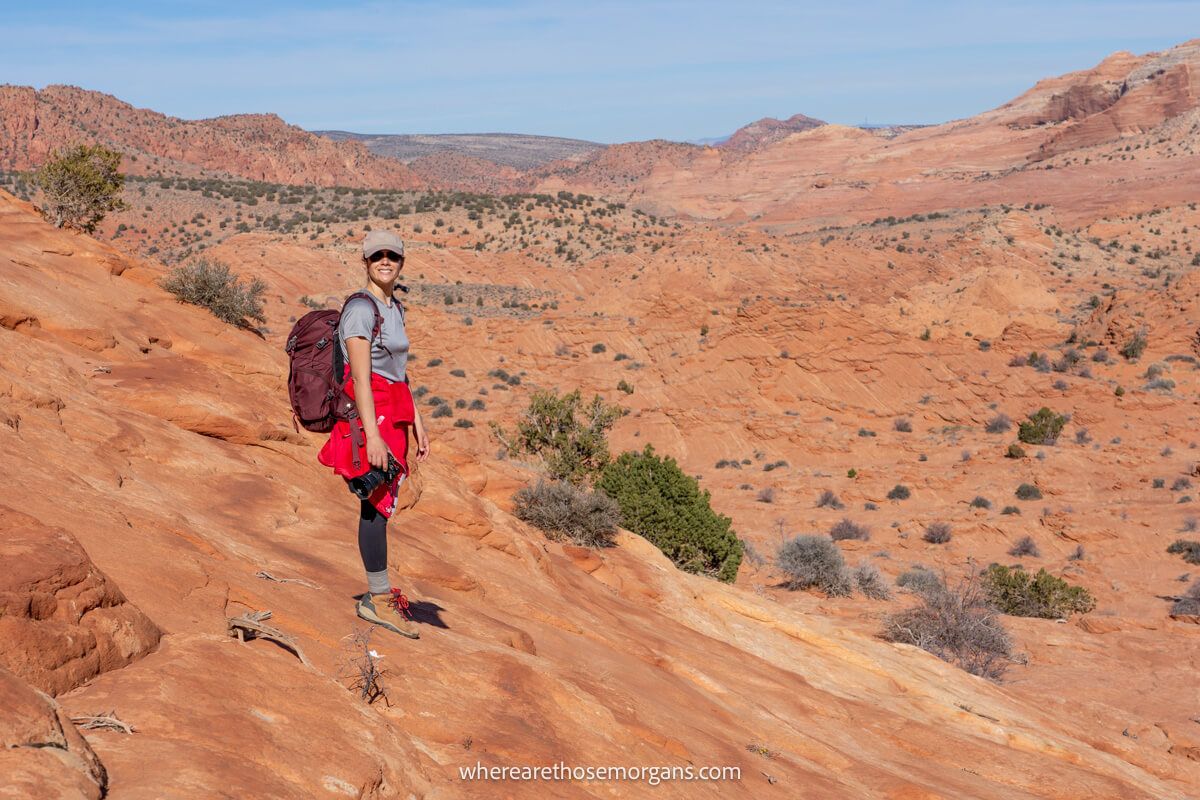
For the next half mile we gradually descended through a picturesque sage field with soft sand underfoot. The trail was easy to follow and there were footprints in the sand to reassure us we were on the right track.
Up ahead we could see a long and rocky ridge line, which was higher on the right side and lower on the left side. We kept the left central side of the ridge in sight, crossed another dry creek and climbed up the easiest part of The Saddle to cross directly over it.
4. Twin Buttes
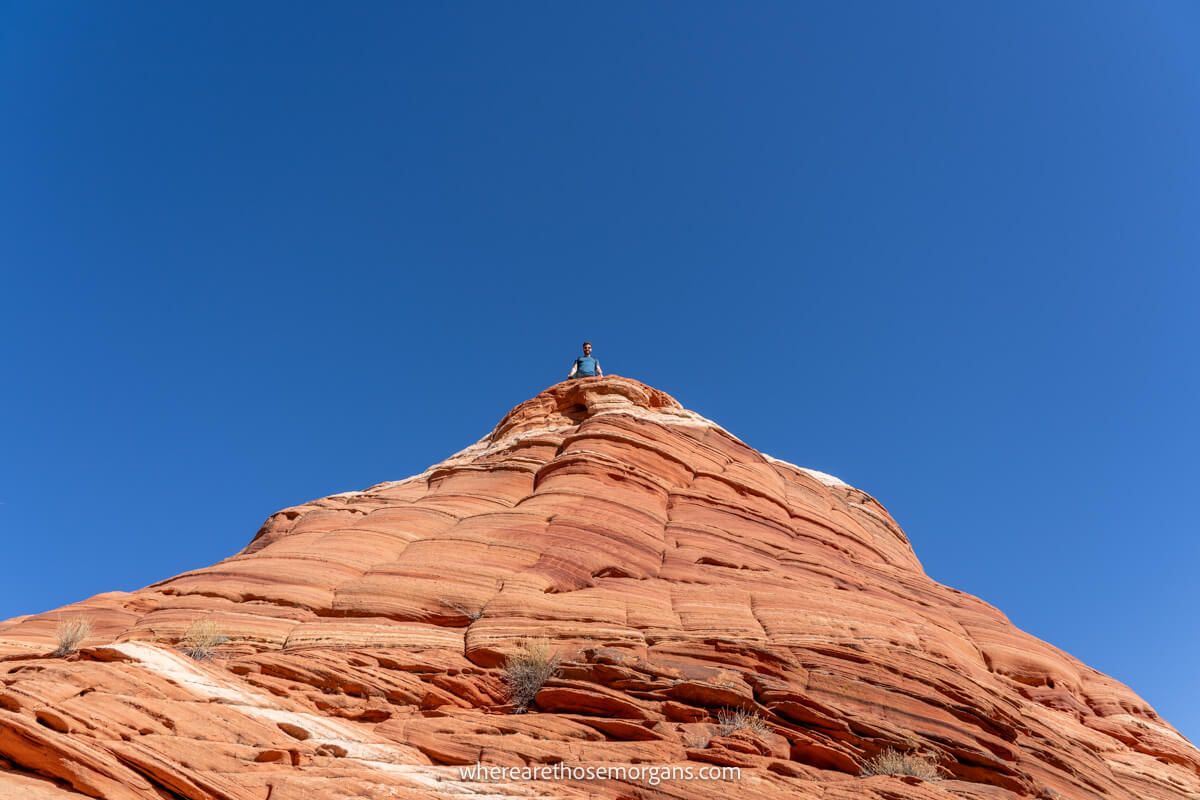
The trail was exclusively a slanted rock face from The Saddle to the next landmark called Twin Buttes. We both agreed it would be treacherous with ice on the ground. Now officially in the permit-only Coyote Buttes North wilderness area, we walked south aiming for two pointed domes called Twin Buttes. We expected it to be harder to follow, but the natural landmarks were impossible to miss so we really relaxed through this early part of pathfinding with the paper map.
At the safety briefing, we were instructed not to use AllTrails, Gaia GPS or similar hiking navigation apps as our main source for directions on the hike because surrounding rock formations would wreak havoc with our GPS. Of course, we still downloaded the route onto our Gaia GPS app to use offline, but we’re not the type to take risks so we only used it as a backup, with our paper map being the primary navigation source for our entire hike.
Honestly? Figuring out the route was so much easier than it was hyped it up to be, just by following the paper map instructions. We did track our location on Gaia GPS and we lost our marker just as we were about to arrive at The Wave. Then it came back again as we were hiking back to the trailhead.
Tip: We passed by small sign posts with arrows pointing towards Twin Buttes, so it’s not actually as unmarked as claimed!
5. The Crack
It doesn’t matter which way you pass through or around Twin Buttes but we went straight through the middle of them. The BLM permits you to climb up the buttes, so Mark obliged on the way back.
After the twins, we walked due south for three quarters of a mile aiming for a significant crack at the top of an enormous formation directly ahead of us. The trail here was flatter with rocks and sand underfoot.
6. Sand Dune
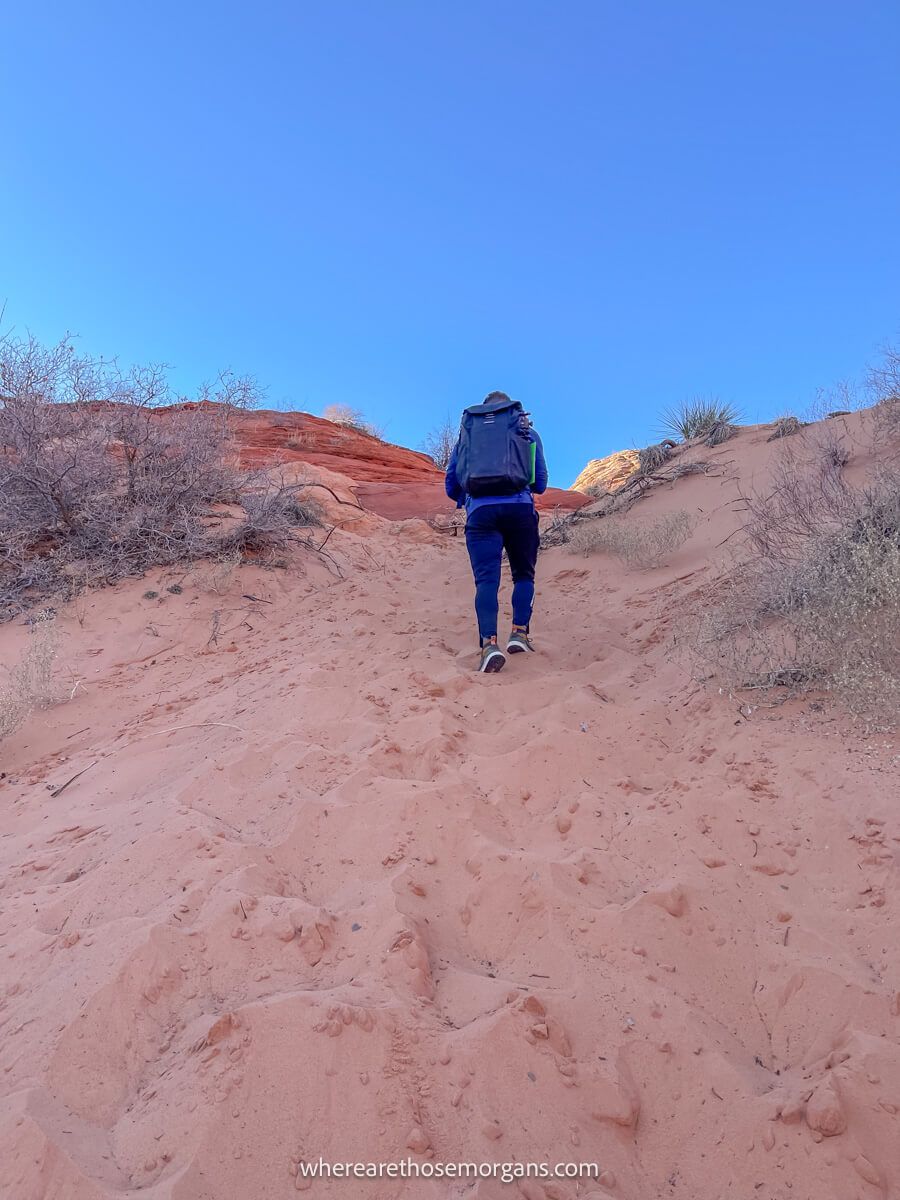
Continuing to aim for the crack, we eventually arrived at a steep sand dune which carried us up to rocks with swirling patterns. We knew we were getting close now.
This sand dune climb was the most physically challenging part of the hike because it was steep and the sand was very soft. You could go around on the rocks instead but we recommend just going straight up the dune because it’s safer.
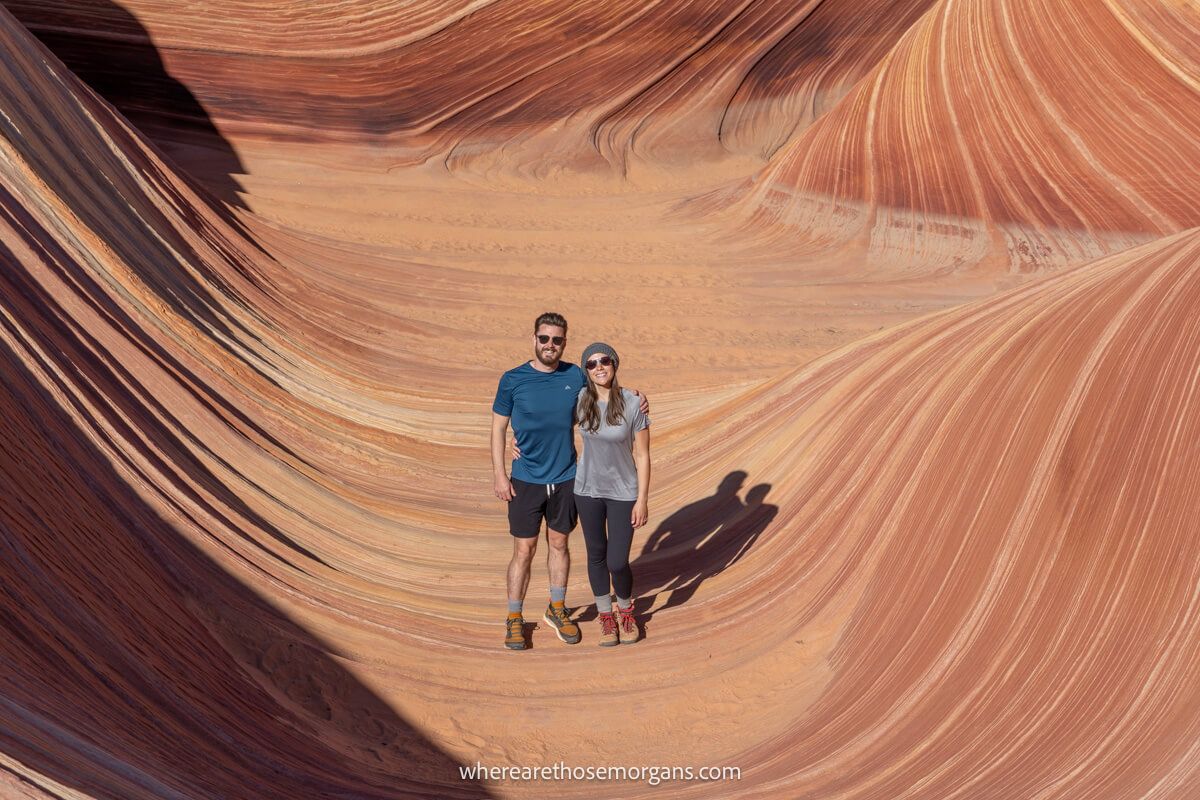
7. The Wave
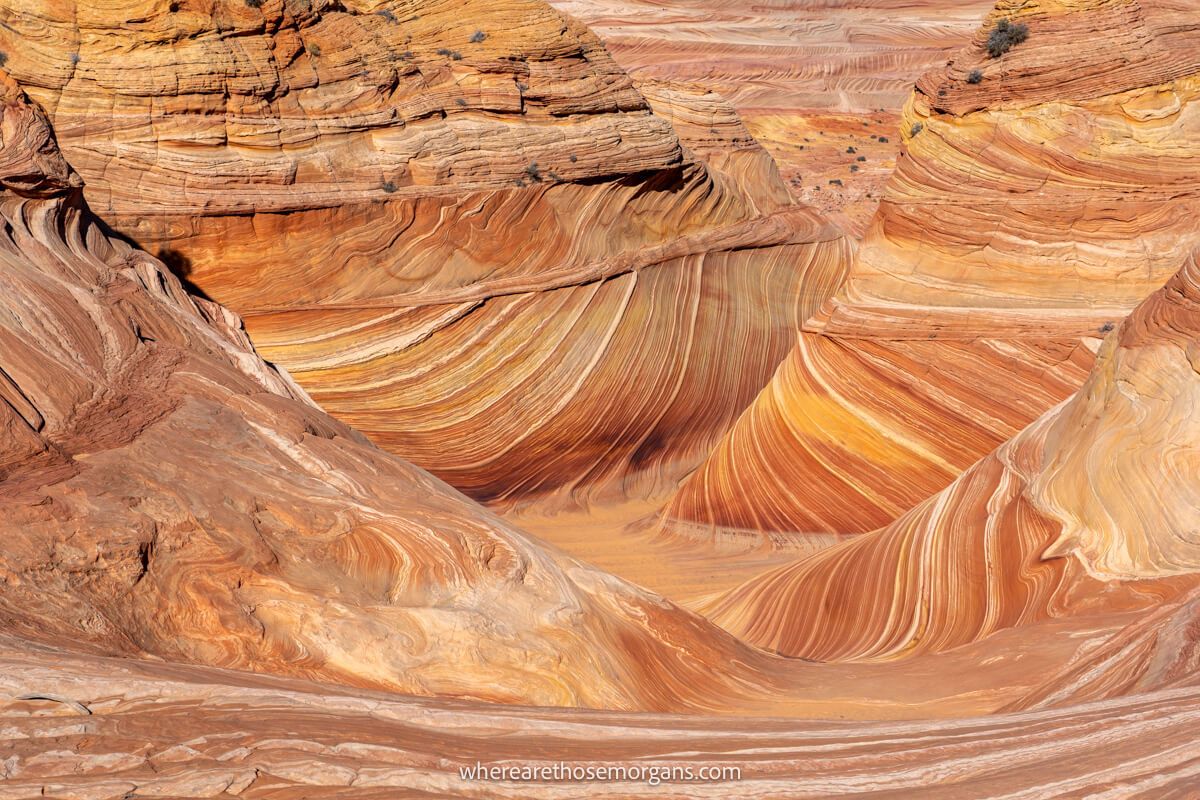
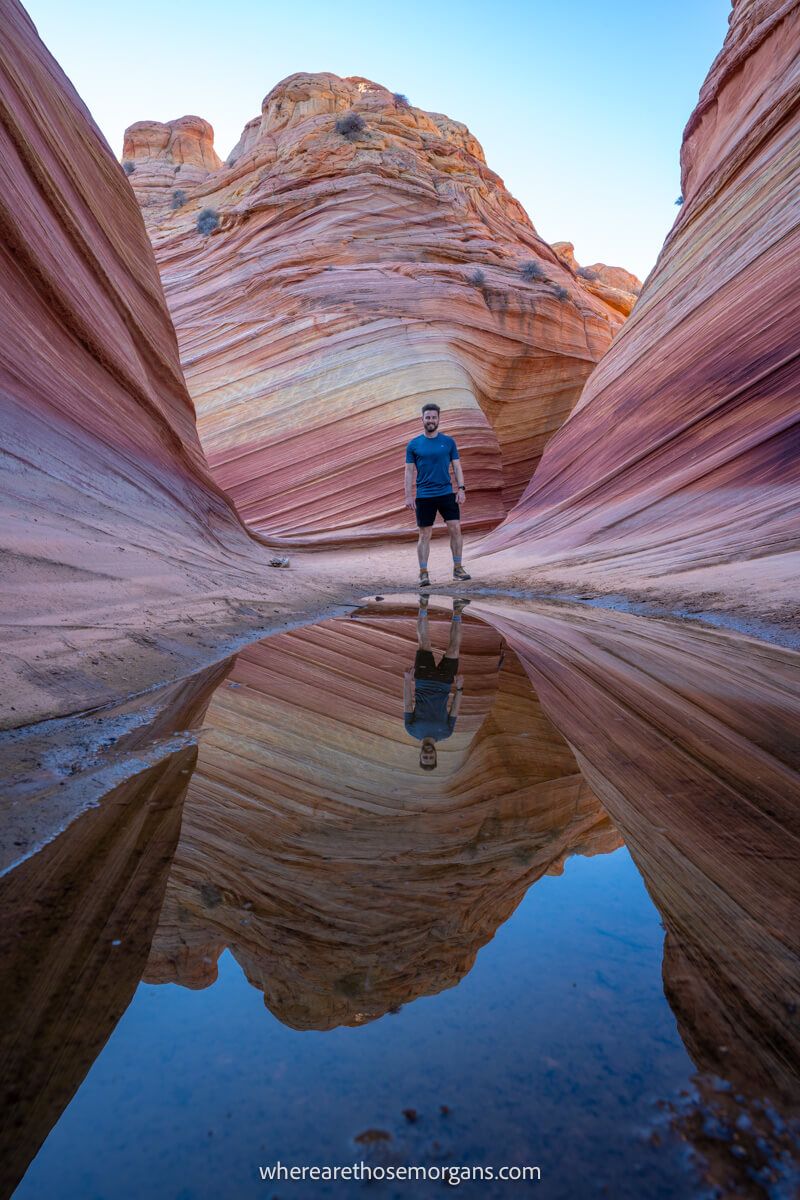
At the top of the dune we took a right turn and saw an opening maybe 100 feet away. Immediately after entering we were met by otherworldly patterns, vibrant swirls and pristine sandstone layers.
There was a shallow pool of water on the ground so we grabbed a few reflection photos, before heading into the main chamber. The only other person ahead of us was nowhere to be seen, so we had it all to ourselves.
8. The Second Wave
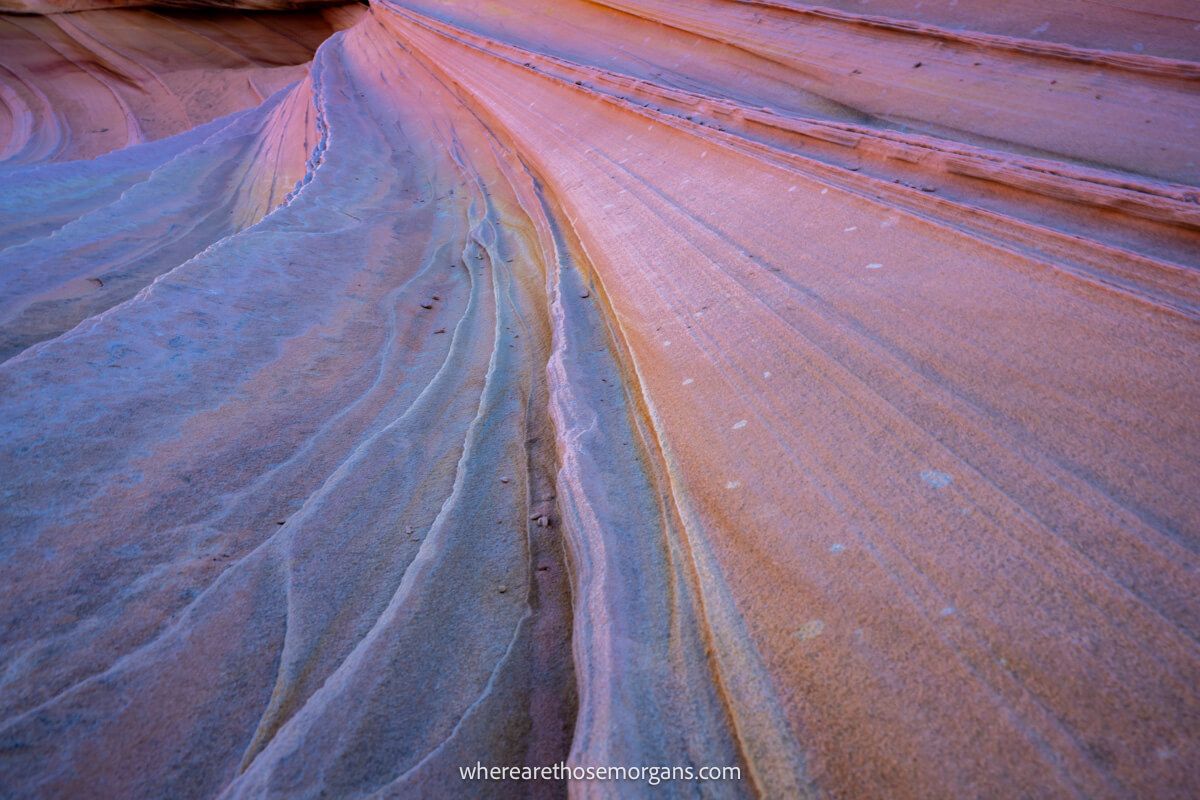
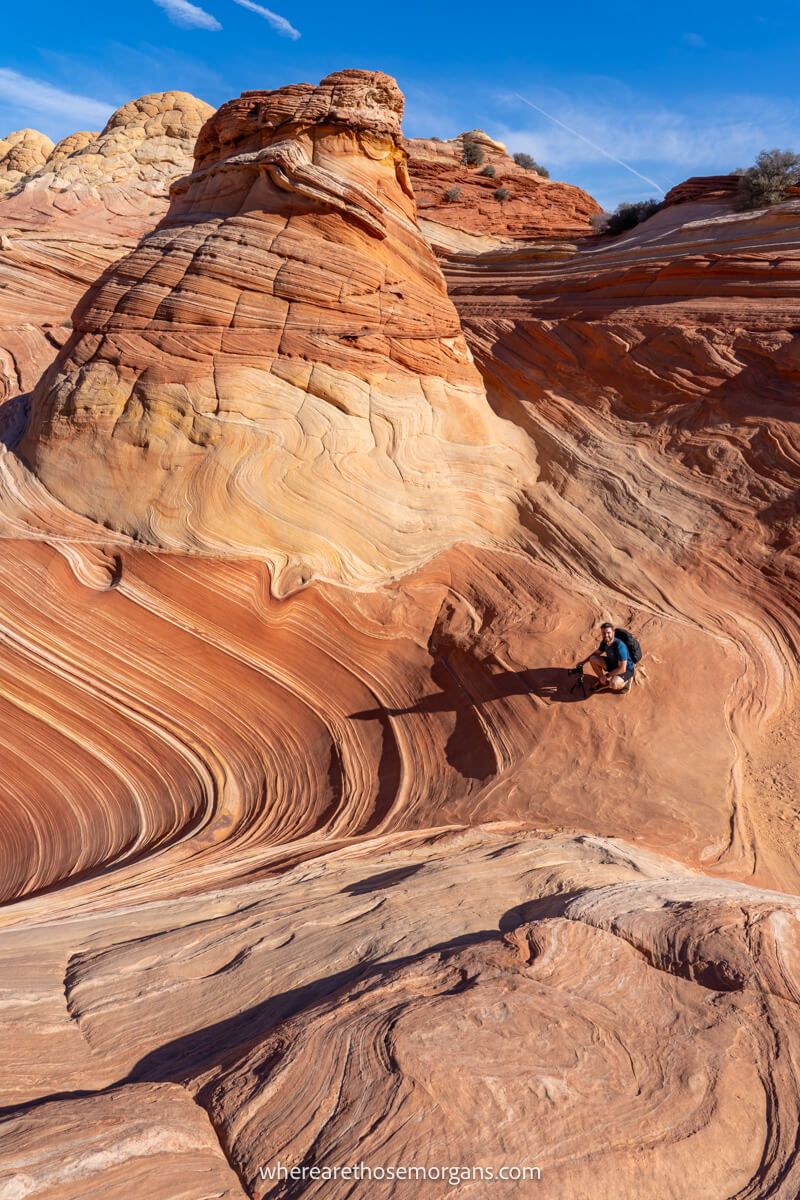
We knew The Wave was the star attraction, but we were keen to explore the surrounding areas before it got busier with other hikers. So we fired off a ridiculous amount of photos in barely any time, then dashed around to see The Second Wave, which was completely different but equally as spectacular.
The Second Wave had exquisitely detailed lines and sediment colors, with darker blues and lighter pinks than The Wave which was mostly just a deep burnt red and orange color. We spent a few minutes grabbing more photos before cracking on.
9. Climb Higher (Optional)
At this point you can either take things easy by only exploring the areas close to The Wave, or you can climb higher and explore further (we only recommend this for experienced hikers because the terrain turns steeper and even less maintained than the main trail).
Unfortunately, we were on a bit of a time crunch based on our overall itinerary and we were more concerned about taking photos of the main areas, so we didn’t fan out into the surrounding wilderness. But here’s what else you can see nearby:
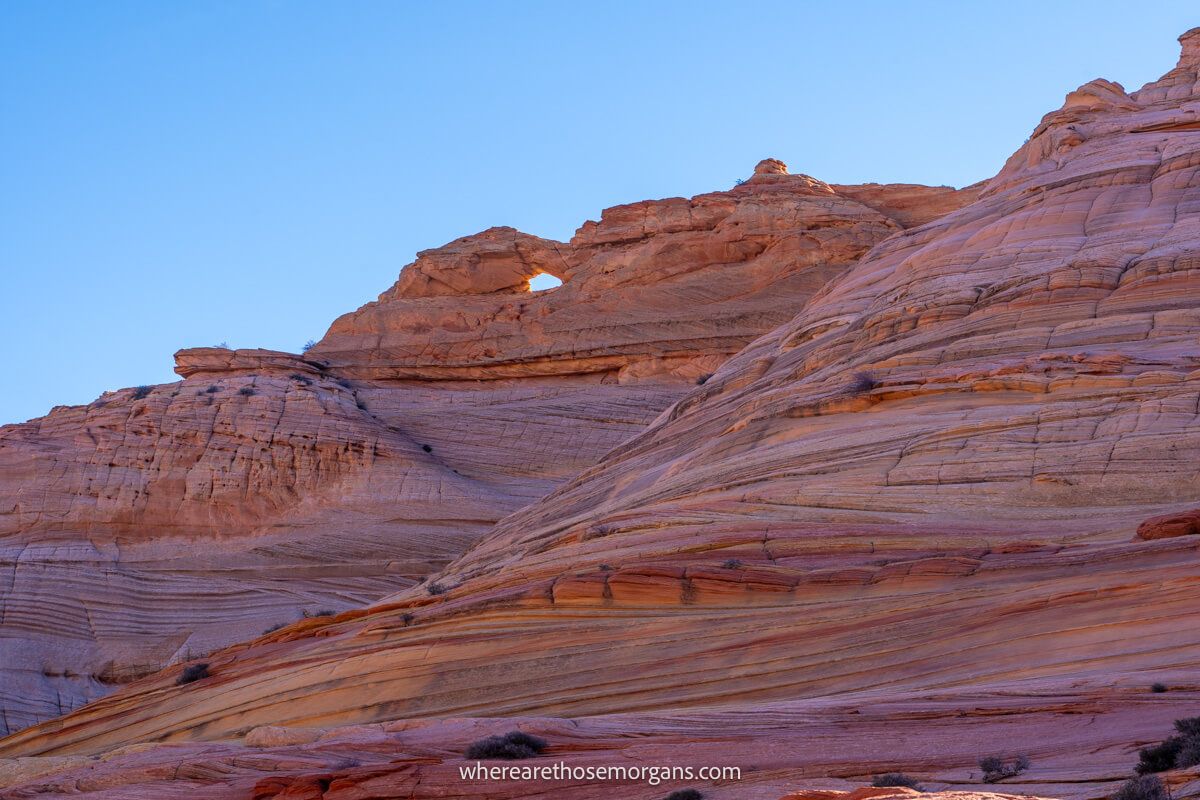
- Top Rock Arch
- The Alcove
- Hourglass Rock
- Melody Arch
- South Teepees
10. Dinosaur Tracks

Instead, we went back to The Wave. The sun had moved around a bit since we arrived so the whole formation was glowing, but it was already busy with other hikers so we felt justified for our early start.
We snapped a few more photos then descended the steep sand dune, took a left turn, climbed a fair way up a sloping rock face and aimed for horizontal red and white layers ahead. Then we scanned the ground for dinosaur prints and took photos of our hands next to them.
Tip: If you’re using GPS coordinates, use 36° 59′ 57.3″ North, 112° 00′ 35.6″ West (source) to find clear prints.
11. Boneyard
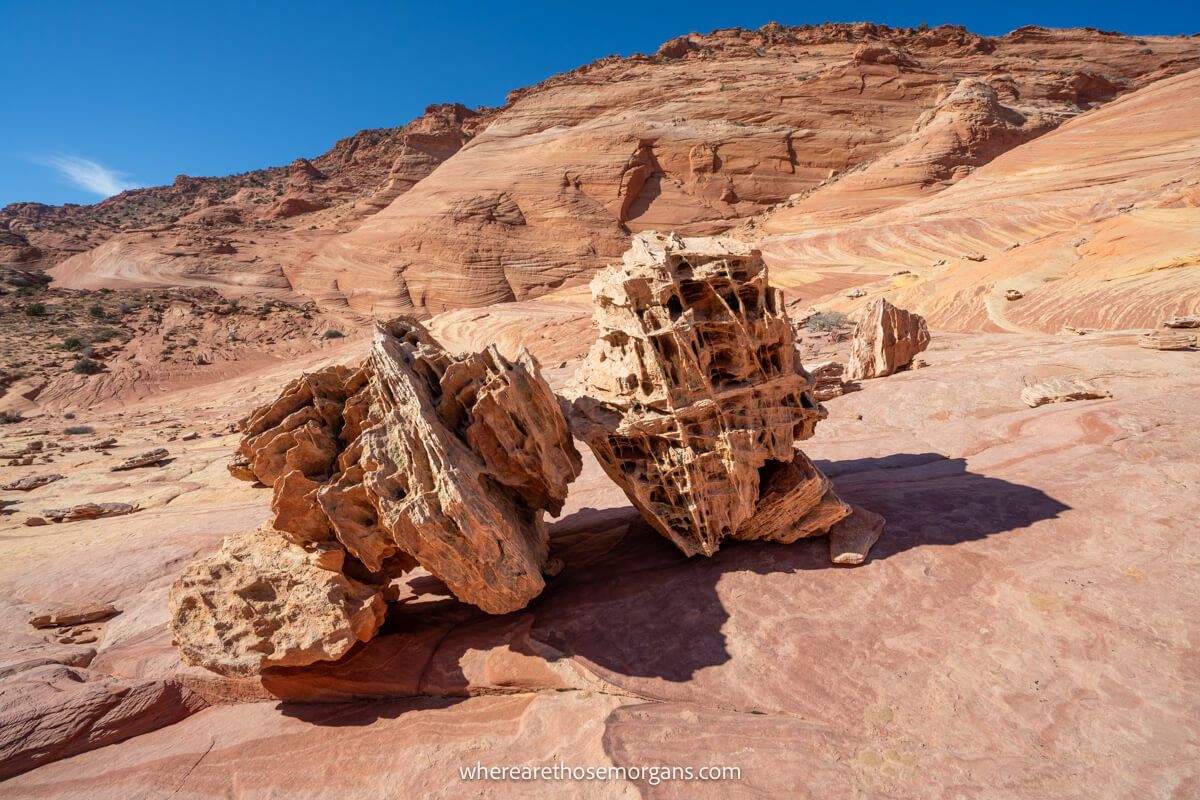
Next, we kept heading south for another 0.3 miles until we reached The Boneyard, which is also called Fatali’s Boneyard after the photographer who named it. We knew we’d arrived when we could see striped lines of brown and yellow, along with box or lace rocks scattered across the landscape.
Tip: You can continue into Sand Cove after Boneyard, but it requires crossing uneven surfaces and large rocks. You’ll find what feels like a slot canyon with swirling patterns and at the far side it rejoins the steep sand dune.
12. The Return Journey
Navigating back to the trailhead using the same landmarks was easy, so we didn’t need our paper map. We also met three other hikers and spent the whole return leg exchanging stories about where else to visit in the American southwest.
It was much warmer on the way back, so we made sure to hydrate properly and eat our snacks to keep up energy. Back at the trailhead, we signed the register with our return time, jumped in the car and drove to Toadstool Hoodoos Trail for yet another hike!
How To Take Photos Of The Wave
There’s no doubt you’re going to be utterly blown away by topography at The Wave, so make sure you take home plenty of photos. We travel and hike for a living, and this is among the most photogenic natural landscapes we’ve ever seen.
The main Wave chamber has three arms shaped like a triangle with three points (imagine this shape – ⅄):
- North arm – Where we first arrived and found the shallow pool of water for reflection photos.
- Southeast arm – The most iconic photo spot looked directly through the curving formation.
- Southwest arm – The narrowest entry reflected intense light once sunlight filled the formation.
We arrived into the north arm at the shallow pool of water not too long after sunrise, so sunlight hadn’t yet penetrated this part of the formation. Any later and there would have been lots of deep shadows contrasting with intense highlights.
Inside the main part of the formation, we arrived before the whole thing was in direct sunlight which meant our photos had these contrasts. And then by the time the formation lit up entirely which would have been better for photos, many more hikers had arrived so it was harder to take photos with no people in them.
If you arrive when there’s nobody around, head straight up the southeast arm to get the classic photo while it’s clear. Then go into the other arms, and then go hunting around the area for other photogenic spots like The Second Wave. This is your priority order.
Tip: Everyone was courteous and helped each other with photos the day we hiked, but we have read lots of negative comments about people taking over the main photo spots and not moving for others. We hope you have a reasonable bunch the day you hike!
Is The Wave Worth It?
Yes, The Wave is definitely worth it! It’s one of the most sought after hikes in the US because it leads to such a unique climax that you won’t see anywhere else. Winning a permit is incredibly difficult, but trust us, even if it takes 100 applications it’s more than worth the effort. We think this is a trail every keen hiker and photographer should do at least once.
It has a very strong 4.9 out of 5 rating on AllTrails, but we’d give it a full 5 out of 5. There are only a handful of hikes we’ve done that we would class as a 5. We don’t give them out lightly, but this is certainly one of them. We’d love to hike it again one day, but we would do things a bit differently next time – like staying longer, exploring further and taking photos of the formations at different times of day.
Mistakes To Avoid
Not checking the weather: We got lucky with dry and clear weather, but it wouldn’t take much to ruin the day. Grey clouds with light rain wouldn’t allow the colors to really shine, and worse yet heavy rain might even close the trailhead access road. Check the weather to know what you’re up against before arriving.
Starting too late in the morning: If you want to hike in the morning like we did and you want to get clear photos, make sure you’re at Wire Pass Trailhead parking lot just as daylight is beginning to break. Any later and you’ll arrive at the worst time of the entire day – right as the big morning rush arrives.
Going in the morning: Honestly, after hiking it in the morning we wouldn’t do it at the same time again. We’d actually wait until later in the afternoon because most of the 64 hikers will have already been and gone, the colors get softer and the sunset would be amazing. Then we’d stay for Milky Way photography once the sun disappeared.
Not staying long: We knew the hike would be fun and the end would be picturesque, but even so it still surpassed our expectations enormously – and we didn’t give ourselves enough time to stay a while. If we did it again, we’d give ourselves the full day with no other plans.
Only visiting The Wave: We loved The Wave, but the other landmarks were also amazing to see. If you’re a strong enough hiker and have time, we highly recommend exploring the whole area around the main chamber – there’s tons more to see and we didn’t have enough time to see the further out parts which we regret.
Not taking a camera: Sometimes we overdo it with cameras and photography gear. But The Wave is one place we encourage you to take a proper camera, and not just use your smartphone. The landscape is incredible and you should print a photo for your home, so borrow a camera if you have to, but don’t turn up without one.
Next Steps
We hope our guide helps with planning your hike to The Wave.
Don’t forget you can book a travel planning video call with us if you’d like our expert help organizing your trip to southern Utah and northern Arizona. We can answer any questions you have or walk through a personalized itinerary to make the most of your time.
Still researching for your trip?
- Here are the top things to do near Kanab
- This is our first-timers guide to Sedona
- Here are the hikes not to miss in Zion
- Here’s our first-timers guide to Grand Canyon
- See our favorite Utah road trip routes
Finally, if you’ll be visiting more places on the same trip, we recommend reading our Arizona travel guide for more helpful tips and advice.
Happy Travels,
Mark and Kristen
Find this guide helpful? Pin it for later!
All Rights Reserved © Where Are Those Morgans, LLC. Republishing this article and/or any of its contents (text, photography, maps, graphics, etc.) in whole or in part is strictly prohibited.
Mark and Kristen spent 6 years traveling the world, visiting over 40 countries across 4 continents and more than 30 US states. They created Where Are Those Morgans in 2018 to help others plan the best possible vacations by writing authentic travel and hiking guides based on their real experiences.
Since the arrival of baby Maya in late 2024, Mark and Kristen’s extensive travels have slowed down but they still take plenty of trips. Where Are Those Morgans now helps millions of travelers each year to visit new places and hike new trails through information-packed blog posts and expert travel guidebooks. Read more about Mark and Kristen.
Thanks for the write up! To see the other landmarks at the Wave, particularly Melody Arch and the Alcove, which are at the top of the mountain, what route do you recommend taking?
Straight up scramble? To the Second Wave, then Boneyard and around? Opposite? Any suggestion would be helpful.
Very excited to go! (Oct. 5, 2023)
Hi Steven, glad to hear you will be hiking The Wave next week. When you get to The Wave you can make your own path around the entire area and there is no real “path” to the other landmarks. With that said, we would suggest going to the Second Wave and heading straight up (carefully!) from there. Boneyard is in a completely different area that you should do afterwards just before leaving, along with Dinosaur Prints. Have a fantastic time!
I have an on-line permit for the Wave for Monday, May 8, 2023. I will be driving to Kanab from Las Vegas on Sunday, May 7th. Do I need to check in for a safety briefing before heading to Wire Pass? Can I check in on Sunday?
Thank for your time,
Steve Wirick
Lake Havasu City, AZ
Hi Steve, glad to hear you will be hiking The Wave. When you win an advanced lottery permit, you are not required to attend a safety briefing the day before hiking the trail. However, we do highly recommend going to it if possible because they will give you updates about the weather and any appropriate safety issues. If you have any questions or concerns, call the BLM phone number for advanced lottery permit holders and they will be able to help you out. Have a fantastic hike!
Really confused. How do I get my wife signed up on the advanced lottery? I put her email down as an alternate permit holder. Is that how?
Hi Robert, yes it is quite confusing, they could definitely do a better job being more clear with instructions. The way we read it is that if you have put your wife’s name down as an alternate permit holder on your permit application, she will receive an email within 72 hours and has to create an account on reservation.gov to accept the alternate position. Once your wife confirms as an alternate, the wording on recreation is “an alternate may not be able to reserve another permit or be an alternate for another permit at this facility for this season” which to us sounds like your wife will not be able to apply for a whole new permit or be on any other permit as an alternate. It is to stop groups applying for loads of permits and being each others alternates. One way to play it is to apply for a permit each but not put each other down as alternates, as long as you are 100% sure you will be there in person for the hike as the permit holder. Hope that helps and best of luck!
Thank you for an excellent writeup on hiking The Wave. Really helpful and informative.
Thank you, Jenn – Hope you are able to win a permit and hike to The Wave sometime soon.